Infor Grid on CryptDB

I made a proof of concept of the Infor ION Grid running on CryptDB, a database that computes on encrypted data.

Fully homomorphic encryption

Let’s suppose Alice is a client that is computationally bounded, she has an input X, she wants to compute an arbitrary program P on her input X and get the result where P is computationally intensive, she wants to delegate her computation to a powerful server (e.g. cloud provider) while preserving the privacy of her input (untrusted cloud). The way to do this is to encrypt the input, do the computation on the cipher text, and output the encryption of the result. A fully homomorphic encryption (FHE) is an encryption scheme that achieves that. It is currently still impractical in its full form because the algorithms take exponential time, but it is generating a lot of research in both academia and the industry, and they are bringing variants that make it practical.

CryptDB

CryptDB is a practical database server that allows SQL queries on encrypted data using SQL-aware encryption schemes (e.g. deterministic encryption for joins, order-preserving encryption for comparison predicates, homomorphic encryption for sums). The threat model for CryptDB is to ensure the privacy of the data in the face of a compromise of the database server.

I learned about CryptDB during the MIT cyber security courseMicrosoft Always Encrypted with SQL Server is another implementation.

Proof of concept

I made a proof of concept of the Grid running on CryptDB. I have not followed the guidelines to optimize the encryption schemes for the Grid; I just used the default CryptDB with the goal to spark interest in homomorphic encryption. The ideal would be to apply homomorphic encryption to M3.

1. Preparation

Install Ubuntu 12.04 (as required by CryptDB), Ruby, Git, and JDK 7 (minimum requirement for the Grid):

sudo apt-get install ruby git openjdk-7-jdk

2. Install CryptDB

  1. Download and build CryptDB; it will take some time:
    git clone -b public git://g.csail.mit.edu/cryptdb
    cd cryptdb/cd cryptdb/
    sudo scripts/install.rb .

  2. It will install MySQL on default port 3306; for the root password, enter CryptDB’s default letmein
  3. Start the CryptDB proxy (e.g. on default port 3307; change the EDBDIR accordingly):
    export EDBDIR=/home/thibaud/cryptdb/
    cd $EDBDIR
    bins/proxy-bin/bin/mysql-proxy \
     --plugins=proxy --event-threads=4 \
     --max-open-files=1024 \
     --proxy-lua-script=$EDBDIR/mysqlproxy/wrapper.lua \
     --proxy-address=127.0.0.1:3307 \
     --proxy-backend-addresses=localhost:3306

3. Install the Grid

  1. Install the Grid on MySQL (see part 8), but via CryptDB (i.e. port 3307 instead of 3306):
    mysql -u root -pletmein -h 127.0.0.1 -P 3307
    create database InforIONGrid;
    use InforIONGrid;
    CREATE TABLE ...

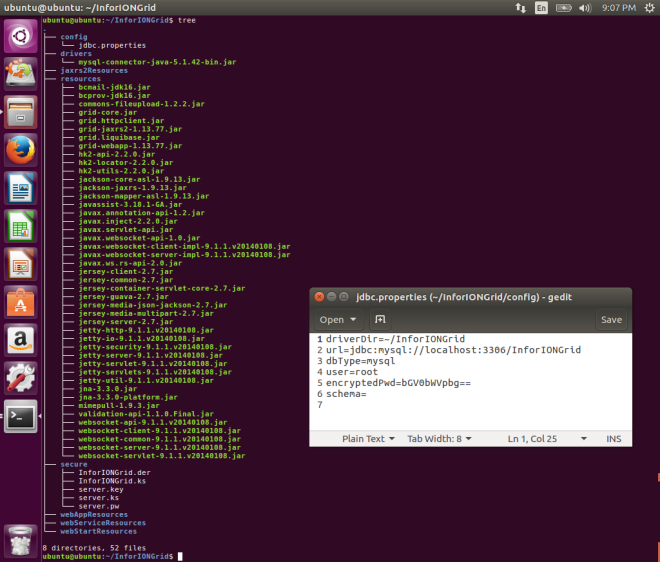
  2. Change the Grid’s config/jdbc.properties to use CryptDB instead of MySQL (i.e. port 3307 instead of 3306):
  3. Fix the CryptDB proxy query parser (it fails on column aliases and on the USER() function):
    cryptdb/mysqlproxy/wrapper.lua
    if string.find(query, "auto_increment_increment AS auto_increment_increment") then
        return -- fix for MySQL JDBC driver ConnectionImpl.loadServerVariables
    end
    if query == "SELECT USER()" then
        query = "SELECT CURRENT_USER()" -- fix for Grid Agent
    end
    

4. Start the Grid

Start the Grid as usual (see part 8).

Result

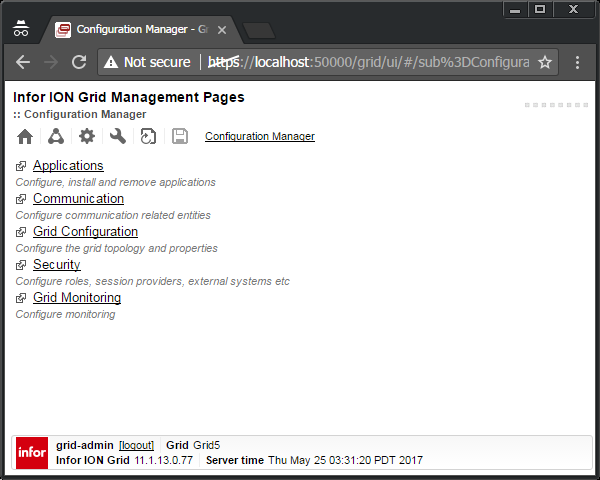
The result is a Grid running transparently on CryptDB, unaware that the underlying data is encrypted, while CryptDB does the computation on the encrypted data on behalf of the Grid:

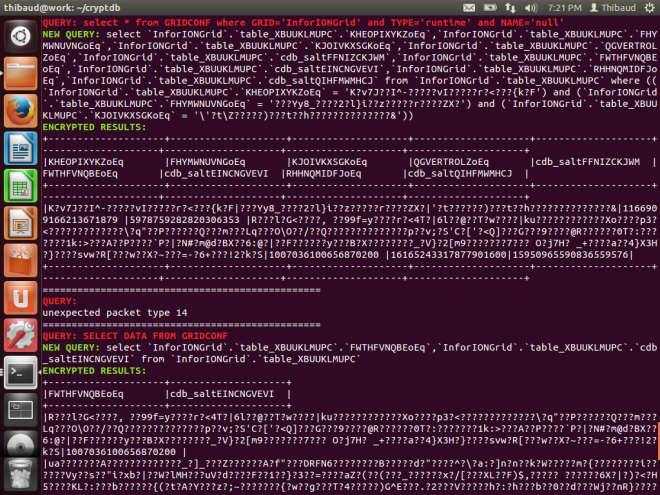
The CryptDB proxy intercepts the queries (QUERY), it parses them and encrypts them (NEW QUERY), it executes them on MySQL, it decrypts the result and returns the clear text to the Grid:

Benefits

The advantages are that the Grid data is encrypted which preserves its privacy in case the database server is compromised, and the Grid application did not have to be rewritten for it.

If someone were to compromise the database server, they would only see encrypted table names and columns and encrypted data that does not reveal information about the actual data:

Potential

I hope this proof of concept inspires Infor Product Development to consider this type of security for their applications that run on the multi-tenant cloud, such as M3. Secure multi-party computation and homomorphic encryption are the future direction for the security of multi-tenant clouds and a potential market not yet realized.

That’s it!

Please like, comment, share, subscribe, and come write the next idea.

Building an Infor Grid Lab – Part 8

As a corollary to building my Infor ION Grid laboratory for learning purposes, today I will setup the Grid on MySQL on Ubuntu; it involves re-compiling the Grid.

Why?

MySQL was a popular free/libre software database from Sweden from the glory days of LAMP, then Sun Microsystems acquired it, then Oracle acquired Sun, then the community forked MySQL into MariaDB to protect its freedom.

Why bother, given the community moved away from MySQL, and given the Infor Grid does not need or even support MySQL? Well, I am building a proof-of-concept of the Infor Grid on CryptDB, and that requires Ubuntu and MySQL. You will probably never need to know any of this, so I won’t put too much emphasis. I will use what I learned in parts 2, 2bis, and 6.

1. Install MySQL + JDK

Install MySQL and the Java Development Kit:

sudo apt-get install mysql-server default-jdk

2. Database tables

Create the InforIONGrid database and tables:

mysql -u root -p
create database InforIONGrid;
use InforIONGrid;
CREATE TABLE APPMAPPINGS (GRID varchar(256) NOT NULL, NAME varchar(256) NOT NULL, HOST varchar(256) NOT NULL, ID varchar(64) NULL, PENDINGID varchar(64) NULL, STATE varchar(32) NOT NULL, LOGNAME varchar(256) NULL, PROFILENAME varchar(64) NULL, PROFILEDATA BLOB NULL, JVMID varchar(64) NULL);
CREATE TABLE EXISTING_GRIDS (GRID_NAME varchar(64) NOT NULL, GRID_VERSION varchar(32) NOT NULL, MODIFIED_BY varchar(128) NULL, TIMESTAMP bigint NOT NULL);
CREATE TABLE GRIDCONF (GRID varchar(64) NOT NULL, TYPE varchar(32) NOT NULL, NAME varchar(128) NOT NULL, TS bigint NOT NULL, DATA BLOB NULL, SEQID bigint NOT NULL);
CREATE TABLE HOSTS (GRID_NAME varchar(64) NOT NULL, HOST_NAME varchar(64) NOT NULL, VALID_CERT varchar(32) NOT NULL, MODIFIED_BY varchar(128) NULL, DEPLOY_STATE varchar(32) NOT NULL, TIMESTAMP bigint NOT NULL, RUNNING varchar(32) NOT NULL, GRID_VERSION varchar(64) NOT NULL, BOOTSTRAP_VERSION varchar(64) NULL, HTTP_PORT bigint NOT NULL);
CREATE TABLE KEY_VALUE_STORE (APPLICATION_NAME varchar(64) NOT NULL, PROPERTY_NAME varchar(256) NOT NULL, PROPERTY_KEY varchar(128) NOT NULL, PROPERTY_VALUE BLOB NULL, PROPERTY_TYPE varchar(256) NOT NULL, PROPERTY_SIZE bigint NOT NULL, SEQID bigint NOT NULL, TIMESTAMP bigint NOT NULL);
INSERT INTO EXISTING_GRIDS (GRID_NAME, GRID_VERSION, MODIFIED_BY, TIMESTAMP) VALUES ('InforIONGrid', 1, 'Thibaud', 0);
INSERT INTO GRIDCONF (GRID, TYPE, NAME, TS, DATA, SEQID) VALUES ('InforIONGrid', 'runtime', 'null', 0, '<?xml version="1.0" ?><runtime xmlns="http://schemas.lawson.com/grid/configuration_v3"><bindings /><sessionProviders developer="true" /><routers><router name="Default Router" host="localhost" httpsPort="50000" httpPort="50001" /></routers><contextRoots /><propertySettings /></runtime>', 0);
INSERT INTO GRIDCONF (GRID, TYPE, NAME, TS, DATA, SEQID) VALUES ('InforIONGrid', 'topology' , 'null', 0, '<?xml version="1.0" ?><topology xmlns="http://schemas.lawson.com/grid/configuration_v3"><hosts><host name="localhost" address="127.0.0.1" gridAgentPort="50003" /></hosts><registry host="localhost" port="50004" /><administrativeRouter host="localhost" port="50005" webStartPort="50006" httpsPort="50007" /></topology>', 0);
INSERT INTO HOSTS (GRID_NAME, HOST_NAME, VALID_CERT, MODIFIED_BY, DEPLOY_STATE, TIMESTAMP, RUNNING, GRID_VERSION, BOOTSTRAP_VERSION, HTTP_PORT) VALUES ('InforIONGrid', 'localhost', 'true', 'Thibaud', 'ACTIVE', 0, 'STARTED', '1.13.77', '1.13.77', 50002);

3. JDBC

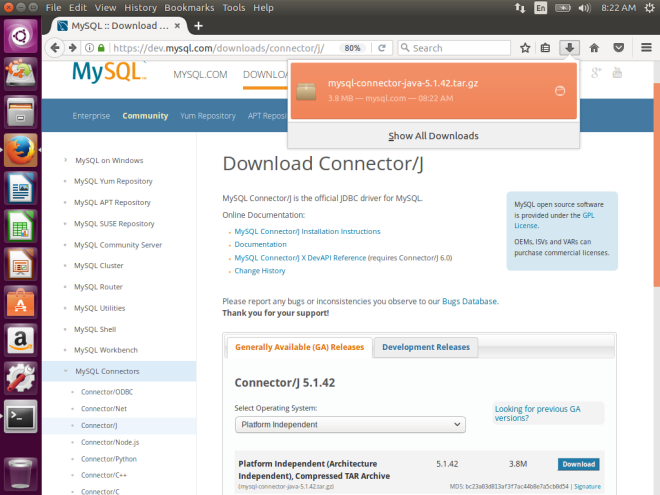
  1. Download the JDBC driver for MySQL:
    mysql-connector-java-5.1.42-bin.jar

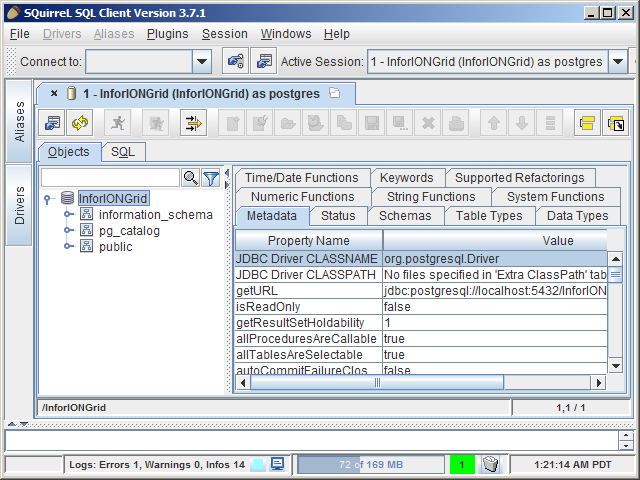
  2. Test the connection with a JDBC client such as SQuirreL:
    jdbc:mysql://localhost:3306/InforIONGrid

4. Grid files & folders

Create the Grid files and folders as before:

5. Re-compile the Grid

The Grid is hard-coded to only support a few database servers (e.g. Microsoft SQL Server), and MySQL is NOT one of them. However, given the Grid uses Liquibase for database abstraction, and given Liquibase supports MySQL, with some re-compilation of the Grid, it should work on MySQL. Let’s do that.

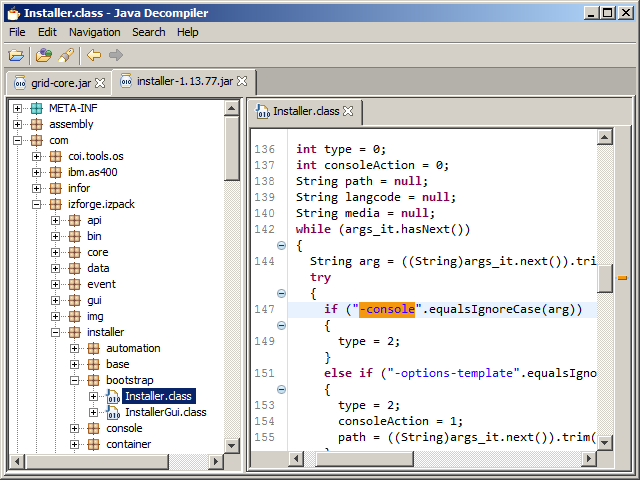
  1. Open the file grid-core.jar and de-compile the following Java class:
    com.lawson.grid.jdbc.JDBCProperties

  2. Re-write the code to add support for MySQL:
    static String DB_TYPE_MYSQL = "mysql";
    static String JAR_NAME_MYSQL = "mysql-connector-java";
    static String CLASS_NAME_MYSQL = "com.mysql.jdbc.Driver";
    static String URL_TEMPLATE_MYSQL = "jdbc:mysql://host:port/database";
    ...
    public static String getDbTypeFromConnectionString(String s) {
        ...
        if (... || type.equals(DB_TYPE_MYSQL))
        ...
    }
    public String getJarNameFromType() {
        ...
        if (type.equals(DB_TYPE_MYSQL))
            return JAR_NAME_MYSQL;
        ...
    }
    public static String getDriverClassFromType(String type) {
        ...
        if (type.equals(DB_TYPE_MYSQL))
            return CLASS_NAME_MYSQL;
        ...
    }
    public static String getUrlTemplateFromType(String type) {
        ...
        if (type.equals(DB_TYPE_MYSQL))
            return URL_TEMPLATE_MYSQL;
        ...
    }
    
  3. The Java Decompiler failed in a few places, and with the help of Krakatau decompiler we can fix them:
    public long getPooledCons() {
        synchronized(pool) {
            return pool.size();
        }
    }
    public static void setDefault(JDBCProperties instance) {
        JDBCProperties.instance = instance; // fixed scope
    }
    private static void removeDriverManagerReferences(Driver d) {
        ...
        if (isMatchingDriverClass((Class<? extends Driver>)oo.getClass(), d.getClass())) // fixed cast
        ...
    }
    public void releaseConnection(Connection con) {
        ...
        this.pool.add(new ConnectionWrapper(con)); // fixed null
        ...
    }
    public GridDatabaseException getSuspendedCause() {
        synchronized(this.suspendedCause) {
            return suspendedCause[0];
        }
    }
    
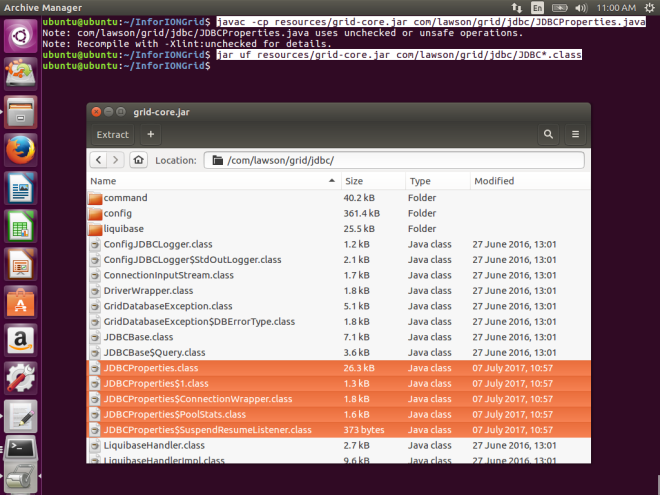
  4. Re-compile the code, and replace the classes in grid-core.jar with the new ones:
    javac -cp resources/grid-core.jar com/lawson/grid/jdbc/JDBCProperties.java
    jar uf resources/grid-core.jar com/lawson/grid/jdbc/JDBC*.class

  5. Test the re-compiled JAR with the following code (change the InforIONGrid path accordingly), it will dump the config/jdbc.properties and the GRIDCONF topology and runtime XML:
    javac -cp resources/grid-core.jar Test.java
    java -cp resources/grid-core.jar:drivers/mysql-connector-java-5.1.42-bin.jar:. Test
    
    import java.io.File;
    import java.util.List;
    import java.sql.Connection;
    import java.sql.ResultSet;
    import java.sql.Statement;
    import com.lawson.grid.jdbc.JDBCProperties;
    import com.lawson.grid.jdbc.config.ConfigurationConnector;
    import com.lawson.grid.config.ConfigAreaRuntime;
    import com.lawson.grid.config.JDBCConfigAreaRuntime;
    import com.lawson.grid.config.JDBCUtil;
    
    public class Test  {
        public static void main(String[] args) throws Exception {
            JDBCProperties p = new JDBCProperties();
            JDBCUtil.initFromGridDirectory(p, new File("/home/ubuntu/InforIONGrid"));
            p.toPrintStream(System.out); // dumps config/jdbc.properties
            ConfigAreaRuntime car = new JDBCConfigAreaRuntime(p);
            car.validate();
            Connection c = p.getConnection();
            Statement s = c.createStatement();
            ResultSet r = s.executeQuery("SELECT DATA FROM GRIDCONF");
            while (r.next()) {
                System.out.println(r.getString("DATA")); // dumps XML
            }
            c.close();
            ConfigurationConnector db = new ConfigurationConnector(p);
            System.out.println(db.getGrids()); // [InforIONGrid]
        }
    }
    

6. Start the Grid

Start the various Grid nodes (change the InforIONGrid path accordingly):

# variables
export CLASSPATH=drivers/mysql-connector-java-5.1.42-bin.jar:resources/bcmail-jdk16.jar:resources/bcprov-jdk16.jar:resources/commons-fileupload-1.2.2.jar:resources/grid-core.jar:resources/grid-jaxrs2-1.13.77.jar:resources/grid-webapp-1.13.77.jar:resources/grid.httpclient.jar:resources/grid.liquibase.jar:resources/hk2-api-2.2.0.jar:resources/hk2-locator-2.2.0.jar:resources/hk2-utils-2.2.0.jar:resources/jackson-core-asl-1.9.13.jar:resources/jackson-jaxrs-1.9.13.jar:resources/jackson-mapper-asl-1.9.13.jar:resources/javassist-3.18.1-GA.jar:resources/javax-websocket-client-impl-9.1.1.v20140108.jar:resources/javax-websocket-server-impl-9.1.1.v20140108.jar:resources/javax.annotation-api-1.2.jar:resources/javax.inject-2.2.0.jar:resources/javax.servlet-api.jar:resources/javax.websocket-api-1.0.jar:resources/javax.ws.rs-api-2.0.jar:resources/jersey-client-2.7.jar:resources/jersey-common-2.7.jar:resources/jersey-container-servlet-core-2.7.jar:resources/jersey-guava-2.7.jar:resources/jersey-media-json-jackson-2.7.jar:resources/jersey-media-multipart-2.7.jar:resources/jersey-server-2.7.jar:resources/jetty-http-9.1.1.v20140108.jar:resources/jetty-io-9.1.1.v20140108.jar:resources/jetty-security-9.1.1.v20140108.jar:resources/jetty-server-9.1.1.v20140108.jar:resources/jetty-servlet-9.1.1.v20140108.jar:resources/jetty-servlets-9.1.1.v20140108.jar:resources/jetty-util-9.1.1.v20140108.jar:resources/jna-3.3.0-platform.jar:resources/jna-3.3.0.jar:resources/mimepull-1.9.3.jar:resources/validation-api-1.1.0.Final.jar:resources/websocket-api-9.1.1.v20140108.jar:resources/websocket-client-9.1.1.v20140108.jar:resources/websocket-common-9.1.1.v20140108.jar:resources/websocket-server-9.1.1.v20140108.jar:resources/websocket-servlet-9.1.1.v20140108.jar
export CONFIG=/home/ubuntu/InforIONGrid
# Registry
java -cp $CLASSPATH com.lawson.grid.Startup -registry -configDir $CONFIG -host localhost -logLevel ALL &
# Default Router
java -cp $CLASSPATH com.lawson.grid.Startup -router "Default Router" -configDir $CONFIG -host localhost -logLevel ALL &
# Administrative Router
java -cp $CLASSPATH com.lawson.grid.Startup -router "Administrative Router" -configDir $CONFIG -host localhost -logLevel ALL &
# Grid Agent
java -cp $CLASSPATH com.lawson.grid.agent.GridAgent -configDir $CONFIG -host localhost -logLevel ALL &
# Grid Management Client
java -jar resources/grid-core.jar localhost 50004 &
# Configuration Manager
java -cp $CLASSPATH com.lawson.grid.config.client.ui.Launch -griddir $CONFIG -ui &
# Import XML
java -cp $CLASSPATH com.lawson.grid.config.JDBCConfigAreaRuntime $CONFIG

Result

The result is a Grid as usual, running on MySQL:

Conclusion

That was how to run the Infor ION Grid on MySQL after re-compiling the Grid Java classes to make it support MySQL. I will use it in my next proof-of-concept to run the Grid on CryptDB.

That’s it!

Related posts

Building an Infor Grid Lab – Part 7

Continuing to build an Infor ION Grid laboratory for my learning purposes, today I will install the Grid on a $10/month virtual [private] cloud, with DigitalOcean. Random fact: DigitalOcean is headquartered a few blocks from Infor’s headquarters down the Avenue of the Americas in New York.

Competition

There are various cloud hosting service providers for Infor M3 that compete with Infor. Some use cloud computing platforms other than Amazon Web Services. Competition is good to foster innovation, to drive prices down for customers, and to resist vendor lock-in. But it is a tough market as cloud infrastructure is a commodity, and unless those providers can differentiate themselves with a competitive advantage, they will be unable to survive against the utter economies of scale and expertise of Infor and Amazon and their thousands of employees dedicated to the cloud. As a laboratory for learning purposes, however, DigitalOcean or any other cloud platform are sufficient.

Disclaimers

The Grid bundled installer is available for internal use only, not for production use. ** Infor M3 only supports Red Hat Enterprise Linux (see the announcement thing), not CentOS. ** I am not revealing any internal information as Infor made the Installation Guide available online, and the rest can be achieved by inductive reasoning as I am doing. ** I will use Cygwin for the Unix tools on my Windows computer.

1. Create Droplet

In this step we will create a droplet in DigitalOcean:

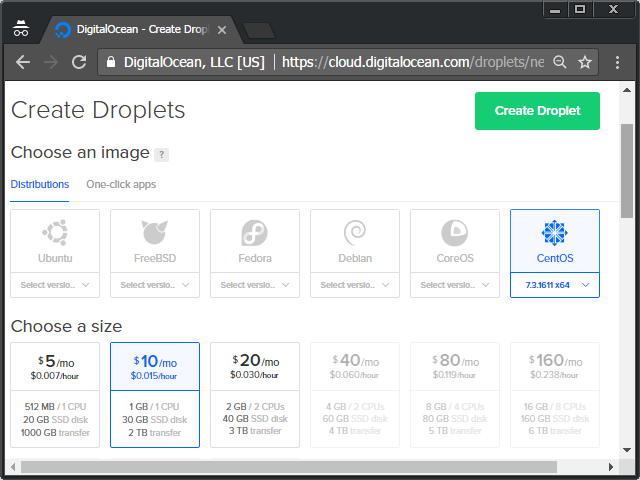
  1. Click Create Droplet, choose the CentOS distribution, and chose the $10/month size, it has the necessary and sufficient amount of memory (in my local virtual machine of 512 Mb RAM the Grid ran fine, but strangely in a droplet of the same 512 Mb RAM there was not enough memory and the Grid kept crashing, so I upgraded to the next bigger size; 1 Gb of RAM is sufficient as we do not need more):
  2. Generate an SSH key pair on your computer, if you do not already have one:
    ssh-keygen

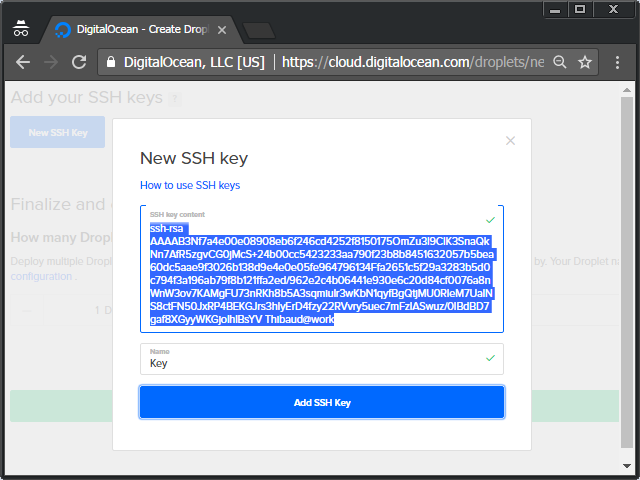
  3. Add your public key to the droplet (copy/paste):
    cat ~/.ssh/id_rsa.pub

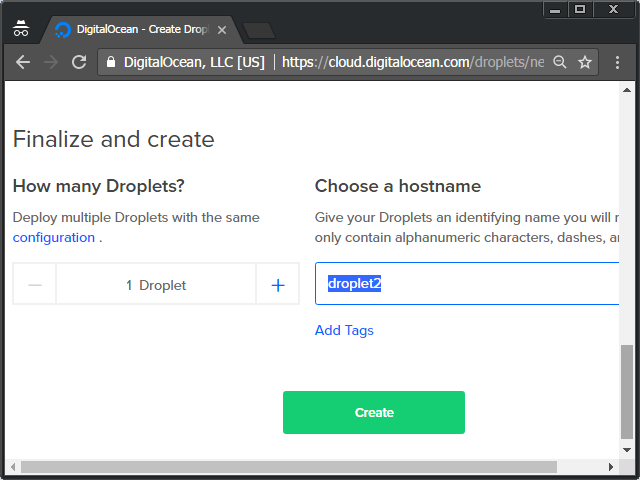
  4. Set the hostname, e.g. droplet2, and click Create:
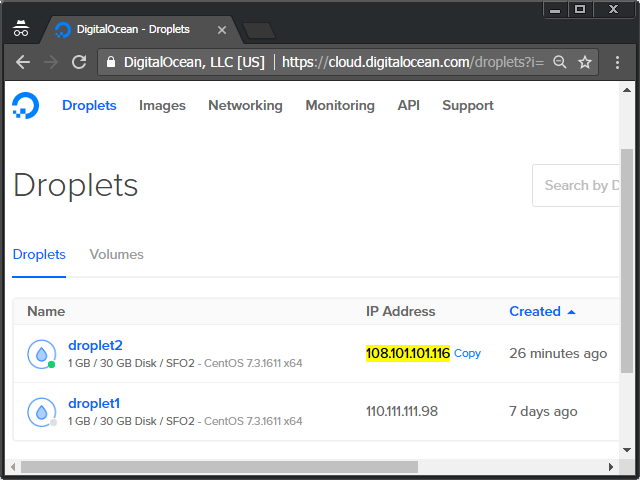
  5. Get the IP address of your droplet:
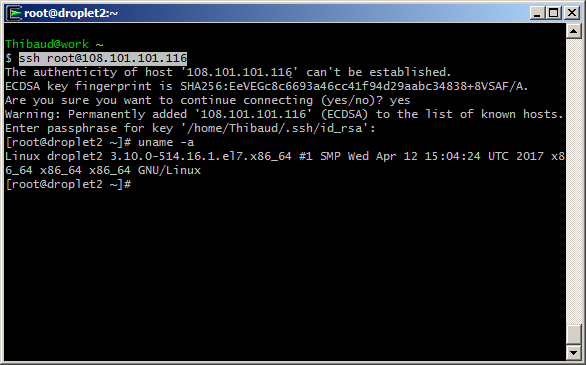
  6. SSH into it:
    ssh root@108.101.101.116

  7. Create a new user, e.g. thibaud, with administrative privileges (the built-in group wheel is allowed sudo), and switch to it:
    adduser thibaud
    passwd thibaud
    gpasswd -a thibaud wheel
    su thibaud
    cd ~

  8. Setup SSH for that user (I will use the same key setup earlier):
    mkdir ~/.ssh/
    chmod 700 ~/.ssh/
    sudo cp /root/.ssh/authorized_keys .ssh/
    sudo chown thibaud .ssh/authorized_keys
    chmod 600 ~/.ssh/authorized_keys

  9. Disallow SSH as root (uncomment PermitRootLogin, and change it from yes to no):
    sudo vi /etc/ssh/sshd_config
    PermitRootLogin no

    Note: to use vim, move with the cursor until you reach the desired location, press INSERT to enter edit mode, change the text as desired, press ESC to return to command mode, type :wq and press ENTER to write your changes to file and quit.
  10. Restart the SSH service:
    sudo systemctl reload sshd

We now have a droplet ready to use.

2. Preparation

In this step, we will install the JDK, PostgreSQL, and the Grid database, as shown in part 6bis.

  1. Install the JDK:
    sudo yum install java-1.8.0-openjdk-devel

  2. Install PostgreSQL:
    sudo yum install postgresql-server

    sudo postgresql-setup initdb

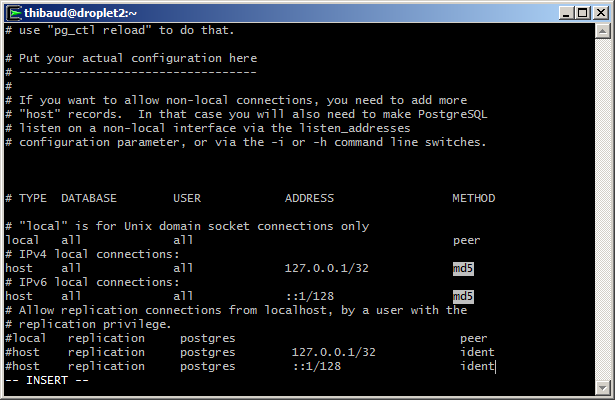
  3. Setup password authentication (change these two host lines from ident to md5):
    sudo vi /var/lib/pgsql/data/pg_hba.conf

  4. Start PostgreSQL, and enable it on reboot:
    sudo systemctl start postgresql
    sudo systemctl enable postgresql

  5. Change the password of user postgres and create the InforIONGrid database:
    sudo -i -u postgres psql -c "ALTER USER postgres with encrypted password 'password123';"
    sudo -i -u postgres createdb InforIONGrid
    

  6. Create the user and group for the Grid service:
    sudo groupadd grid
    sudo useradd -g grid grid

The droplet is now ready to install the Grid.

3. Install the Grid

In this step, we will install the Grid in unattended installation mode as shown in part 4bis.

  1. Copy the Grid installer to somewhere in the droplet, e.g. ~/Downloads/:
    mkdir ~/Downloads/
    exit
    exit
    scp ~/Downloads/installer-1.13.77.jar thibaud@108.101.101.116:~/Downloads/
    ssh thibaud@108.101.101.116

  2. Create a template file installer.properties:
    java -jar ~/Downloads/installer-1.13.77.jar -console -options-template ~/Downloads/installer.properties

  3. Set the following properties (change the IP address and hostname accordingly; use a text editor, e.g. vim):
    install.path=/opt/Infor/InforIONGrid
    jdk.path=/usr/lib/jvm/java-openjdk
    database.jdbc=jdbc:postgresql://localhost:5432/InforIONGrid
    database.username=postgres
    database.password=password123
    database.schema=public
    grid.externaladdress=108.101.101.116
    grid.hostname=droplet2
    grid.internaladdress=droplet2
    service.username=grid
    service.group=grid
    

  4. Install the Grid in silent mode:
    sudo java -jar ~/Downloads/installer-1.13.77.jar -console -options ~/Downloads/installer.properties

  5. Check the log files if needed.
  6. Ensure all the Grid nodes are listening:
    netstat -an | grep :5000 | grep LISTEN

  7. Verify the Grid status is Started:
    curl http://localhost:50002/status

Result

The result is a usual Grid, on a cloud:

Firewall

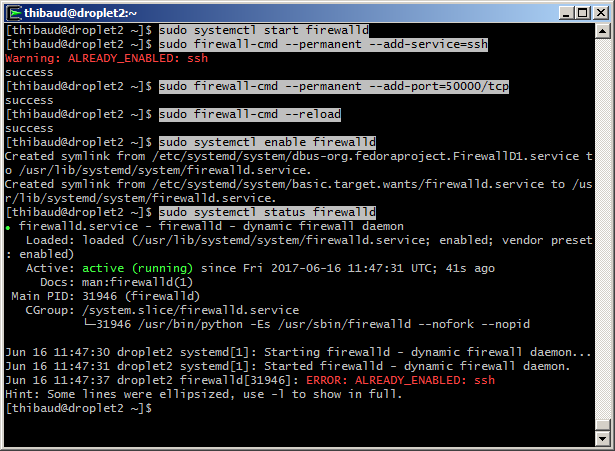
To setup the firewall to block all incoming connections except SSH and Grid https port 50000:

sudo systemctl start firewalld
sudo firewall-cmd --permanent --add-service=ssh
sudo firewall-cmd --permanent --add-port=50000/tcp
sudo firewall-cmd --reload
sudo systemctl enable firewalld
sudo systemctl status firewalld

Next

The droplet is publicly available on the Internet. At this point you should secure it as per your needs, for example with DMZ and VPN. Here are Infor’s installation topology considerations, recommended installation scenarios, and network topology considerations. To make your cloud private, set it up in a private subnet.

GitHub

I put it all together in the install.sh script on my GitHub.

Future work

  • Install Grid session providers
  • Install GDBC
  • Install Grid applications
  • Grid pentesting
  • Proof-of-concept of Grid database on homomorphic encryption with CryptDB or Microsoft’s Always Encrypted SQL Server

Conclusion

That was an illustration of how to install the Infor ION Grid on a virtual [private] cloud as a laboratory for learning purposes, using DigitalOcean as the cloud provider. The installation is remote with SSH, no graphical user interface.

Related posts

Building an Infor Grid Lab – Part 6bis

More building an Infor ION Grid laboratory for my learning purposes. Today, I will install the Grid on CentOS Linux, a free/libre Linux distribution based on Red Hat which the Grid supports (see previous post).

Disclaimer

The Grid bundled installer is available for internal use only, not for production use. Infor M3 only supports Red Hat Enterprise Linux (see announcement thing).

CentOS

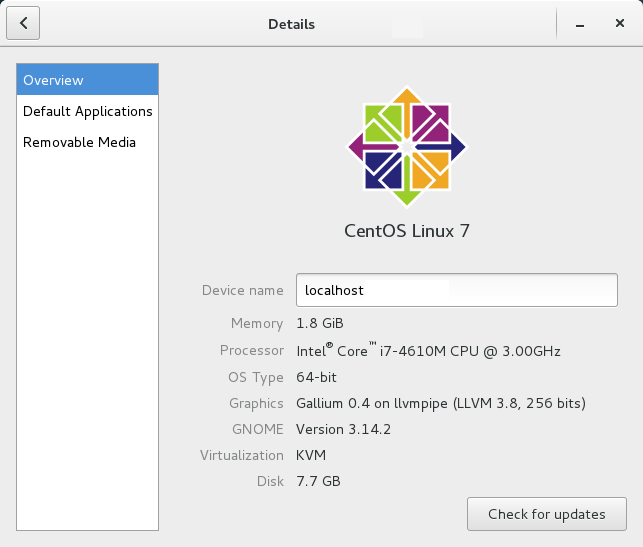
I will user the latest CentOS Linux 7:

1. Install PostgreSQL

Install PostgreSQL (see part 5 and part 6):

sudo yum install postgresql-server
sudo postgresql-setup initdb

Setup password authentication of hosts from ident to md5:

/var/lib/pgsql/data/pg_hba.conf

Start and enable PostgreSQL:

systemctl start postgresql
systemctl enable postgresql

Verify the connection and change the password:

sudo -i -u postgres
psql
select version();
\conninfo
\password

2. Create the Grid database

Create the InforIONGrid database and verify:

sudo -i -u postgres
createdb InforIONGrid
psql -d InforIONGrid
\list

3. Install the Grid

Launch the Grid bundled installer and follow the installation wizard (see part 4):

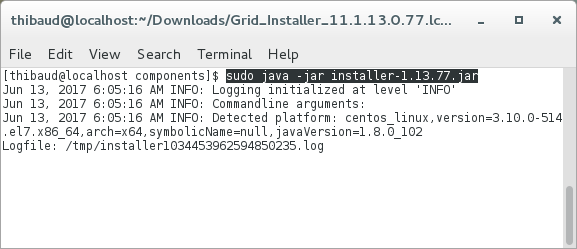
sudo java -jar installer-1.13.77.jar
/opt/Infor/InforIONGrid
/usr/lib/jvm/java-openjdk

Create the user and group for the Grid service:

sudo groupadd grid
sudo useradd -g grid grid

Result

The result is a usual Grid, in CentOS:

Future work

  • Install Grid on a virtual private cloud
  • Install Grid session providers
  • Install GDBC
  • Install Grid applications
  • Grid pentesting
  • Proof-of-concept of Grid database on homomorphic encryption with CryptDB or Microsoft’s Always Encrypted SQL Server

Conclusion

That was an illustration of how to install the Infor ION Grid on CentOS, a Red Hat based Linux distribution, for learning purposes.

Related posts

Building an Infor Grid Lab – Part 6

Further building my Infor ION Grid laboratory for learning purposes, today, I will install the Grid on Ubuntu Linux, a Debian-based Linux distribution.

About

I will use what I learned in part 5 for the PostgreSQL database, in part 4bis for the console installation mode, in part 2 for the manual installation, and in part 3 for the cryptographic key material. And I will install the latest Grid version 11.1.13.0.77, on the latest Ubuntu Desktop 16.04.2 with Long Term Support (LTS).

1. Install PostgreSQL

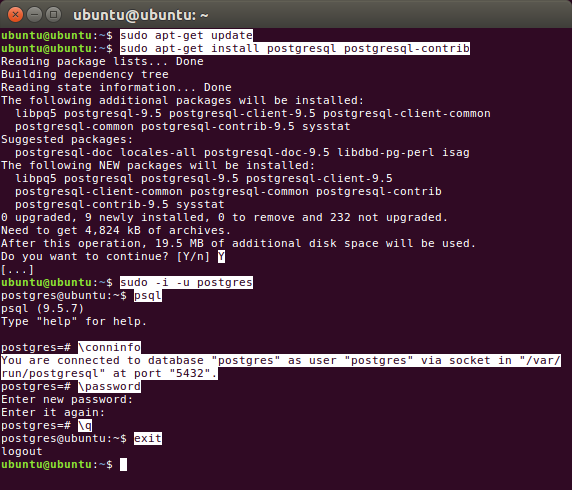
Install PostgreSQL on Linux, verify the connection, and set the password for user postgres:

sudo apt-get update
sudo apt-get install postgresql postgresql-contrib
sudo -i -u postgres
psql
\conninfo
\password
\q
exit

2. Grid installer – FAILED!

The Grid bundled installer (as in part 4bis) throws the following error:

You are installing on an unsupported platform (001)
Console installation FAILED!

Apparently, it is hard-coded to only support Red Hat and Suse, not Ubuntu.

Nonetheless, the Grid is just Java and SQL, so it should work on Ubuntu as well. Let’s try installing it manually instead.

3. Create the database manually

Create the Grid database in PostgreSQL as in part 5, and create the Grid tables as in part 2 with a few changes for the binary data type:

sudo -i -u postgres
createdb InforIONGrid
psql -d InforIONGrid
CREATE TABLE GRIDCONF (
 GRID varchar(64) NOT NULL,
 TYPE varchar(32) NOT NULL,
 NAME varchar(128) NOT NULL,
 TS numeric(20, 0) NOT NULL,
 DATA bytea NULL,
 SEQID numeric(5, 0) NOT NULL
);
INSERT INTO GRIDCONF (GRID, TYPE, NAME, TS, DATA, SEQID) VALUES ('InforIONGrid', 'runtime' , 'null', 0, '<?xml version="1.0" ?>
<runtime xmlns="http://schemas.lawson.com/grid/configuration_v3">
 <bindings />
 <sessionProviders /> 
 <routers />
 <contextRoots />
 <propertySettings />
</runtime>', 0);
INSERT INTO GRIDCONF (GRID, TYPE, NAME, TS, DATA, SEQID) VALUES ('InforIONGrid', 'topology' , 'null', 0, '<?xml version="1.0" ?>
<topology xmlns="http://schemas.lawson.com/grid/configuration_v3">
 <hosts>
 <host name="localhost" address="127.0.0.1" gridAgentPort="50003" />
 </hosts>
 <registry host="localhost" port="50004" />
</topology>', 0);

Verify with a JDBC client:

4. Install the Grid manually

Install the Grid manually as in part 2:

Create the file and folder structure, with the JAR files, and JDBC driver:

jdbc.properties:

driverDir=/home/ubuntu/InforIONGrid/drivers/
url=jdbc:postgresql://localhost:5432/InforIONGrid
dbType=postgresql
user=postgres
encryptedPwd=cGFzc3dvcmQxMjM=
schema=public

Create the cryptographic key material as in part 3:

java -cp resources/grid-core.jar:resources/bcprov-jdk16.jar:resources/bcmail-jdk16.jar com.lawson.grid.security.Certificates -create=gridcert -gridname InforIONGrid -gridpassword password123 -gridkeystore secure
java -cp resources/grid-core.jar:resources/bcprov-jdk16.jar:resources/bcmail-jdk16.jar com.lawson.grid.security.Certificates -create=hostcert -gridname InforIONGrid -gridpassword password123 -hostname localhost -gridkeystore secure -hostkeystore secure -role grid-admin -address localhost -address ::1 -address 127.0.0.1 -address example.com -unresolved
java -cp resources/grid-core.jar:resources/bcprov-jdk16.jar:resources/bcmail-jdk16.jar com.lawson.grid.security.Certificates -create=symkey -gridname InforIONGrid -gridkeystore secure -gridpassword password123 -symkeypath secure -hostkeystore secure -hostname localhost

Start the Grid:

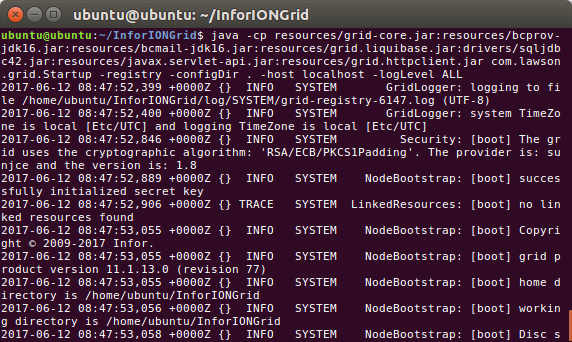
java -cp resources/grid-core.jar:resources/bcprov-jdk16.jar:resources/bcmail-jdk16.jar:resources/grid.liquibase.jar:drivers/sqljdbc42.jar:resources/javax.servlet-api.jar:resources/grid.httpclient.jar com.lawson.grid.Startup -registry -configDir . -host localhost -logLevel ALL

Result

The result is a Grid as usual, in Ubuntu:

GitHub

I put the install.sh script on my GitHub. I tested it with a stock Ubuntu Live DVD, and it works like a charm, installing and launching a Grid in less than a minute.

Demo

I made a demo here: I boot the stock Ubuntu Live DVD, I download the Grid and the install.sh script, I execute the script, it installs the Grid (the minimal version of part 2), and it launches the Grid:

Next

From here, you can finish the rest of part 2 for the Configuration Import & Edit and Topology View, and continue to part 2bis for the Default Router, Developer Session Provider, Administrative Router, Configuration Manager, web user interface, and Grid Agent.

Future work

  • Install Grid on CentOS Linux
  • Install Grid on a virtual private cloud
  • Install Grid session providers
  • Install GDBC
  • Install Grid applications
  • Grid pentesting
  • Proof-of-concept of Grid database on homomorphic encryption with CryptDB or Microsoft’s Always Encrypted SQL Server

Conclusion

That was an illustrated guide on how to install the Infor ION Grid manually on Ubuntu Linux and PostgreSQL, for learning purposes. I had to use everything I learned in this series so far.

That’s it! Thanks for reading until here.

Related posts

Building an Infor Grid Lab – Part 5

To further build my Infor ION Grid laboratory for learning purposes, today I will install the Grid on the PostgreSQL database, on Windows.

Special note

I have a special appreciation for PostgreSQL. It is free/libre software. It is the successor of Postgres which is the successor of Ingres, two pioneering database systems in the heydays of Edgar F. Codd’s relational model. It originated at the University of California at Berkeley, a remarkable institution of computer science, near San Francisco where I live. And Ingres and Postgres were written by professor Michael Stonebraker, who is another recipient of the ACM Turing Award for his extensive contribution to database systems, and whom was my professor in the MIT Big Data course.

Disclaimer

The Infor ION Grid bundled installer has built-in support for PostgreSQL (see part 4), but it is for your internal use only, not for production use. Anyhow, Infor M3 only supports EnterpriseDB Postgres Plus Advanced Server (see the announcement thing).

1. Install PostgreSQL

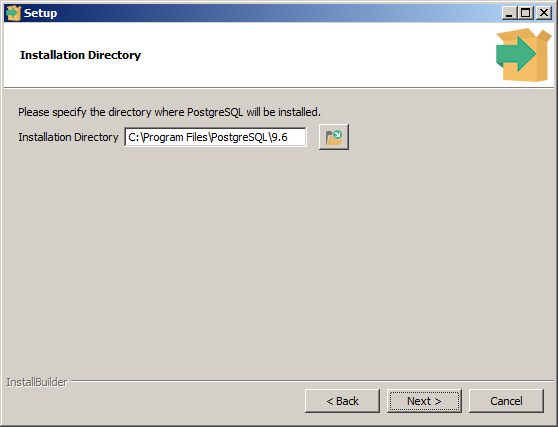
Download PostgreSQL for Windows:

Follow the installation wizard:

Verify it is started and listening:

2. Create the database

Create the Grid database, e.g. InforIONGrid, and verify the connection:

cd C:\Program Files\PostgreSQL\9.6\
createdb --username=postgres InforIONGrid
psql --username postgres -d InforIONGrid
\conninfo
\list
\q

Verify with a JDBC client such as SQuirreL (the Grid bundled installer ships with a PostgreSQL JDBC driver):

Grid_Installer_11.1.13.0.77.lcm\products\Infor_ION_Grid_11.1.13.0\components\postgresql-9.3-1101-jdbc41.jar
jdbc:postgresql://localhost:5432/InforIONGrid

You can also verify with pgAdmin:

C:\Program Files\PostgreSQL\9.6\pgAdmin 4\bin\pgAdmin4.exe

3. Install the Grid

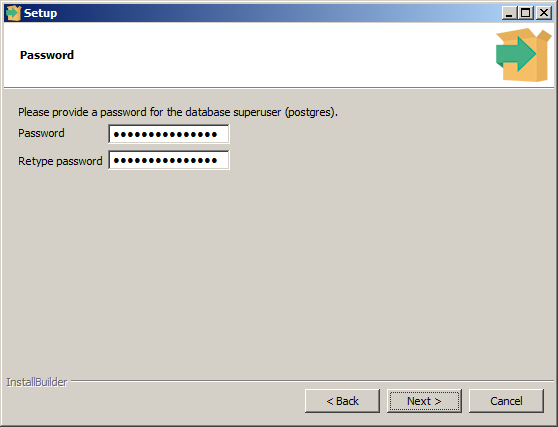
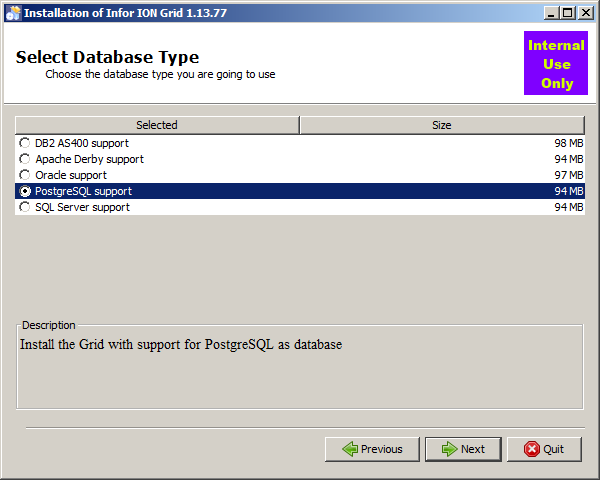
Now install the Grid as usual, select PostgreSQL support, enter Schema public:

Result

The result is a Grid as usual, running on the PostgreSQL database:

Future work

  • Install Grid on Linux
  • Install Grid on a virtual private cloud
  • Install Grid session providers
  • Install GDBC
  • Install Grid applications
  • Grid pentesting
  • Proof-of-concept of Grid database on homomorphic encryption with CryptDB or Microsoft’s Always Encrypted SQL Server

Conclusion

That was an illustration of how to install the Infor ION Grid on PostgreSQL on Windows, for learning purposes. The installation is quite intuitive.

Special thanks to the Infor ION Grid team in Sweden for making the Grid available on PostgreSQL.

Related posts

Building an Infor Grid Lab – Part 4bis

Continuing from part 4 building an Infor ION Grid laboratory for my learning purposes, today I will do alternative installations using the IzPack console and unattended installation modes. Most probably, you will never need to know any of this, except if you maintain a large cloud environment.

Disclaimer

The Grid bundled installer is available publicly as part of the Grid deliverable, but it is for internal use only, not for production use.

Console mode

The Grid installer uses IzPack for the installation wizard, which comes with a text console installation mode, to have a command line interface instead of the graphical user interface:

To use it, create the empty database as usual, start a command prompt as administrator, execute the following command, and answer the prompts:

java -jar installer-1.13.77.jar -console

Refer to the log file if needed. The result is the same as in part 4, with database tables, files and folders, Grid registry, administrative router, user interface, Windows Service, etc.

Unattended mode

Furthermore, IzPack has an unattended installation mode, for a silent install.

To use, create an empty installer.properties file with the following command:

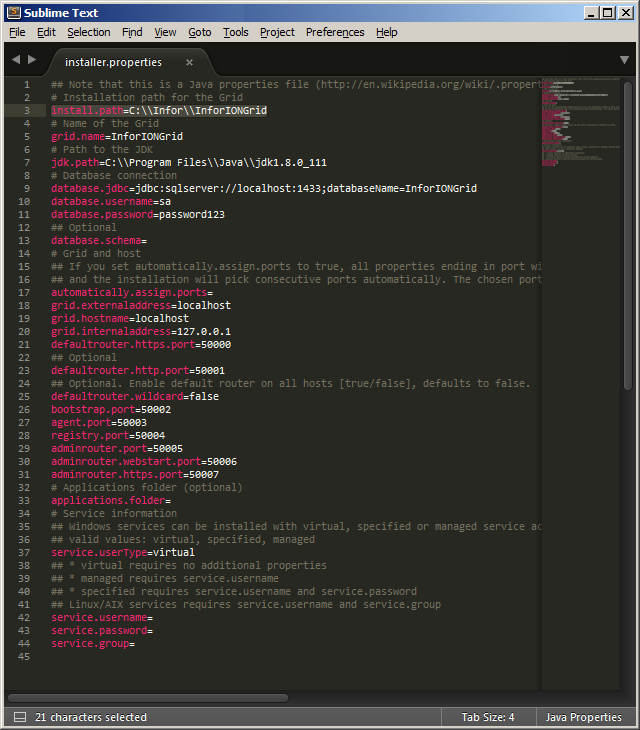
java -jar installer-1.13.77.jar -console -options-template installer.properties

Open the resulting file in a text editor, set the desired property values, with the proper escaping where necessary (e.g. install.path=C:\\Infor\\InforIONGrid):

And execute the silent install with the following command, there will be no prompts:

java -jar installer-1.13.77.jar -console -options installer.properties

The resulting Grid is the same as usual.

Future work

  • Install the Grid on Linux and PostgreSQL
  • Install Grid on a virtual private cloud
  • Install Grid session providers
  • Install GDBC
  • Install Grid applications
  • Penetration testing
  • Proof-of-concept of Grid database on homomorphic encryption with CryptDB or Microsoft’s Always Encrypted SQL Server

Conclusion

That was an illustration of alternative installations of the Infor ION Grid using the IzPack text console installation mode for a command line interface, and the unattended installation mode for a silent install. Most probably, you will never need to know any of this. It shows Infor’s commitment to transition, from graphical user interfaces and customer on-premise installations, to migrating products to a multi-tenant cloud, the new direction.

That’s it! Please like, comment, subscribe, share, participate.

Related posts

Building an Infor Grid Lab – Part 2bis

I am learning how to install an Infor ION Grid laboratory from scratch without LifeCycle Manager (LCM). I had started in part 2 with a minimalist Grid. Today, I will add the Default Router, Developer Session Provider, Administrative Router, Configuration Manager, web user interface, and Grid Agent.

BUT WHY?

I am learning the guts of the Grid because I am curious by nature, because I want to do penetration testing, because I want to install M3 on Linux and PostgreSQL to promote free software (as in freedom), and I want to make a proof-of-concept of M3 (just the Grid for now) on a homomorphic encryption database such as CryptDB or Microsoft’s Always Encrypted SQL Server.

Learning process

To learn, I take any installed Grid as a reference, and I study its internals. I start from the Topology View, I select the Node of interest (e.g. Administrative Router), I look at the Properties to make note of the command that launches it, I look at the Threads to determine the Java class name, I look at the disassembled source code to assimilate what it does, I look at the LCM installation package to understand the Velocity scripts and Ant tasks (see my previous work on LCM), and I look at the public Infor documentation. Then, I try to reproduce the Grid in my laboratory with only the necessary and sufficient elements. Here are some screenshots while learning the Grid Administrative Router:

I must use this Chinese wall technique because as a consultant I do not have access to Infor Product Development, i.e. the developers do not respond to my questions, and they do not share their source code or internal documentation. I am known for having “crazy ideas”, supposedly pointless. I call it progress 😉 If we do not challenge the status quo, who will? Even if I had access to the internal details, I am not allowed to show proprietary information. The workaround is to put myself in the situation of a clean room, analogous to that of any customer that has access to the binaries and that can reverse engineer on their own. That is how I can share my results here. Nonetheless, congratulations to Infor for finally having made a lot of the documentation public; please encourage them as well. In that direction, please sign the petition so Infor makes their source code at least source-available or shared source, and so they cooperate more with developers.

1. Begin with minimal Grid

Follow part 2 to begin with a minimal Grid.

2. Additional JAR files

Get the following additional JAR files (I may need to clean up the list). These JAR files are packed with IzPack at Grid_Installer_11.1.13.0.77.lcm\products\Infor_ION_Grid_11.1.13.0\components\installer-1.13.77.jar\resources\packs\ . More easily, I get them from my existing Grid installation of part 4. Then, put them somewhere, e.g. C:\Infor\Grid\resources\ :

resources\1.13.77\jna-3.3.0-platform.jar
resources\1.13.77\jna-3.3.0.jar
runtimes\1.13.77\jaxrs2Resources\grid-jaxrs2-1.13.77.jar
runtimes\1.13.77\jaxrs2Resources\hk2-api-2.2.0.jar
runtimes\1.13.77\jaxrs2Resources\hk2-locator-2.2.0.jar
runtimes\1.13.77\jaxrs2Resources\hk2-utils-2.2.0.jar
runtimes\1.13.77\jaxrs2Resources\jackson-core-asl-1.9.13.jar
runtimes\1.13.77\jaxrs2Resources\jackson-jaxrs-1.9.13.jar
runtimes\1.13.77\jaxrs2Resources\jackson-mapper-asl-1.9.13.jar
runtimes\1.13.77\jaxrs2Resources\javassist-3.18.1-GA.jar
runtimes\1.13.77\jaxrs2Resources\javax.annotation-api-1.2.jar
runtimes\1.13.77\jaxrs2Resources\javax.inject-2.2.0.jar
runtimes\1.13.77\jaxrs2Resources\javax.ws.rs-api-2.0.jar
runtimes\1.13.77\jaxrs2Resources\jersey-client-2.7.jar
runtimes\1.13.77\jaxrs2Resources\jersey-common-2.7.jar
runtimes\1.13.77\jaxrs2Resources\jersey-container-servlet-core-2.7.jar
runtimes\1.13.77\jaxrs2Resources\jersey-guava-2.7.jar
runtimes\1.13.77\jaxrs2Resources\jersey-media-json-jackson-2.7.jar
runtimes\1.13.77\jaxrs2Resources\jersey-media-multipart-2.7.jar
runtimes\1.13.77\jaxrs2Resources\jersey-server-2.7.jar
runtimes\1.13.77\jaxrs2Resources\mimepull-1.9.3.jar
runtimes\1.13.77\jaxrs2Resources\validation-api-1.1.0.Final.jar
runtimes\1.13.77\tools\grid-cli\jackson-core-asl-1.9.13.jar
runtimes\1.13.77\tools\grid-cli\jackson-mapper-asl-1.9.13.jar
runtimes\1.13.77\webAppResources\commons-fileupload-1.2.2.jar
runtimes\1.13.77\webAppResources\grid-webapp-1.13.77.jar
runtimes\1.13.77\webAppResources\javax.websocket-api-1.0.jar
runtimes\1.13.77\webAppResources\javax-websocket-client-impl-9.1.1.v20140108.jar
runtimes\1.13.77\webAppResources\javax-websocket-server-impl-9.1.1.v20140108.jar
runtimes\1.13.77\webAppResources\javax.annotation-api-1.2.jar
runtimes\1.13.77\webAppResources\jetty-http-9.1.1.v20140108.jar
runtimes\1.13.77\webAppResources\jetty-io-9.1.1.v20140108.jar
runtimes\1.13.77\webAppResources\jetty-security-9.1.1.v20140108.jar
runtimes\1.13.77\webAppResources\jetty-server-9.1.1.v20140108.jar
runtimes\1.13.77\webAppResources\jetty-servlet-9.1.1.v20140108.jar
runtimes\1.13.77\webAppResources\jetty-servlets-9.1.1.v20140108.jar
runtimes\1.13.77\webAppResources\jetty-util-9.1.1.v20140108.jar
runtimes\1.13.77\webAppResources\websocket-api-9.1.1.v20140108.jar
runtimes\1.13.77\webAppResources\websocket-client-9.1.1.v20140108.jar
runtimes\1.13.77\webAppResources\websocket-common-9.1.1.v20140108.jar
runtimes\1.13.77\webAppResources\websocket-server-9.1.1.v20140108.jar
runtimes\1.13.77\webAppResources\websocket-servlet-9.1.1.v20140108.jar

3. CLASSPATH

Prepare a CLASSPATH environment variable with all the JAR files including the JDBC driver:

set CLASSPATH=drivers\sqljdbc42.jar;resources\bcmail-jdk16.jar;resources\bcprov-jdk16.jar;resources\commons-fileupload-1.2.2.jar;resources\grid-core.jar;resources\grid-jaxrs2-1.13.77.jar;resources\grid-webapp-1.13.77.jar;resources\grid.httpclient.jar;resources\grid.liquibase.jar;resources\hk2-api-2.2.0.jar;resources\hk2-locator-2.2.0.jar;resources\hk2-utils-2.2.0.jar;resources\jackson-core-asl-1.9.13.jar;resources\jackson-jaxrs-1.9.13.jar;resources\jackson-mapper-asl-1.9.13.jar;resources\javassist-3.18.1-GA.jar;resources\javax-websocket-client-impl-9.1.1.v20140108.jar;resources\javax-websocket-server-impl-9.1.1.v20140108.jar;resources\javax.annotation-api-1.2.jar;resources\javax.inject-2.2.0.jar;resources\javax.servlet-api.jar;resources\javax.websocket-api-1.0.jar;resources\javax.ws.rs-api-2.0.jar;resources\jersey-client-2.7.jar;resources\jersey-common-2.7.jar;resources\jersey-container-servlet-core-2.7.jar;resources\jersey-guava-2.7.jar;resources\jersey-media-json-jackson-2.7.jar;resources\jersey-media-multipart-2.7.jar;resources\jersey-server-2.7.jar;resources\jetty-http-9.1.1.v20140108.jar;resources\jetty-io-9.1.1.v20140108.jar;resources\jetty-security-9.1.1.v20140108.jar;resources\jetty-server-9.1.1.v20140108.jar;resources\jetty-servlet-9.1.1.v20140108.jar;resources\jetty-servlets-9.1.1.v20140108.jar;resources\jetty-util-9.1.1.v20140108.jar;resources\jna-3.3.0-platform.jar;resources\jna-3.3.0.jar;resources\mimepull-1.9.3.jar;resources\validation-api-1.1.0.Final.jar;resources\websocket-api-9.1.1.v20140108.jar;resources\websocket-client-9.1.1.v20140108.jar;resources\websocket-common-9.1.1.v20140108.jar;resources\websocket-server-9.1.1.v20140108.jar;resources\websocket-servlet-9.1.1.v20140108.jar

4. Additional folders

Create the following additional folders, I leave them empty even though I could organize the JAR files accordingly:

jaxrs2Resources
webAppResources
webServiceResources
webStartResources

And create file webStartResources\webStartResources.properties, even though empty.

5. Additional tables

Create the following additional database tables:

CREATE TABLE KEY_VALUE_STORE (
 APPLICATION_NAME varchar(64) NOT NULL,
 PROPERTY_NAME varchar(256) NOT NULL,
 PROPERTY_KEY varchar(128) NOT NULL,
 PROPERTY_VALUE varbinary(max) NULL,
 PROPERTY_TYPE varchar(256) NOT NULL,
 PROPERTY_SIZE numeric(10, 0) NOT NULL,
 SEQID numeric(5, 0) NOT NULL,
 TIMESTAMP numeric(20, 0) NOT NULL,
)
CREATE TABLE HOSTS(
 GRID_NAME varchar(64) NOT NULL,
 HOST_NAME varchar(64) NOT NULL,
 VALID_CERT varchar(32) NOT NULL,
 MODIFIED_BY varchar(128) NULL,
 DEPLOY_STATE varchar(32) NOT NULL,
 TIMESTAMP numeric(20, 0) NOT NULL,
 RUNNING varchar(32) NOT NULL,
 GRID_VERSION varchar(64) NOT NULL,
 BOOTSTRAP_VERSION varchar(64) NULL,
 HTTP_PORT numeric(20, 0) NOT NULL
)
INSERT INTO HOSTS (GRID_NAME, HOST_NAME, VALID_CERT, MODIFIED_BY, DEPLOY_STATE, TIMESTAMP, RUNNING, GRID_VERSION, BOOTSTRAP_VERSION, HTTP_PORT) VALUES ('Grid', 'localhost', 'true', 'Thibaud', 'ACTIVE', 0, 'STARTED', '1.13.77', '1.13.77', 50002)

6. Default Router

The Default Router is what Grid clients will connect to by default to communicate with the Grid.

Add the following to <routers> in the runtime.xml in the GRIDCONF table:

<router name="Default Router" host="localhost" httpsPort="50000" httpPort="50001" />

Use this command to start the Default Router:

java -cp %CLASSPATH% com.lawson.grid.Startup -router "Default Router" -configDir C:\Infor\Grid\ -host localhost -logLevel ALL

7. Developer Session Provider

The Developer Session Provider will let us login with any user and password (e.g. grid-admin) and get a session.

Add the following to <runtime> in the runtime.xml in the GRIDCONF table:

<sessionProviders developer="true" />

8. Administrative Router

The administrative router is the server part of the Configuration Manager.

Add the following to <topology> in the topology.xml in the GRIDCONF table:

<administrativeRouter host="localhost" port="50005" webStartPort="50006" httpsPort="50007" />

Use this command to start the Administrative Router:

java -cp %CLASSPATH% com.lawson.grid.Startup -router "Administrative Router" -configDir C:\Infor\Grid\ -host localhost -logLevel ALL

9. Configuration Manager Client

The Configuration Manager Client is the user interface to manage the runtime.xml.

You can use the online client from the Grid Management Pages:

Or you can use this command to start the offline client:

java -cp %CLASSPATH% com.lawson.grid.config.client.ui.Launch

10. Web UI

Start the Grid web user interface by opening a browser to https://localhost:50000/grid/info.html , then select /grid/ui/ , then go to the Configuration Manager and login:

11. Start the Grid

To start the Grid:

  1. Start the Registry as shown previously in part 2:
  2. java -cp %CLASSPATH% com.lawson.grid.Startup -registry -configDir C:\Infor\Grid\ -host localhost -logLevel ALL
  3. Start the Default Router as shown above.
  4. Start the Administrative Router as shown above.

Now we can start the Configuration Manager Client and/or web UI as shown above and enjoy the Grid.

Result

We now have a minimal Grid with the Configuration Manager and fewer error messages:

Optional – Grid Agent

Instead of starting the Grid manually piece by piece, we can let the Grid Agent start it all. The Grid Agent is used to start nodes programmatically (e.g. registry, routers, applications); there is one Grid Agent per host. The Windows Service Infor ION Grid Bootstrap uses the Grid Launcher and Grid Agent to launch everything in the Grid at startup: registry, routers, applications, etc.:

java -cp %CLASSPATH% com.lawson.grid.agent.GridAgent -configDir C:\Infor\Grid\ -logToConsole -logLevel ALL -host localhost

Note: The Grid Agent will attempt to create the database tables, but because we already have some tables, not all of them, it will stop. Delete all the tables from the Grid database; re-run the Grid Agent, it will create all the tables; re-import the GRIDCONF with runtime.xml and topology.xml; re-run the Grid Agent.

Note: To stop the Grid, if we simply close the Grid Agent command prompt to terminate the batch job, it will not terminate the Java processes. We must go in the Task Manager and end the three java.exe processes for the registry, default router, and administrative router:

GitHub

I put the SQL and commands on my GitHub.

Future work

I hope to do the following soon:

  • Install Grid session providers
  • Install GDBC
  • Install Grid applications
  • Install the Grid on Linux and PostgreSQL
  • Penetration testing
  • Proof-of-concept of Grid database on homomorphic encryption with CryptDB or Microsoft’s Always Encrypted SQL Server

Conclusion

That was a continuation of part 2 of building an Infor Grid laboratory for learning purposes, beginning with a minimal Grid, and adding a Default Router, Developer Session Provider, Administrative Router, Configuration Manager, web user interface, and Grid Agent. I can probably polish some of it. I will continue in the next posts.

That’s it!

Please like, comment, subscribe, share, and come write the next idea.

Related posts

Building an Infor Grid Lab – Part 4

Continuing to learn Infor ION Grid and building a laboratory without LifeCycle Manager (LCM), today I will use the Grid bundled installer and spew screenshots of the intuitive and automated install.

Disclaimer

The Grid bundled installer is available publicly as part of the Grid deliverable, but it is for internal use only, not for production use.

1. Database

Install a database server (DB2 AS/400, Apache Derby, Oracle, PostgreSQL, or SQL Server), and create a new database, e.g. InforIONGrid:

2. JAR file

Go to the Infor Product Download Center, find the M3 Core Infrastructure and Technology, download the Grid installer, unzip it, go to the components sub-folder, and execute the installer JAR file:

3. Next Next Next

Follow the wizard:

3. Result

Here is the resulting Grid, files and folders, web UI, admin UI, topology, registry, default router, administrative router, user and role mapping, Grid Bootstrap, database, Windows Service, processes, topology XML, and runtime XML:

User and Role Mappings:

Routers:

Database:

Windows Service:

Infor ION Grid Bootstrap - InforIONGrid - localhost
LogOnAs=NT SERVICE\Infor ION Grid Bootstrap - InforIONGrid - localhost
ConfigDir=C:\Infor\InforIONGrid
JavaHome=C:\Program Files\Java\jdk1.8.0_111
ClassName=com.infor.bootstrap.DaemonWrapper
JVMParameters=-Xmx512M -XX:MaxPermSize=512m
ApplicationParameters=-baseDir C:\Infor\InforIONGrid

topology.xml:

<?xml version="1.0" encoding="UTF-8" standalone="no"?>
<topology gridId="83144c68-5a16-4e6c-8280-b9102a477980" xmlns:xsi="http://www.w3.org/2001/XMLSchema-instance" xsi:schemaLocation="http://schemas.lawson.com/grid/configuration_v3 http://schemas.lawson.com/grid/configuration_v3" xmlns="http://schemas.lawson.com/grid/configuration_v3">
    <hosts>
        <host address="localhost" gridAgentPort="50003" name="localhost"/>
    </hosts>
    <registry host="localhost" port="50004"/>
    <administrativeRouter externalAddress="localhost" host="localhost" httpsAuthType="client" httpsPort="50007" port="50005" webStartPort="50006"/>
    <!--5/9/17 12:45 PM-->
    <!--Created by installer-->
</topology>

runtime.xml:

<?xml version="1.0" encoding="UTF-8" standalone="no"?>
<runtime xmlns:xsi="http://www.w3.org/2001/XMLSchema-instance" xsi:schemaLocation="http://schemas.lawson.com/grid/configuration_v3 http://schemas.lawson.com/grid/configuration_v3" xmlns="http://schemas.lawson.com/grid/configuration_v3">
    <bindings/>
    <sessionProviders developer="false"/>
    <routers>
        <router externalAddress="localhost" host="localhost" httpAuthenticationMethods="ntlm" httpPort="50001" httpsAuthType="client" httpsAuthenticationMethods="basic ntlm" httpsPort="50000" name="Default Router"/>
    </routers>
    <propertySettings>
        <propertyOverrides nodeType="router">
            <property name="grid.jvm.maxHeapMB">256</property>
        </propertyOverrides>
        <propertyOverrides nodeType="registry">
            <property name="grid.jvm.maxHeapMB">256</property>
        </propertyOverrides>
        <propertyOverrides>
            <property name="grid.jvm.maxHeapMB">512</property>
            <property name="java.net.preferIPv4Stack">true</property>
            <propertyListMap name="grid.slf4j.mapping" strategy="merge">
                <key>org.apache.cxf.service.*</key>
                <values>
                    <value>ERROR</value>
                    <value>WARN</value>
                    <value>DEBUG</value>
                    <value>DEBUG</value>
                    <value>TRACE</value>
                </values>
                <key>org.apache.cxf.endpoint.*</key>
                <values>
                    <value>ERROR</value>
                    <value>WARN</value>
                    <value>DEBUG</value>
                    <value>DEBUG</value>
                    <value>TRACE</value>
                </values>
            </propertyListMap>
            <propertyListMap name="grid.router.endpoints"/>
        </propertyOverrides>
    </propertySettings>
    <!--5/9/17 12:45 PM-->
    <!--Created by installer-->
</runtime>

Here is the folder structure (zoom in):

C:\Infor\InforIONGrid>tree /a /f
Folder PATH listing for volume Windows_OS
Volume serial number is 0E5A-3982
C:.
|   BootstrapWebUI-50002.url
|   pid
|
+---config
|       agentlaunch.properties
|       bootstrap.properties
|
+---drivers
|       sqljdbc4-4.0.jar
|
+---grids
|   \---InforIONGrid
|       |   AdminUI.cmd
|       |   ChangeDBPassword.cmd
|       |   ChangeJDK.cmd
|       |   OfflineConfigUI.cmd
|       |   StartAllHosts.cmd
|       |   StartHost.cmd
|       |   StopAllHosts.cmd
|       |   StopHost.cmd
|       |
|       +---config
|       |       binary.path
|       |       jdbc.properties
|       |
|       +---log
|       |   \---SYSTEM
|       |           grid-agent-1244.log
|       |           grid-agent-1772.log
|       |           grid-agent-4504.log
|       |           grid-agent-4600.log
|       |           grid-agent-4960.log
|       |           grid-agent-6808.log
|       |           grid-registry-3816.log
|       |           grid-registry-3872.log
|       |           grid-registry-4072.log
|       |           grid-registry-5040.log
|       |           grid-registry-6492.log
|       |           grid-registry-8832.log
|       |           grid-router-Administrative_Router-3220.log
|       |           grid-router-Administrative_Router-3908.log
|       |           grid-router-Administrative_Router-4776.log
|       |           grid-router-Administrative_Router-5020.log
|       |           grid-router-Administrative_Router-5320.log
|       |           grid-router-Administrative_Router-9504.log
|       |           grid-router-Default_Router-3052.log
|       |           grid-router-Default_Router-3832.log
|       |           grid-router-Default_Router-4824.log
|       |           grid-router-Default_Router-5152.log
|       |           grid-router-Default_Router-5340.log
|       |           grid-router-Default_Router-8508.log
|       |
|       \---secure
|               https-ts.pw
|               https.ks
|               https.pw
|               https.ts
|               InforIONGrid.der
|               InforIONGrid.ks
|               InforIONGrid.pw
|               server.key
|               server.ks
|               server.pw
|
+---log
|       bootstrap-2516.log
|       bootstrap-2532.log
|       bootstrap-2544.log
|       bootstrap-2552.log
|       bootstrap-2568.log
|       bootstrap-2588.log
|       bootstrap-2732.log
|       bootstrap-8144.log
|       installation_20170509124513914.log
|       installation_20170518165426295.log
|       service-2516.log
|       service-2532.log
|       service-2544.log
|       service-2552.log
|       service-2568.log
|       service-2588.log
|       service-2732.log
|       service-8144.log
|       service_out-2516.log
|       service_out-2532.log
|       service_out-2544.log
|       service_out-2552.log
|       service_out-2568.log
|       service_out-2588.log
|       service_out-2732.log
|       service_out-8144.log
|
+---resources
|   |   bootstrap-daemon-1.2.4.jar
|   |   commons-daemon-1.0.15.jar
|   |
|   +---1.13.77
|   |       bcmail-jdk16-1.45.jar
|   |       bcprov-jdk16-1.45.jar
|   |       bootstrap-core-1.13.77.jar
|   |       grid-core-1.13.77.jar
|   |       grid.commons-dbcp2-2.0.1.jar
|   |       grid.httpclient-4.2.6.jar
|   |       grid.liquibase-2.0.5.jar
|   |       jackson-core-asl-1.9.12.jar
|   |       jackson-mapper-asl-1.9.12.jar
|   |       javax.servlet-api-3.1.0.jar
|   |       jna-3.3.0-platform.jar
|   |       jna-3.3.0.jar
|   |       maven-shared-utils-0.4.jar
|   |       windowsjnasecurity-1.0.4.jar
|   |
|   +---amd64
|   |       service-wrapper-11.1.13.1-amd64.exe
|   |
|   \---x86
|           service-wrapper-11.1.13.1-x86.exe
|
+---runtimes
|   \---1.13.77
|       +---jaxrs1Resources
|       |       grid-jaxrs1-1.13.77.jar
|       |       jackson-core-asl-1.9.2.jar
|       |       jackson-jaxrs-1.9.2.jar
|       |       jackson-mapper-asl-1.9.2.jar
|       |       jackson-xc-1.9.2.jar
|       |       jersey-core-1.18.1.jar
|       |       jersey-json-1.18.1.jar
|       |       jersey-multipart-1.18.1.jar
|       |       jersey-server-1.18.1.jar
|       |       jersey-servlet-1.18.1.jar
|       |       mimepull-1.9.3.jar
|       |
|       +---jaxrs2Resources
|       |       aopalliance-repackaged-2.2.0.jar
|       |       grid-jaxrs2-1.13.77.jar
|       |       hk2-api-2.2.0.jar
|       |       hk2-locator-2.2.0.jar
|       |       hk2-utils-2.2.0.jar
|       |       jackson-core-asl-1.9.13.jar
|       |       jackson-jaxrs-1.9.13.jar
|       |       jackson-mapper-asl-1.9.13.jar
|       |       jackson-xc-1.9.13.jar
|       |       javassist-3.18.1-GA.jar
|       |       javax.annotation-api-1.2.jar
|       |       javax.inject-2.2.0.jar
|       |       javax.ws.rs-api-2.0.jar
|       |       jersey-client-2.7.jar
|       |       jersey-common-2.7.jar
|       |       jersey-container-servlet-2.7.jar
|       |       jersey-container-servlet-core-2.7.jar
|       |       jersey-guava-2.7.jar
|       |       jersey-media-json-jackson-2.7.jar
|       |       jersey-media-multipart-2.7.jar
|       |       jersey-server-2.7.jar
|       |       mimepull-1.9.3.jar
|       |       osgi-resource-locator-1.0.1.jar
|       |       validation-api-1.1.0.Final.jar
|       |
|       +---licenses
|       |   +---asm
|       |   |       license.txt
|       |   |
|       |   +---bcprov-jdk16
|       |   |       license.txt
|       |   |
|       |   +---core
|       |   |       license.html
|       |   |
|       |   +---cxf
|       |   |       license.txt
|       |   |
|       |   +---httpcore
|       |   |       license.txt
|       |   |
|       |   +---jetty-package
|       |   |       license.txt
|       |   |
|       |   +---jna
|       |   |       license.txt
|       |   |
|       |   +---jquery
|       |   |       license.txt
|       |   |
|       |   +---jquery-hashchange
|       |   |       license.txt
|       |   |
|       |   +---jsp-2.1-glassfish
|       |   |       license.txt
|       |   |
|       |   +---neethi
|       |   |       license.txt
|       |   |
|       |   +---servlet-api
|       |   |       license.txt
|       |   |
|       |   +---timepicker
|       |   |       license.txt
|       |   |
|       |   +---wsdl4j
|       |   |       license.txt
|       |   |
|       |   +---wstx-asl
|       |   |       license.txt
|       |   |
|       |   +---xml-resolver
|       |   |       license.txt
|       |   |
|       |   +---xmlbeans
|       |   |       license.txt
|       |   |
|       |   \---XmlSchema
|       |           license.txt
|       |
|       +---monitorResources
|       |       activation-1.1.jar
|       |       antlr-2.7.7.jar
|       |       antlr-3.3.jar
|       |       antlr-runtime-3.3.jar
|       |       commonj.sdo-2.1.1.jar
|       |       commons-math3-3.0.jar
|       |       decision-trees-1.0.2.jar
|       |       drools-compiler-5.4.0.Final.jar
|       |       drools-core-5.4.0.Final.jar
|       |       ecj-3.5.1.jar
|       |       eclipselink-2.5.1.jar
|       |       grid-monitor-1.13.77.jar
|       |       grid-monitor-impl-1.13.77.jar
|       |       grid-monitor-linux-1.13.77.jar
|       |       grid-monitor-wmi-1.13.77.jar
|       |       groovy-all-2.0.0.jar
|       |       javax.persistence-2.1.0.jar
|       |       joda-time-2.0.jar
|       |       jsr166-1.7.0.jar
|       |       knowledge-api-5.4.0.Final.jar
|       |       knowledge-internal-api-5.4.0.Final.jar
|       |       mail-1.4.jar
|       |       mvel2-2.1.0.drools16.jar
|       |       ojalgo-31.0.jar
|       |       stringtemplate-3.2.1.jar
|       |
|       +---resources
|       |       bcmail-jdk16-1.45.jar
|       |       bcprov-jdk16-1.45.jar
|       |       grid-core-1.13.77.jar
|       |       grid.commons-dbcp2-2.0.1.jar
|       |       grid.httpclient-4.2.6.jar
|       |       grid.liquibase-2.0.5.jar
|       |       javax.servlet-api-3.1.0.jar
|       |       jna-3.3.0-platform.jar
|       |       jna-3.3.0.jar
|       |       linked-binaries-1.13.77.jar
|       |       maven-shared-utils-0.4.jar
|       |
|       +---services
|       |   \---log
|       |           slf4j-api-1.7.5.jar
|       |           slf4j-grid-1.13.77.jar
|       |
|       +---tools
|       |   \---grid-cli
|       |           grid-cli-1.13.77.jar
|       |           jackson-core-asl-1.9.13.jar
|       |           jackson-mapper-asl-1.9.13.jar
|       |           jcommander-1.32.jar
|       |
|       +---webAppResources
|       |       asm-4.1.jar
|       |       asm-commons-4.1.jar
|       |       asm-tree-4.1.jar
|       |       commons-fileupload-1.2.2.jar
|       |       grid-webapp-1.13.77.jar
|       |       javax-websocket-client-impl-9.1.1.v20140108.jar
|       |       javax-websocket-server-impl-9.1.1.v20140108.jar
|       |       javax.annotation-api-1.2.jar
|       |       javax.el-3.0.0.jar
|       |       javax.servlet.jsp-2.3.2.jar
|       |       javax.servlet.jsp-api-2.3.1.jar
|       |       javax.servlet.jsp.jstl-1.2.0.v201105211821.jar
|       |       javax.websocket-api-1.0.jar
|       |       jetty-annotations-9.1.1.v20140108.jar
|       |       jetty-continuation-9.1.1.v20140108.jar
|       |       jetty-http-9.1.1.v20140108.jar
|       |       jetty-io-9.1.1.v20140108.jar
|       |       jetty-jndi-9.1.1.v20140108.jar
|       |       jetty-jsp-9.1.1.v20140108.jar
|       |       jetty-plus-9.1.1.v20140108.jar
|       |       jetty-schemas-3.1.M0.jar
|       |       jetty-security-9.1.1.v20140108.jar
|       |       jetty-server-9.1.1.v20140108.jar
|       |       jetty-servlet-9.1.1.v20140108.jar
|       |       jetty-servlets-9.1.1.v20140108.jar
|       |       jetty-util-9.1.1.v20140108.jar
|       |       jetty-webapp-9.1.1.v20140108.jar
|       |       jetty-xml-9.1.1.v20140108.jar
|       |       org.apache.taglibs.standard.glassfish-1.2.0.v201112081803.jar
|       |       org.eclipse.jdt.core-3.8.2.v20130121.jar
|       |       websocket-api-9.1.1.v20140108.jar
|       |       websocket-client-9.1.1.v20140108.jar
|       |       websocket-common-9.1.1.v20140108.jar
|       |       websocket-server-9.1.1.v20140108.jar
|       |       websocket-servlet-9.1.1.v20140108.jar
|       |
|       +---webServiceResources
|       |       asm-3.1.jar
|       |       commons-logging-1.1.1.jar
|       |       cxf-api-2.7.5.jar
|       |       cxf-rt-bindings-soap-2.7.5.jar
|       |       cxf-rt-bindings-xml-2.7.5.jar
|       |       cxf-rt-core-2.7.5.jar
|       |       cxf-rt-databinding-jaxb-2.7.5.jar
|       |       cxf-rt-databinding-xmlbeans-2.7.5.jar
|       |       cxf-rt-frontend-jaxws-2.7.5.jar
|       |       cxf-rt-frontend-simple-2.7.5.jar
|       |       cxf-rt-management-2.7.5.jar
|       |       cxf-rt-transports-http-2.7.5.jar
|       |       cxf-rt-ws-addr-2.7.5.jar
|       |       cxf-rt-ws-policy-2.7.5.jar
|       |       cxf-rt-ws-rm-2.7.5.jar
|       |       cxf-rt-ws-security-2.7.5.jar
|       |       ehcache-core-2.5.1.jar
|       |       geronimo-javamail_1.4_spec-1.7.1.jar
|       |       grid-ws-1.13.77.jar
|       |       neethi-3.0.2.jar
|       |       stax2-api-3.1.1.jar
|       |       woodstox-core-asl-4.2.0.jar
|       |       wsdl4j-1.6.3.jar
|       |       wss4j-1.6.10.jar
|       |       xml-resolver-1.2.jar
|       |       xmlbeans-2.6.0.jar
|       |       xmlschema-core-2.0.3.jar
|       |       xmlsec-1.5.4.jar
|       |
|       \---webStartResources
|               AppUI.jnlp
|               grid-core-1.13.77.jar.pack.gz
|               Infor48x48.png
|               webStartResources.properties
|
+---secure
|       client.ks
|       client.pw
|
+---tools
|       admin-ui.jar
|       application-deployer.jar
|       certificates.jar
|       change-db-password.jar
|       change-jdk.jar
|       grid-cli.jar
|       log-viewer.jar
|       scripting-client.jar
|
\---uninstall
    |   uninstall.cmd
    |   uninstall.jar
    |
    \---resources
            grid-annotations.jar
            grid-jdbc.jar
            grid.commons-dbcp2.jar
            grid.liquibase.jar
            installer-common.jar
            installer-post.jar
            installer-uninstall-code.jar
            izpack-api.jar
            izpack-tools.jar
            jna-platform.jar
            jna.jar
            maven-shared-utils.jar
            windowsjnasecurity.jar

Future work

Next, I may:

  • Installing a Grid silently with izpack XML
  • Generate secure\server.key with OpenSSL
  • Setup an Administrative Router
  • Setup a Grid Agent
  • Setup a Grid Launcher
  • Setup a Grid Bootstrap
  • Install session providers
  • Install applications
  • Install GDBC
  • Install the Grid on Linux and PostgreSQL

Conclusion

That was an illustration of the Infor ION Grid bundled installer which is internal only and intuitive.

Related posts
Building an Infor Grid Lab – Part 3

I am building an Infor ION Grid laboratory manually without LifeCycle Manager (LCM) for my learning purposes. In part 2, I had made the installation using cryptographic keys taken from an existing Grid installation. Today, I will create new keys.

About

The Grid uses TLS to ensure privacy, authentication, and integrity of communication within the Grid. That involves asymmetric cryptography, public/private key pairs, key exchange, digital certificates, digital signatures, symmetric keys, ciphers, etc.

Thankfully the Grid automates most of it. It uses the Java Cryptography Extension (JCE), the Bouncy Castle Crypto APIs, and 2048 bit RSA key pairs. The key material is unique to each installation.

Documentation

The Infor Documentation Infocenter has an Infor ION Grid Security Administration Guide:

Disclaimer

The Infor documentation that is publicly available covers the default cryptographic properties of the Grid such as algorithms, providers, cipher suites, block cipher modes of operation, hashing functions, padding, key length, paths, file names, etc.; the Internet covers cryptography in general; and I am not revealing any secrets; therefore, I am revealing no more information than what is already available publicly. Besides, revealing cryptographic properties does not reveal any secrets, therefore Infor is not revealing any secrets either. Besides, the default properties can be changed to suit our needs. The security of a cryptosystem depends not on the knowledge of its cryptographic properties, but on its implementation and on the security of the secret key material. Thus, it is important you keep your systems up-to-date, and keep your secret key material secure. In doubt, read Auguste Kerckhoffs’s principle, “il faut qu’il puisse sans inconvénient tomber entre les mains de l’ennemi” or Claude Shannon’s maxim, “we shall assume that the enemy knows the system being used.”

Key material

For a minimalist Grid installation, we need the following four files, they are unique to each installation:

For the Grid, we need these files, where the file names must match the Grid name, e.g. Grid:

  • Grid.ks: this is the Java keystore for the Grid. It contains the Grid’s public/private key pair, and the Grid self-signed certificate which will be the root certificate authority (CA) to sign other keys.
  • Grid.pw (optional): this is the clear text password for both keystore and private key.

For each host, we need these files, where the file names are server:

  • server.ks: this is the Java keystore for the host. It contains the host’s public/private key pair, and the host certificate signed by the Grid.
  • server.pw: this is the clear text password for both keystore and private key.
  • server.key: this is a symmetric key, signed and encrypted, used to encrypt/decrypt protected Grid properties.

In a production environment, keep all these files secure.

Console tool

The Grid has a console tool that automatically creates the key material:

In addition to the console tool, I will show the equivalent command using the Java keytool, and I will inspect the result with KeyStore Explorer.

1. Create Grid material

Use this command to create new key material for the Grid (replace the parameter values with your values, and use a strong password):

java ^
 -cp resources\grid-core.jar;resources\bcprov-jdk16.jar;resources\bcmail-jdk16.jar ^
 com.lawson.grid.security.Certificates ^
 -create=gridcert ^
 -gridname Grid ^
 -gridpassword password123 ^
 -gridkeystore secure

It produces these two files:

  • Grid.der
  • Grid.ks

Note: Grid.der is the root CA that typically system administrators will push to the users computers, and then those computers will automatically trust the certificates of M3, Smart Office, etc.

Note: Unfortunately, the command does not automatically generate a strong password for this keystore, which leaves it vulnerable to user choice.

The Grid certificate has the following extensions:

  • Basic Constraints: Subject is a CA, Path Length Constraint: 1
  • Subject Key Identifier
  • Key Usage: Digital Signature, Certificate Signing
  • Extended Key Usage: TLS Web Server Authentication, Code Signing, TLS Web Client Authentication

Alternatively, instead of the console tool, we can use the Java keytool:

keytool ^
 -genkeypair ^
 -keyalg RSA ^
 -keysize 2048 ^
 -sigalg SHA256WITHRSA ^
 -dname cn=Grid ^
 -ext BasicConstraints=ca:true,pathlen:1 ^
 -ext KeyUsage=digitalSignature,keyCertSign ^
 -ext ExtendedkeyUsage=serverAuth,codeSigning,clientAuth ^
 -validity 90 ^
 -keypass password123 ^
 -keystore secure\Grid.ks ^
 -storepass password123

Then, we need to do some export/import to add the certificate as a separate entry:

keytool ^
 -exportcert ^
 -file secure\Grid.der ^
 -keystore secure\Grid.ks ^
 -storepass password123
keytool ^
 -changealias ^
 -alias mykey ^
 -destalias grid_key ^
 -keypass password123 ^
 -keystore secure\Grid.ks ^
 -storepass password123
keytool ^
 -noprompt ^
 -importcert ^
 -alias mykey ^
 -file secure\Grid.der ^
 -keypass password123 ^
 -keystore secure\Grid.ks ^
 -storepass password123
keytool ^
 -changealias ^
 -alias mykey ^
 -destalias grid_cert ^
 -keypass password123 ^
 -keystore secure\Grid.ks ^
 -storepass password123

2. Create host material

Use this command to create new key material for the host (replace the parameter values with your values, and add as many roles and addresses as needed for this host):

java ^
 -cp resources\grid-core.jar;resources\bcprov-jdk16.jar;resources\bcmail-jdk16.jar ^
 com.lawson.grid.security.Certificates ^
 -create=hostcert ^
 -gridname Grid ^
 -gridpassword password123 ^
 -hostname localhost ^
 -gridkeystore secure ^
 -hostkeystore secure ^
 -role grid-admin ^
 -address localhost ^
 -address ::1 ^
 -address 127.0.0.1 ^
 -address example.com ^
 -unresolved

It produces these two files:

  • server.ks
  • server.pw

Note: Fortunately, the command automatically generates a strong password for this keystore.

The host certificate has extensions for the role (e.g. grid-admin), for the host actor (SYSTEM), for the IP addresses and hostnames:

Alternatively, instead of the console tool, we can use the Java keytool. But it is tricky for we have to add the certificate extensions in hexadecimal. The IANA enterprise number for Lawson Software (Infor) is 10105. The OID names can be found in the OID repository. Note: Thomas Fanto registered child OID 238 for the Grid runtime information in 2009, but somehow the console tool uses child OID 237 instead, which is not reserved. Anyway, dump the OID values as hexadecimal (e.g. grid-admin is 677269642D61646D696E, and SYSTEM is 53595354454D). Prefix them with the ASN.1 UTF8String tag byte of 0x0C to encapsulate them as a UTF-8 String and with the byte length in HEX (e.g. grid-admin is 10 bytes long which is 0x0A, and SYSTEM is 6 bytes long which is 0x06). For the sequences, prefix them with the SEQUENCE tag byte of 0x30 and with the sequence byte length (e.g. 9+3+9+11+2*4 = 40 = 0x28).

keytool ^
 -genkey ^
 -alias localhost_key ^
 -keyalg RSA ^
 -keysize 2048 ^
 -sigalg SHA256WITHRSA ^
 -dname cn=localhost ^
 -ext 1.3.6.1.4.1.10105.237.0.2=300C0C0A677269642D61646D696E ^
 -ext 1.3.6.1.4.1.10105.237.0.3=0C0653595354454D ^
 -ext 1.3.6.1.4.1.10105.237.0.4=30280C096C6F63616C686F73740C033A3A310C093132372E302E302E310C0B6578616D706C652E636F6D ^
 -validity 90 ^
 -keypass password123 ^
 -keystore secure\server.ks ^
 -storepass password123

Then, we need to create a certificate signing request (CSR) for the host certificate, sign it with the Grid root CA, and import the resulting chain to the keystore:

keytool ^
 -certreq ^
 -alias localhost_key ^
 -keyalg SHA256WITHRSA ^
 -file secure\server.csr.txt ^
 -keystore secure\server.ks ^
 -storepass password123
keytool ^
 -gencert ^
 -infile secure\server.csr.txt ^
 -outfile secure\server.der ^
 -keystore secure\Grid.ks ^
 -storepass password123 ^
 -alias grid_key ^
 -ext BC=0
keytool ^
 -importcert ^
 -noprompt ^
 -trustcacerts ^
 -alias grid_key ^
 -file secure\Grid.der ^
 -keystore secure\server.ks ^
 -storepass password123
keytool ^
 -importcert ^
 -trustcacerts ^
 -alias localhost_key ^
 -file secure\server.der ^
 -keystore secure\server.ks ^
 -storepass password123

Then, save the keystore password with:

echo | set /p="password123" > secure\server.pw

3. Create symmetric material

Use this command to create new symmetric key material (replace the parameter values with your values):

java ^
 -cp resources\grid-core.jar;resources\bcprov-jdk16.jar;resources\bcmail-jdk16.jar ^
 com.lawson.grid.security.Certificates ^
 -create=symkey ^
 -gridname Grid ^
 -gridkeystore secure ^
 -gridpassword password123 ^
 -symkeypath secure ^
 -hostkeystore secure ^
 -hostname localhost

It produces this file:

  • server.key

It is used to encrypt/decrypt protected Grid properties such as passwords:

Alternatively, we can generate the server.key in Java by taking the Grid certificate’s distinguished name in ASN.1 DER encoded form, signing it with the Grid’s private key, and encrypting it with the host’s public key, but I am not allowed to show the source code for that, and I am struggling with replicating it with the OpenSSL RSA utility and AES encryption. So use the Grid command tool above to generate server.key.

Result

We now have the new unique necessary and sufficient cryptographic key material for a minimalist Grid, and the Grid successfully validates it:

successfully initialized secret key
successfully initialized server keystore

GitHub

I collected all the commands in my GitHub at keys.cmd.

Future work

Next time, I would like to:

  • Generate the symmetric key with OpenSSL
  • Continue researching security vulnerabilities
  • Use the new Grid installer
  • Setup an administrative router
  • Setup session providers
  • Install applications
  • Install the Grid on Linux and PostgreSQL

Conclusion

That was an illustration of how to manually create – for learning purposes – new cryptographic keys for a minimalist installation of the Infor ION Grid using the built-in tools, and alternatively using the Java keytool. I am learning so I probably missed a few things. Thankfully the Grid console tool automates most of it.

That’s it! Congratulations if you’ve made it so far.

Related posts