Troubleshooting M3 Web Services

I forgot how to troubleshoot Infor M3 Web Services (MWS) and wasted time researching again. This time I share what I rediscovered so I remember next time.

Scenario

I created a simple web service of type M3 Display Program (MDP) that creates a Facility in CRS008. The steps work correctly in M3:
2_

MWS Designer error

I created the equivalent web service in MWS Designer (MWSD), but it throws ‘Unable to execute MPD!’:

MWS Designer log

The MWSD log does not provide more information:

We can increase the MWSD log level from WARN to DEBUG/TRACE, it shows some HTTP/SOAP information (remember to revert when done as it fills the disk space):
10 10_

Fiddler proxy

We can use an HTTP proxy such as Fiddler to see the HTTP/SOAP request/response:
11 11_

SoapUI

We can use another SOAP client such as SoapUI to test the web service:
12 12_

Generated Java code

MWS Server generates Java code for each web service. I do not see any error with the generated code. The code uses Apache Axis2/CXF for SOAP, and the old Intentia Movex MPD for the interactive session:
7_ 7__

MWS Server log

The MWS Server log provides some more information, it mentions m3.program which hints me to believe my web service is correct and the problem is in M3:
4

MWS Server DEBUG/TRACE

I increased the Grid’s log levels of Subsystem and MWS to DEBUG and TRACE (remember to revert when done as it fills the disk space):
5 5

I ran the test case again, and opened the merged log:
5__

This time the log shows more information. It shows the <MPD> XML, and it shows the error Abnormal termination of mvx.app.pgm […] Dump log created:
5____

M3 DUMPLOG

The M3 dumplog shows even more information, it shows there was a NullPointerException on READ_DSP ICFCMD:
6 6__

I do not know how to analyze an M3 dumplog, so I will forward it to an M3 developer and ask for help. The problem points not to MWS but to the M3 program. That is as far as I can go in my troubleshooting.

Future work

Furthermore, depending on the case, it may also be useful to:

  • Intercept network traffic to the BCI port, and troubleshoot the old Intentia Movex BCI protocol; MPD uses M3Session which uses BCIConnection:
    8 8_
  • Use the Advanced Grid tools:
    9-0
  • Analyze the Thread dumps:
    9-1 9-2
  • Analyze the MWS Profiler:
    9-3
  • Analyze the Grid Status Report:
    9-4
  • Decrypt the encrypted Grid network traffic
  • Debug the MWS Server Java code line by line at runtime

Conclusion

That was how to troubleshoot M3 Web Services and digg more information about an error. I dug as far as I could, all the way to M3, and asked help to an M3 developer. Furthermore, there are plenty other ways to troubleshoot and dig beyond.

That’s it!

Please like, comment, subscribe, share, and come author the next post.

Related posts

X.509 Token policy for M3 Web Services

I finally tested the X.509 Token policy in Infor M3 Web Services (MWS), and I share my results here.

X.509 Token Policy in MWS has been available for at least 7 years. For the setup, we create a public-private key and digital certificate for the SOAP client, and the SOAP client and SOAP server exchange certificates to authenticate each other.

Documentation

For an overview of WS-Security (WSS) in the context of M3, see my previous post.

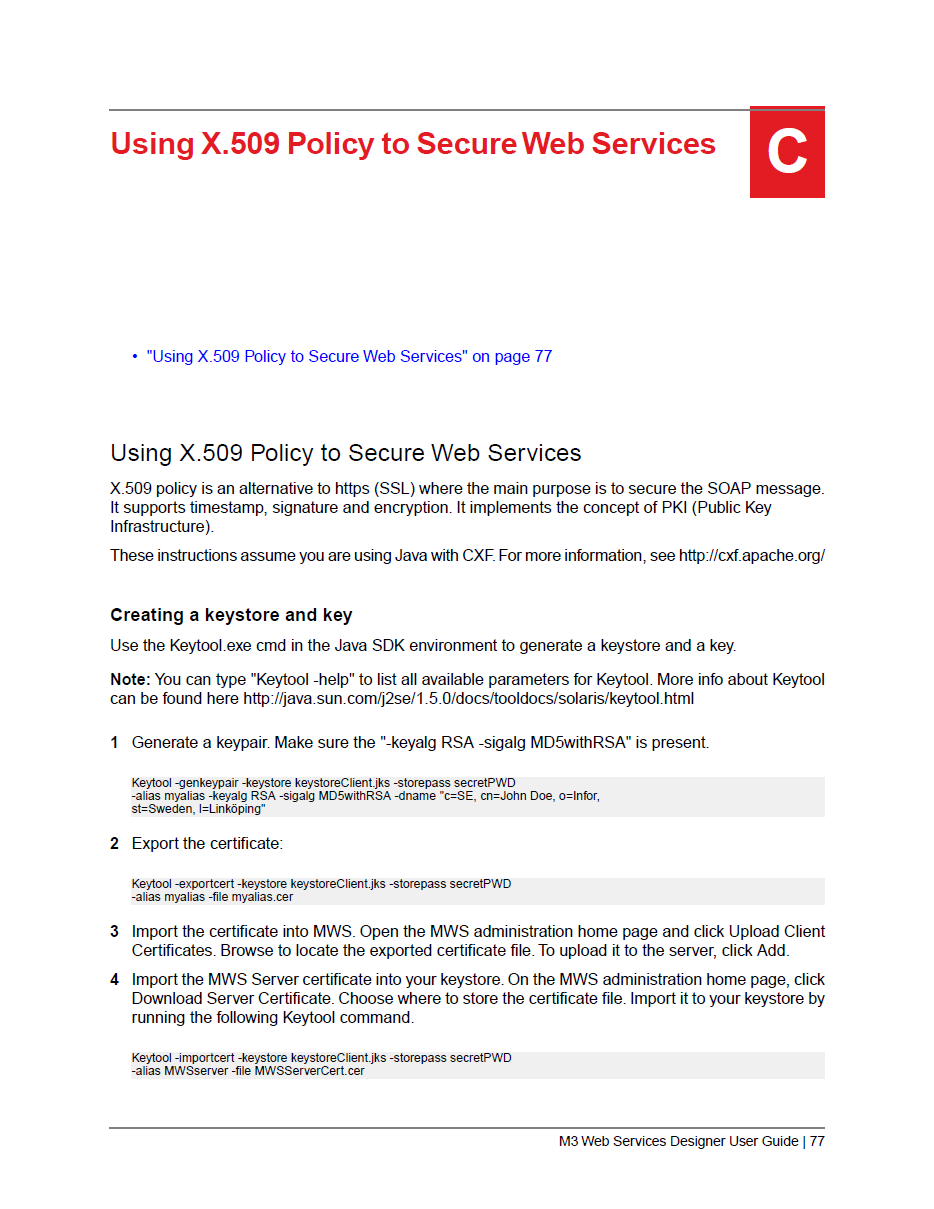
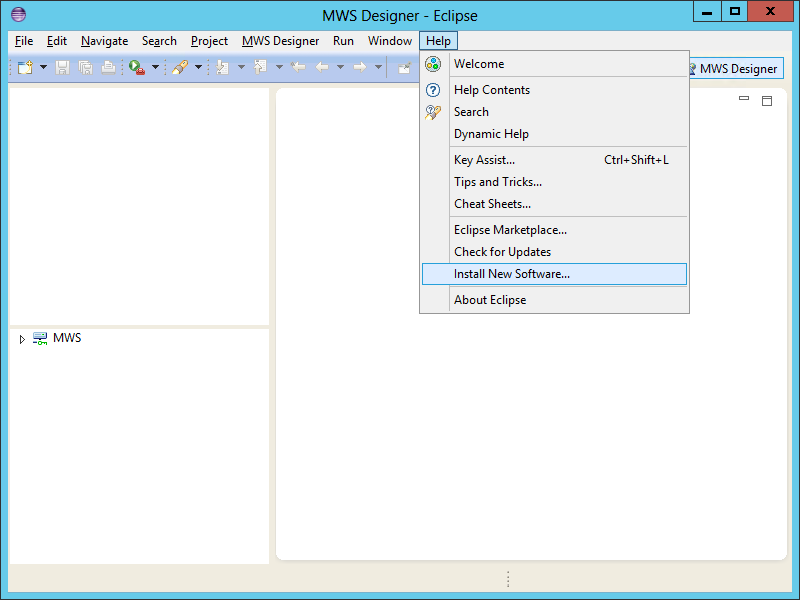
The MWS Designer (MWSD) User Guide has two modest chapters dedicated to WS-Security and X.509 Token policy, and snippets of source code for a Java client:
doc55 doc77

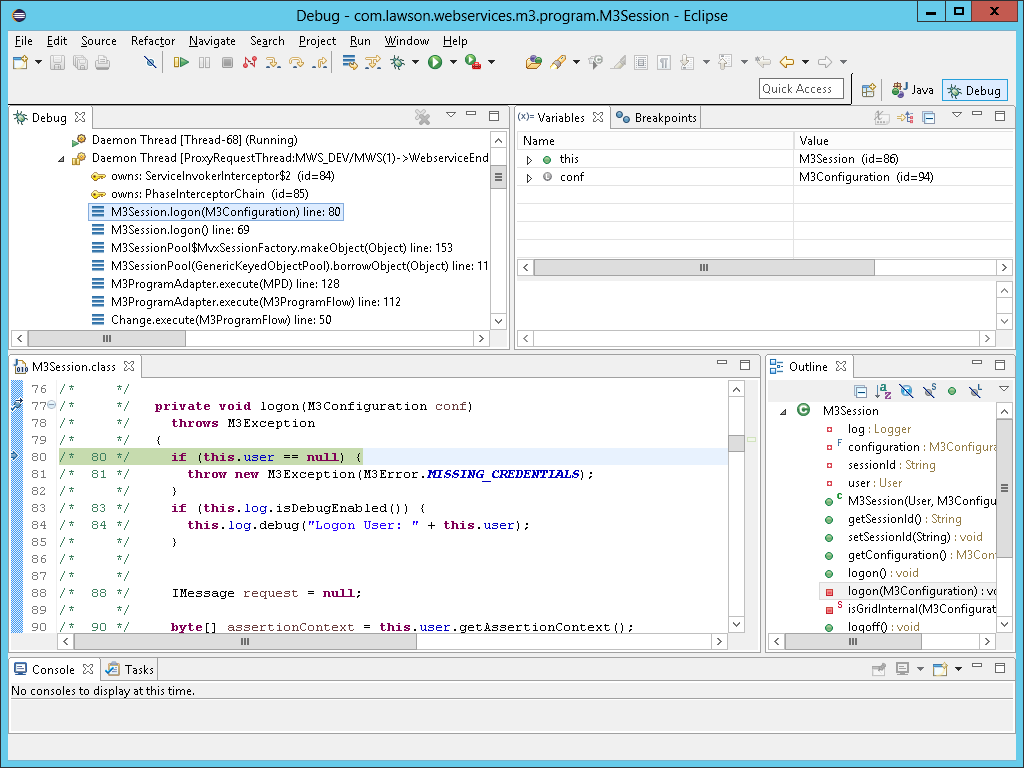
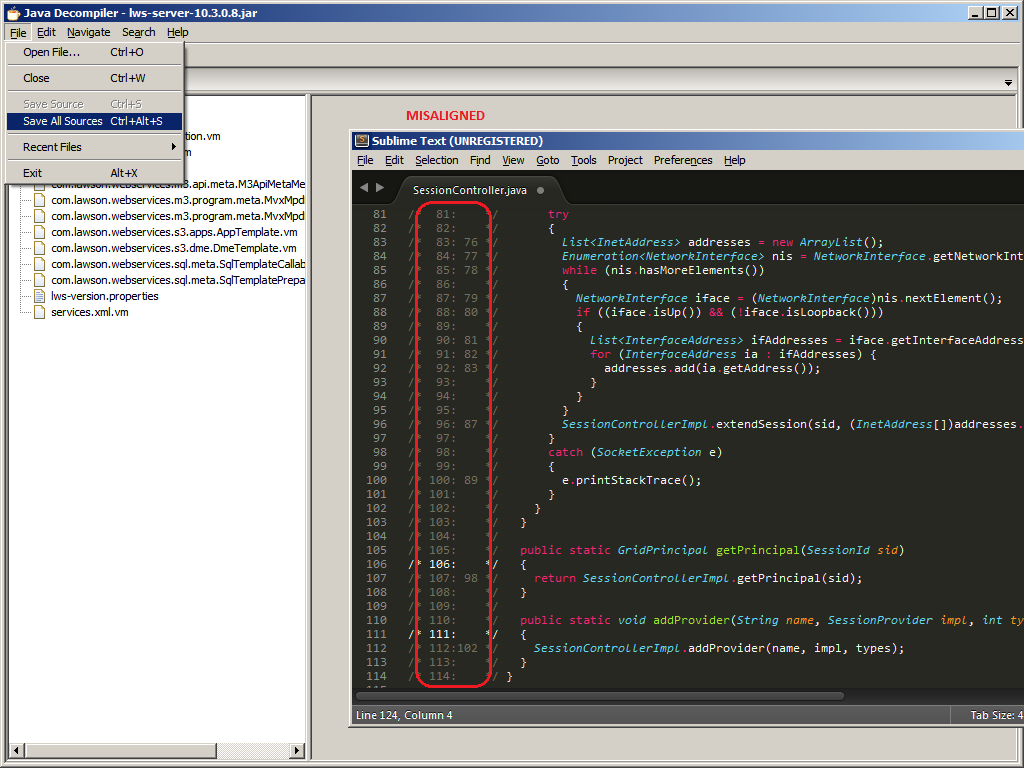
For more information about the implementation of WS-Security in MWS, read the documentation of Apache CXF and Apache WSS4J (Merlin), and explore the MWS server source code in the lws-server and lws-common JARs:
jar

Enable X.509 Token policy

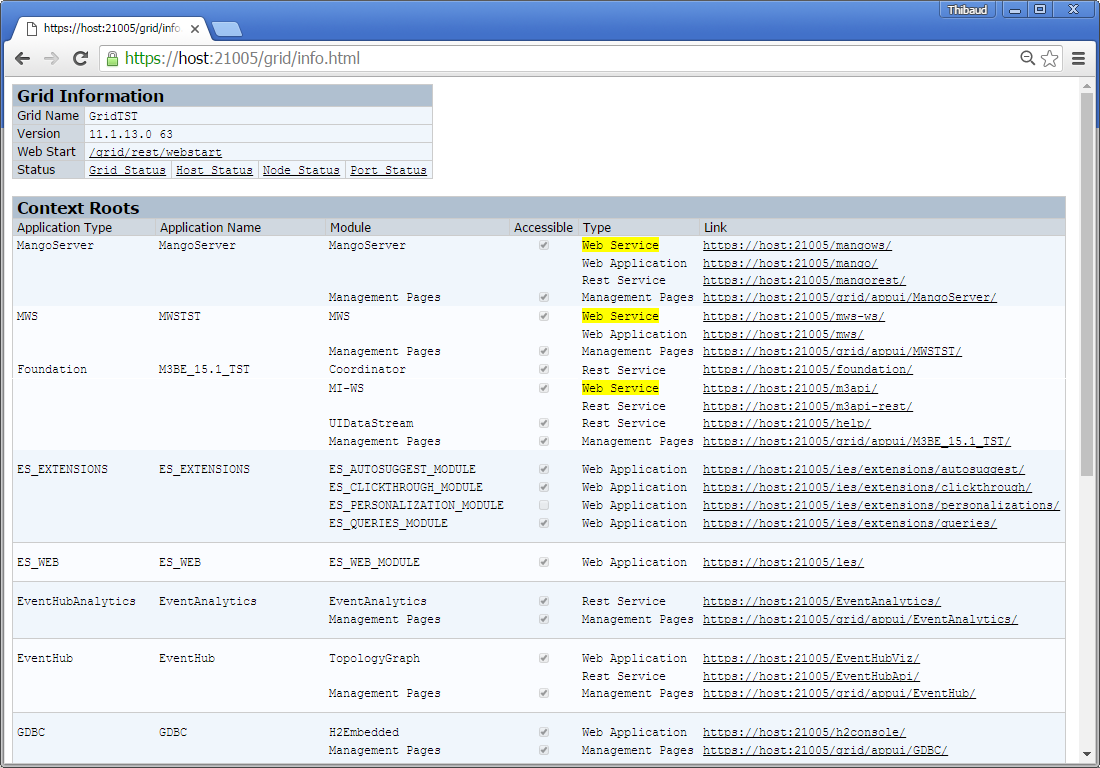
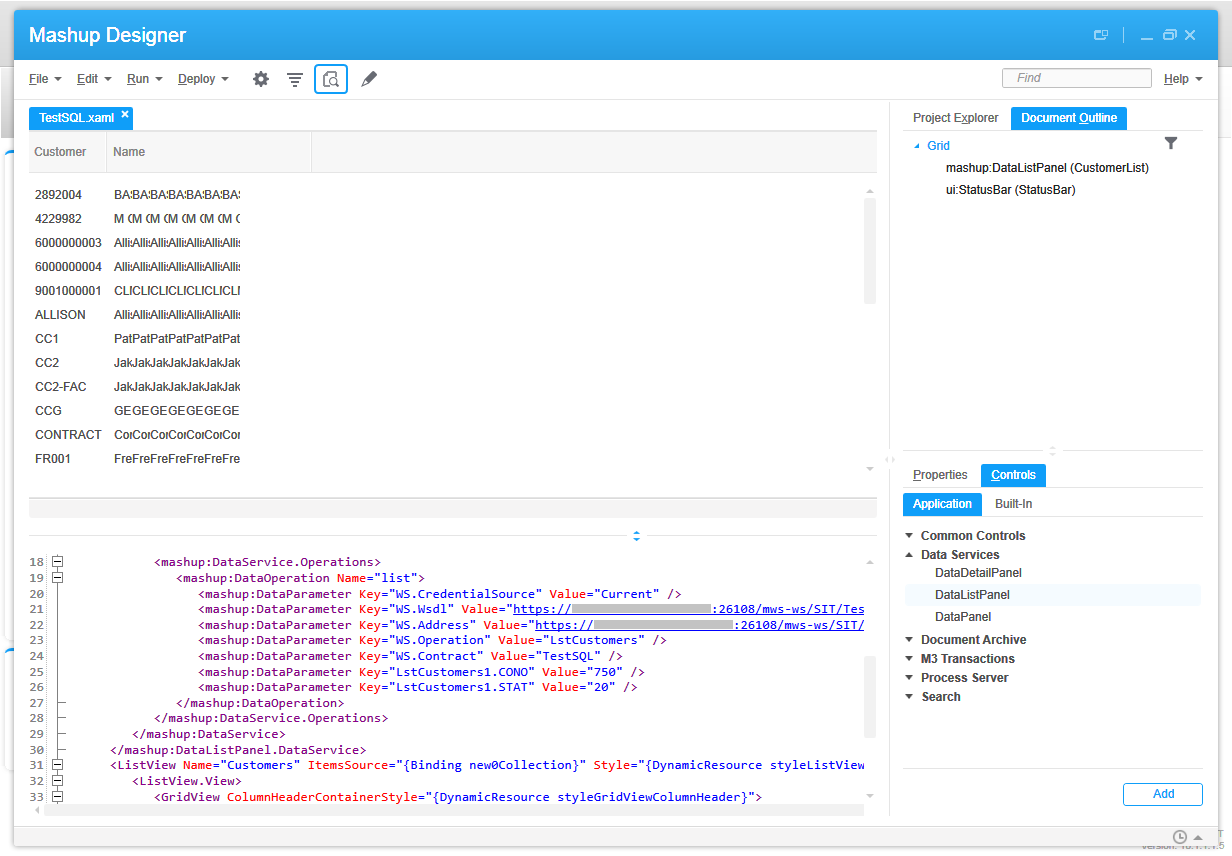
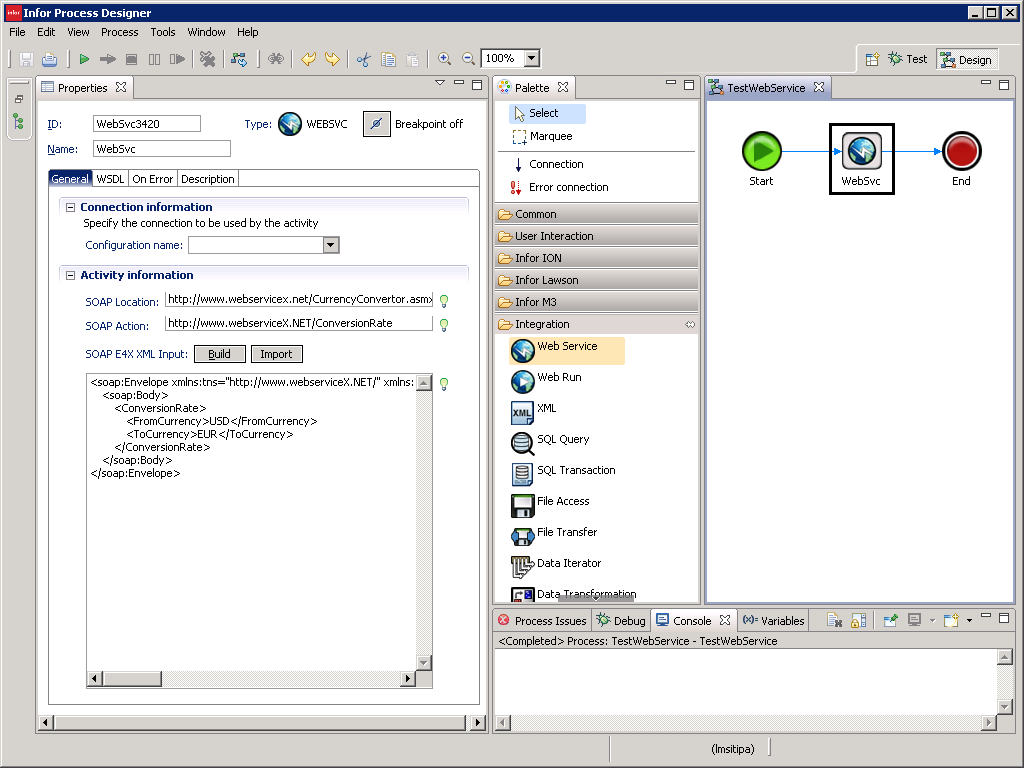
First, create a web service in MWSD, of any type (API, MDP, SQL), deploy it, and test it to ensure it works correctly, e.g. CRS610MI.GetBasicData:
1

Then, go to Infor ION Grid Management Pages > MWSSecurity > Policy Settings > Service Context (e.g. services), select the web service (e.g. CRS610MI), and click the lock icon to Enable X.509 policy token:
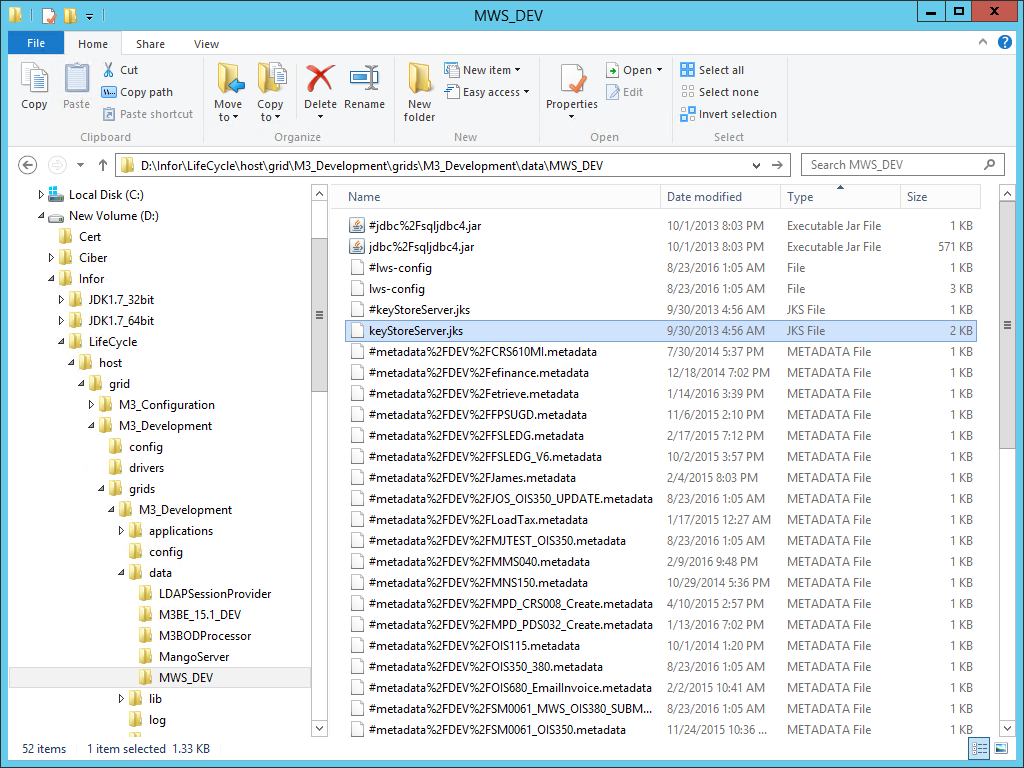
2

Server certificate

Then, go to Certificate Management, and download the server certificate, MWSServerCert.cer:
3

Note: Download it over HTTPS (secure) and not HTTP (clear text); otherwise verify in a side channel the key fingerprint received.

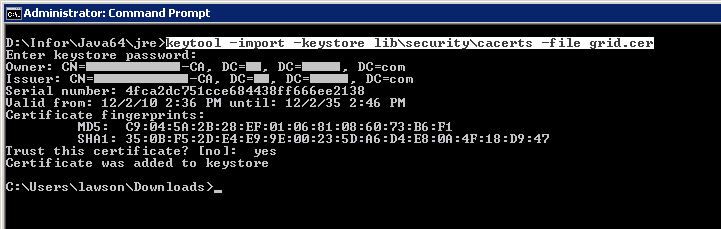
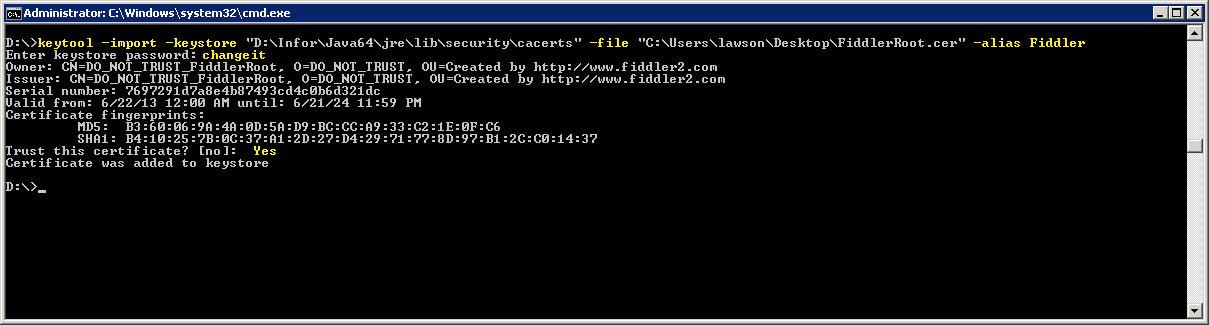
Now, import the server certificate into the client keystore so that the client can authenticate the server:

$ keytool -importcert -file MWSServerCert.cer -alias MwsServer -keystore keystoreClient.jks

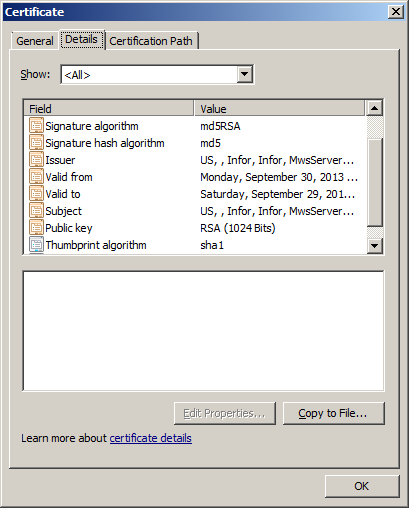
PROBLEM: Weak crypto

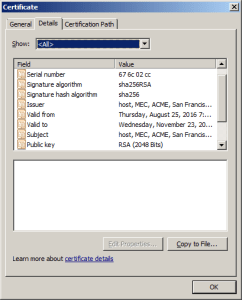
MWS uses weak cryptography [1], MD5 hashing algorithm and RSA key size 1024 bit:

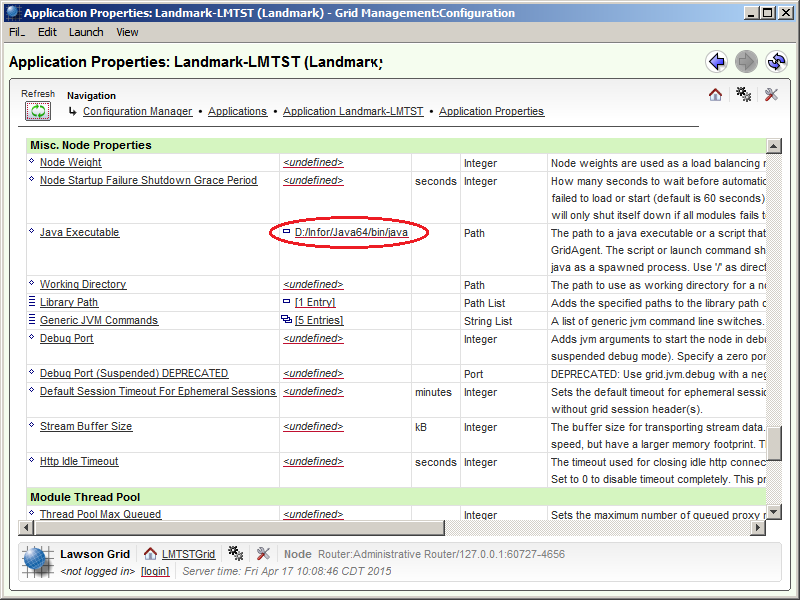
Nowadays, it should use SHA256 and RSA key size 2048 bit. Maybe it is possible to upgrade the keys on the server; for future work:
8

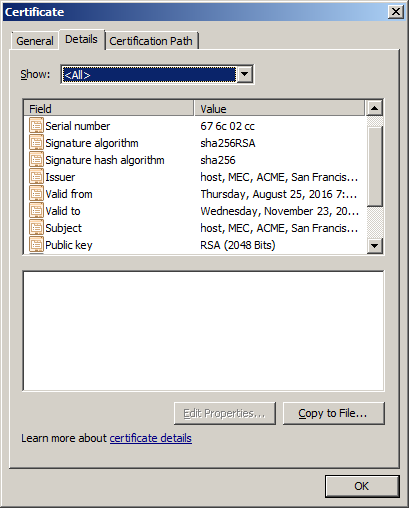
Client keys and certificate

Then, generate a public-private key and digital certificate for the SOAP client; use any tool such as JRE’s keytool or OpenSSL:

$ keytool -genkeypair -keystore keystoreClient.jks -alias trustedclient_host -keyalg RSA

$ keytool -exportcert -keystore keystoreClient.jks -alias trustedclient_host -file trustedclient_host.cer

PROBLEM 1: Do not use the weak crypto recommended by the MWSD User Guide in the parameters keyalg and sigalg. Instead, let the keytool use the default values which today for RSA is 2048 bit key size and SHA256withRSA hashing [2].

PROBLEM 2: Use RSA because with DSA the MWS server throws “java.security.InvalidKeyException: Unsupported key type: Sun DSA Public Key”

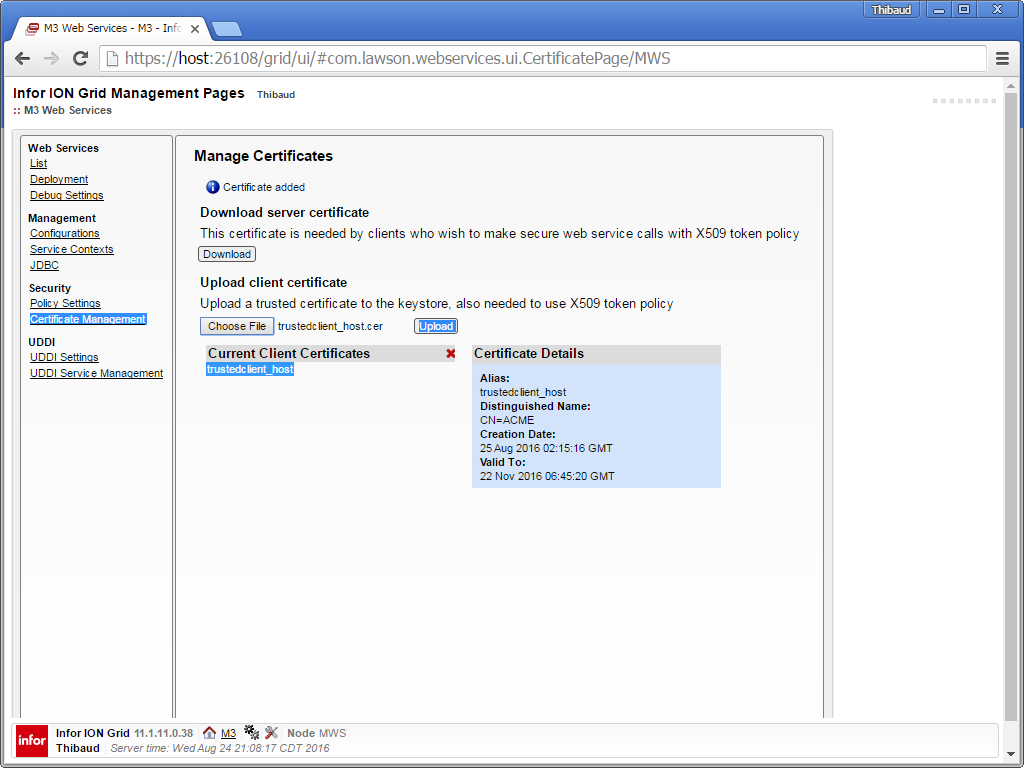
PROBLEM 3: The MWSD User Guide uses -alias myalias. But when we upload the certificate to the server, the server changes the alias to “trustedClient_” + hostName regardless. So I use that alias too.

Note: Keep the private key private! If you need to send it somewhere, do so only over a secure channel (regular email is not a secure channel). On the other hand, the public key and certificate are public, so you can shout them in the street no problem.

Here is the client certificate with stronger crypto:
7_

Now, upload the client certificate to the MWS server, so that the server can authenticate the client (peer authentication):

Note: Upload over HTTPS (secure) and not HTTP (clear text); otherwise verify in a side channel the key fingerprint the server received.

Test with SoapUI

Now, test using any SOAP client that supports WS-Security, such as SoapUI.

Create a new SOAP project as usual:
10_

Go to Project View > WS-Security Configurations > Keystores, and add keystoreClient.jks and Password:

Go to Outgoing WS-Security Configurations, and add a configuration, e.g. outgoing.

Add an action Timestamp:

PROBLEM 1: The Timestamp must be non-zero, e.g. 10; if I set it to zero the server throws “Security processing failed (actions mismatch) […] An error was discovered processing the <wsse:Security> header” and I do not know why.

Add an Signature action (it is for the client to sign the message with its private key, and for the server to use the client’s public key and verify the integrity of the message received). Select the client Keystore, select the Alias of the client, set the keystore Password, in Parts add Name Body with the Namespace of <soapenv:Body> which is http://schemas.xmlsoap.org/soap/envelope/ and Encode Content, and leave the rest default:
12

Add an Encryption action (it is for the client to encrypt the message with the server’s public key, and for the server to decrypt it with its private key). Select the client Keystore, select the Alias of the server, set the keystore Password, in Parts add the same as above, and leave the rest default:
13

PROBLEM 2: SoapUI is buggy and does not always seem to immediately pick my changes in the configurations, so I had to close and re-open it to pick my changes.

Now for decryption, go to Incoming WS-Security Configurations, add a configuration, e.g. incoming (the server will encrypt the SOAP response with the client’s public key, so this is for the client to decrypt that using its private key; and the server will sign the SOAP response with its private key, and the client will verify the signature of the message received using the server’s public key). Select the Decrypt Keystore, the Signature Keystore, and set the keystore Password:
14

PROBLEM 3: There is a bug with decryption in SoapUI 5.2.1, and I solved it by replacing the version of wss4j.jar as explained in this post:
bug2

Now, create the sample SOAP request (SoapUI already created a sample request), remove the <soapenv:Header> which we do not need, set your input parameters (e.g. CustomerNumber), add Basic authentication with the M3 Username and Password, select to Authenticate pre-emptively (optional), select the Outgoing WSS and Incoming WSS, and click Submit:
15

The client will encrypt and sign the Body, the server will decrypt it and verify the signature, the server will execute the web service (e.g. CRS610MI.GetBasicData), it will encrypt and sign the response, and return it to the client.

Result

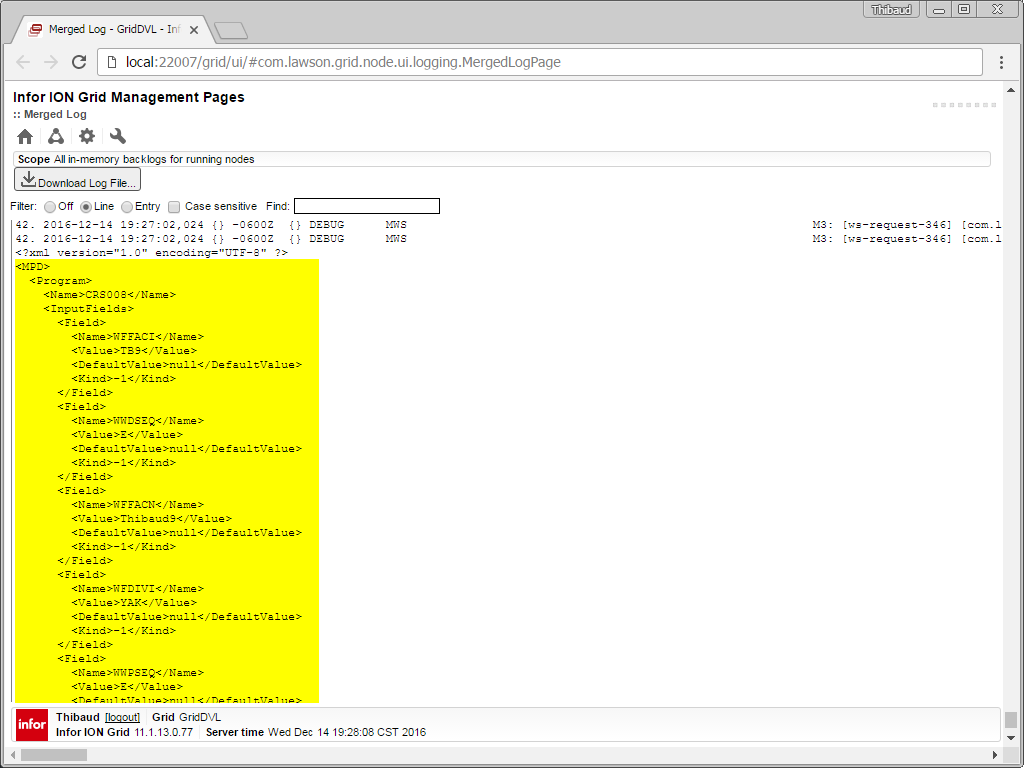
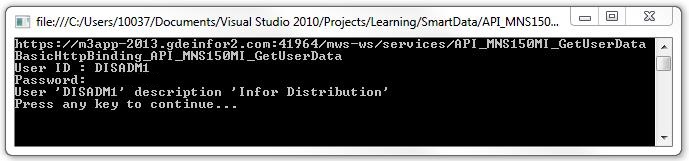
We now have the decrypted and verified SOAP response (e.g. CustomerName, CustomerAddress):
16

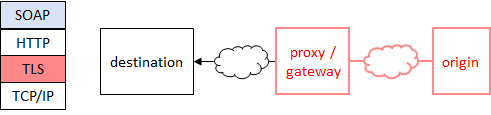
PROBLEM: Plain HTTP and authentication

My understanding of WS-Security is that by design it is an option to transport the message over plain HTTP. That scenario will occur when the message passes the TLS termination point and into proxies and gateways over plain HTTP. For that, we could securely set the M3 user/password in the SOAP header at <cred:lws> and add them to the Encryption and Signature actions. However, I tried it, and I removed the user/password from the HTTP Basic authentication, but MWS throws “401 Unauthorized […] WWW-Authenticate: Basic […] fault […] missing_credentials”:
bug

I found some old documentation from 2009 that sheds more light; maybe I have to use the Username Token instead; for future work:
doc126 doc127

Grid best practice

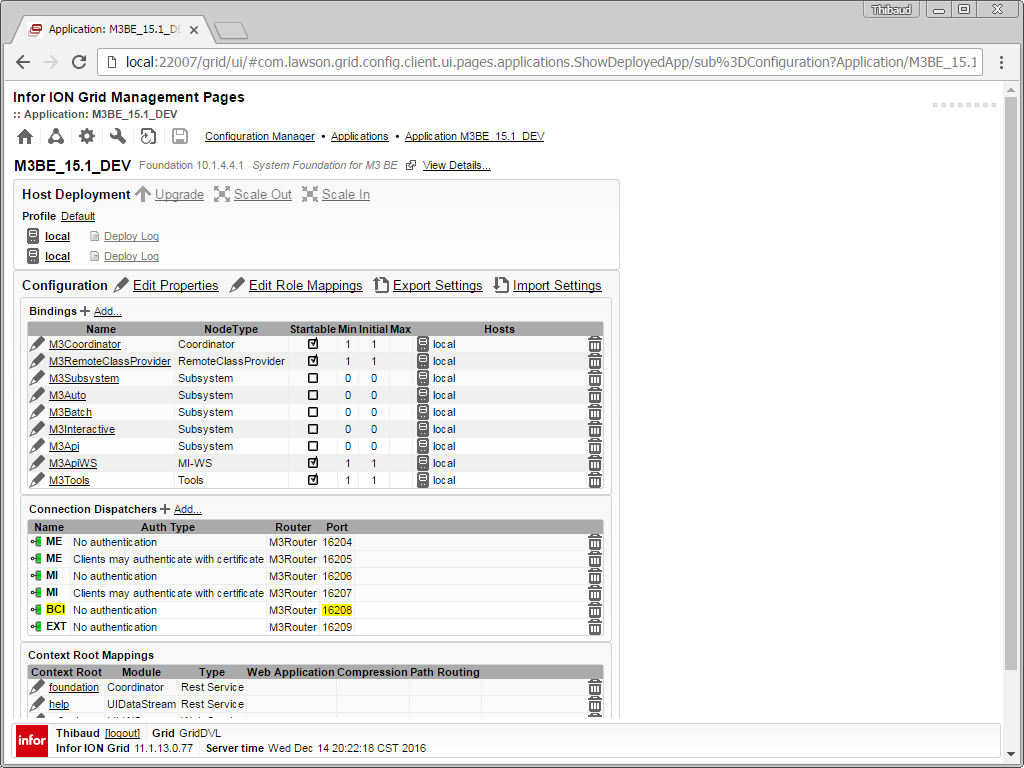
As a general best practice for the Grid, ensure the Configuration Manager > Routers > Default Router, has WWW Authentication Methods disabled for plain HTTP, and enabled for HTTPS only, to prevent sending user/password over plain HTTP:
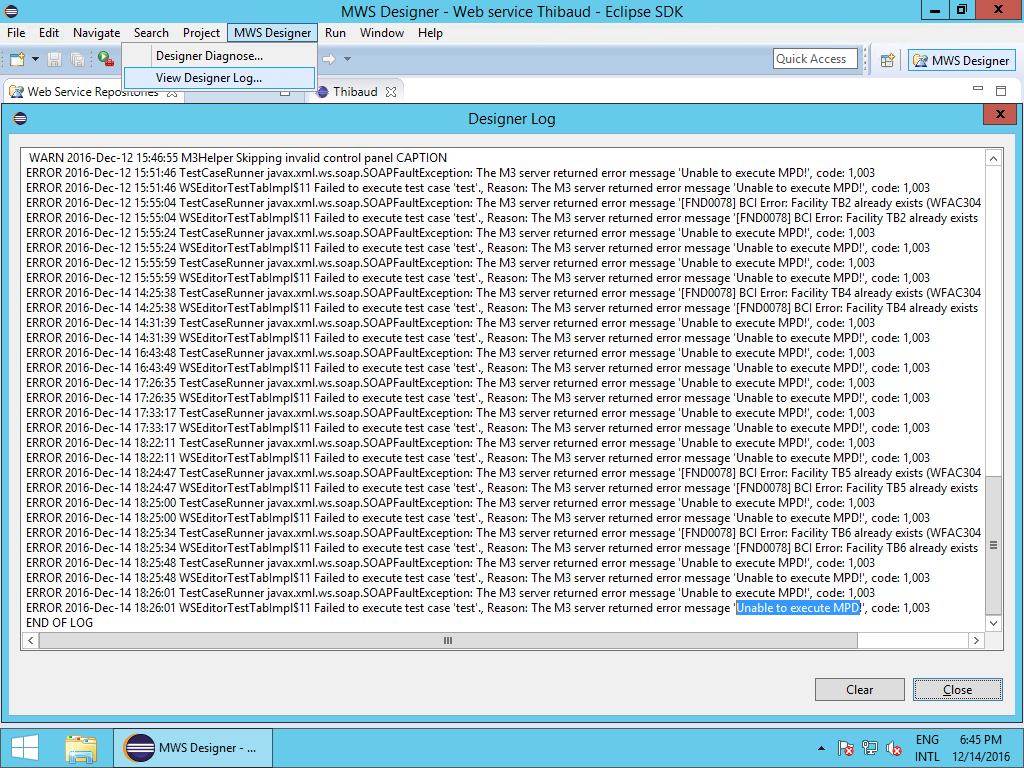
Troubleshooting

Here are some tips for troubleshooting.

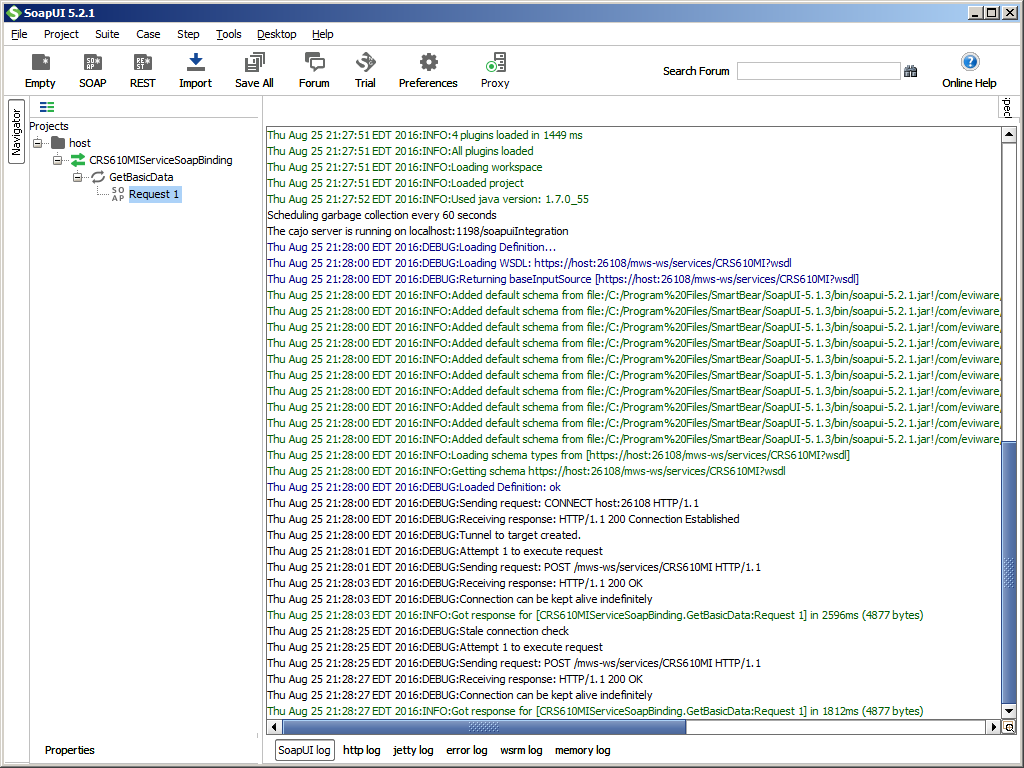
Use SoapUI’s six tabs of logs:
logs5

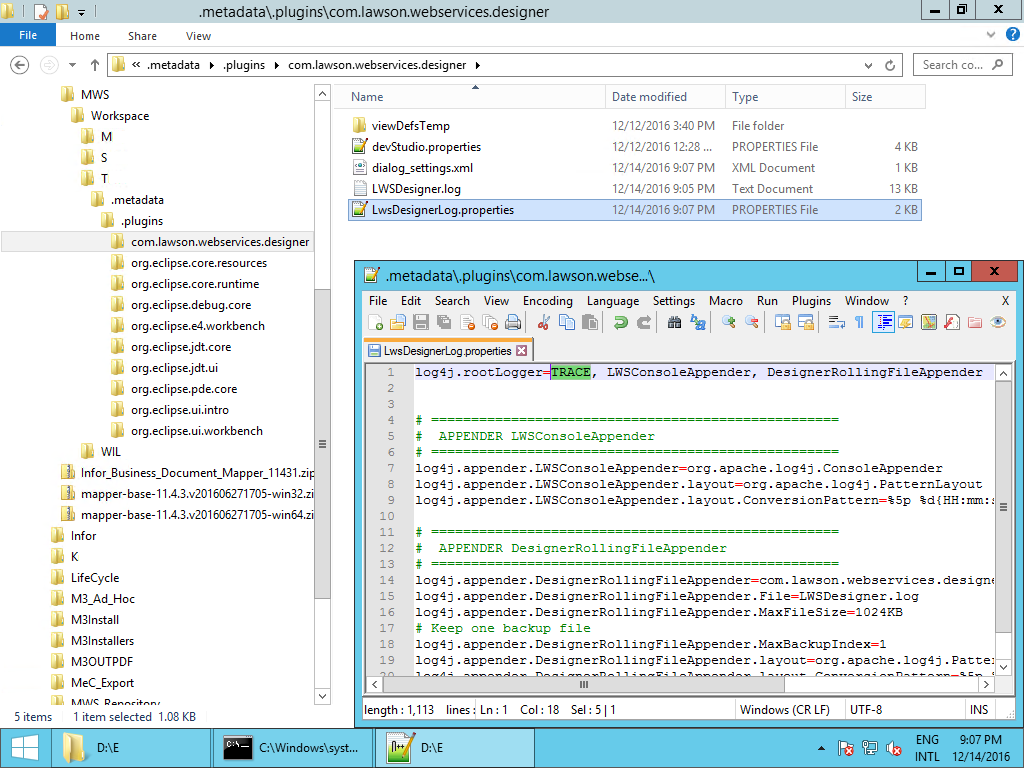
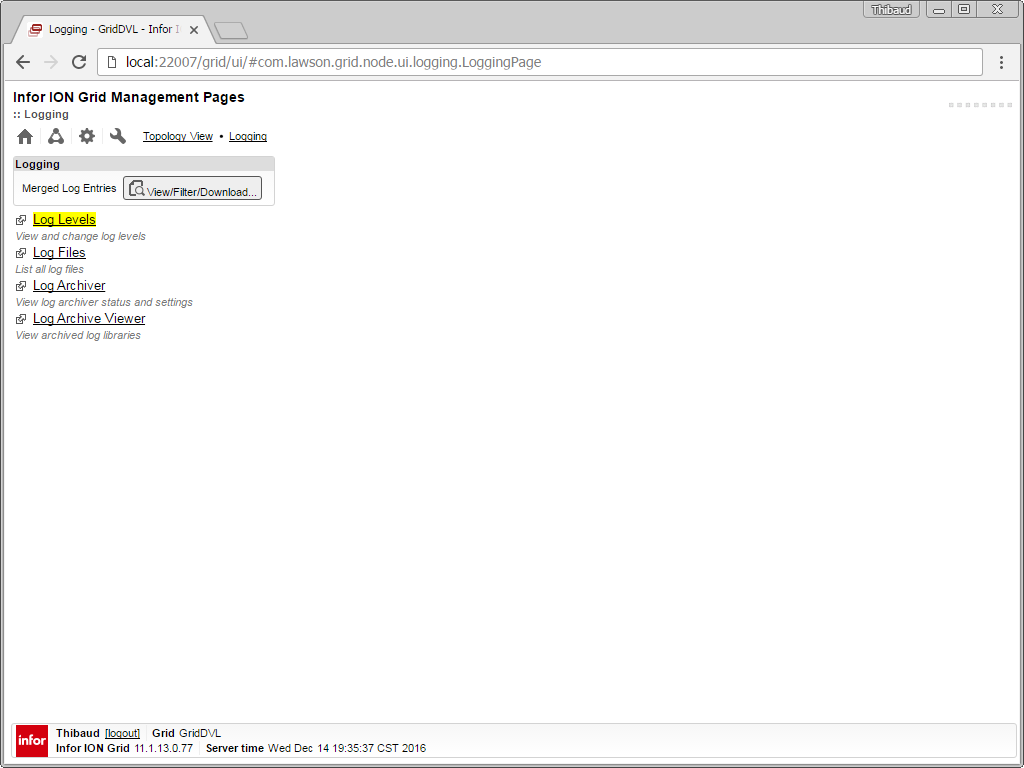
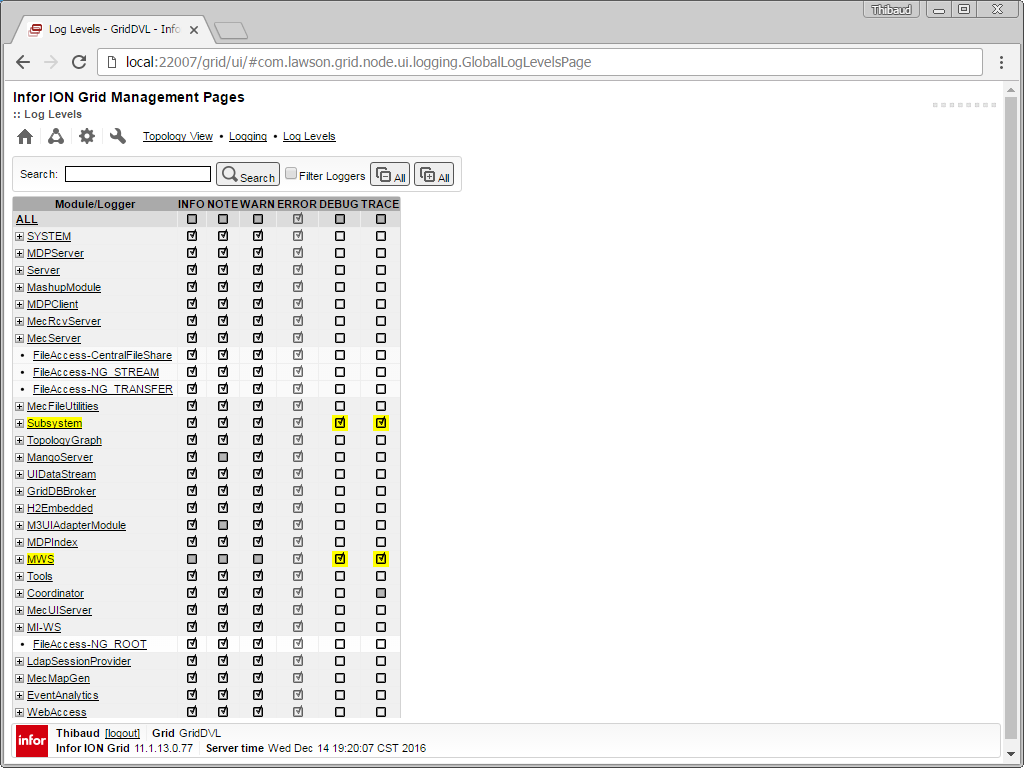
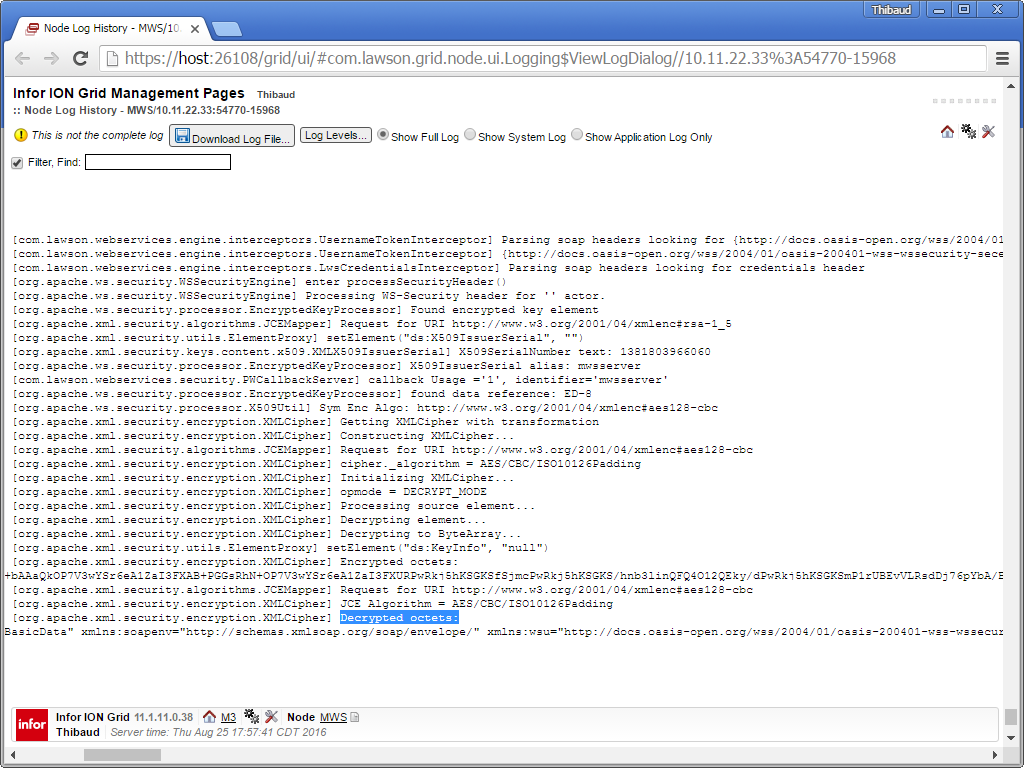
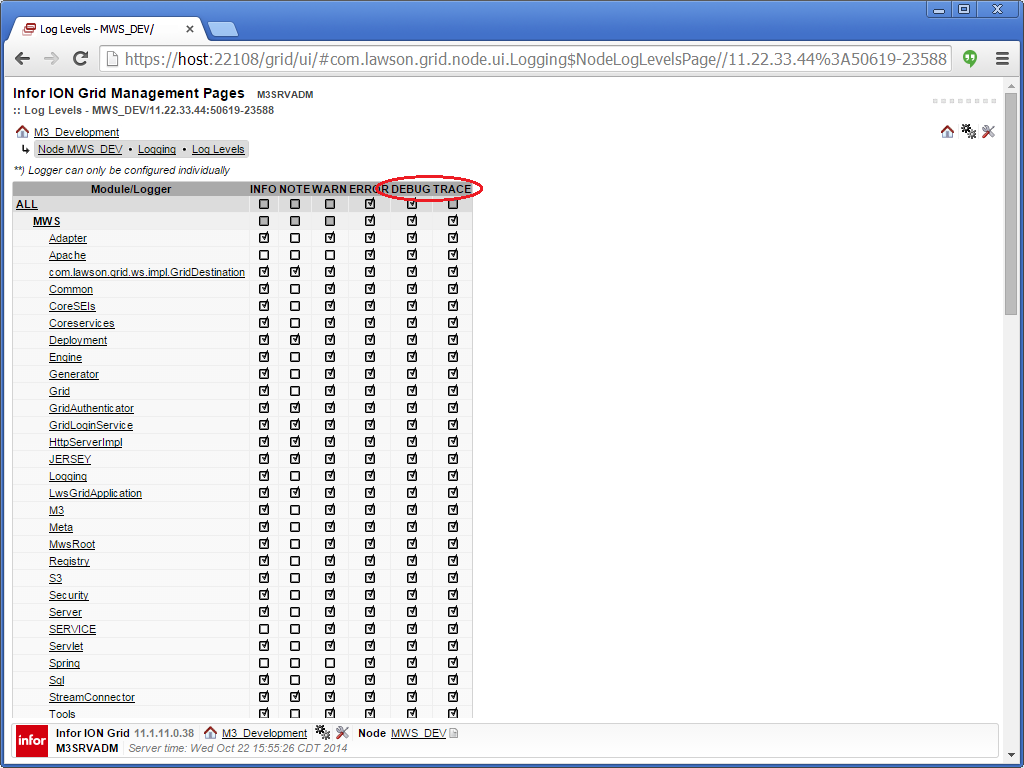
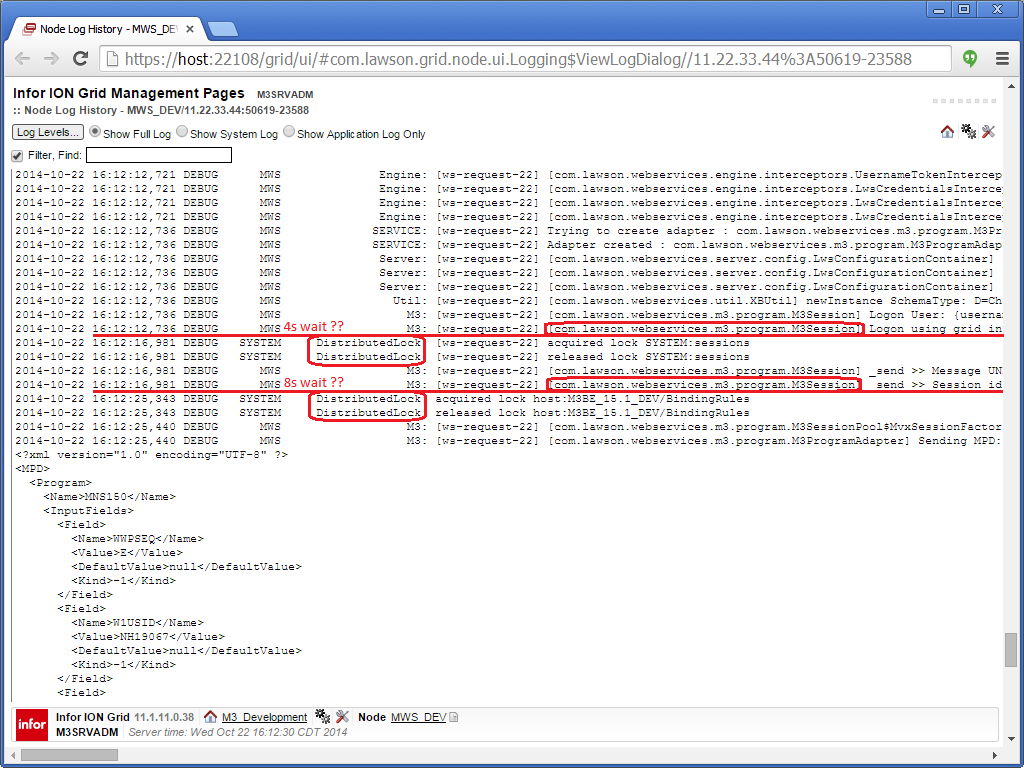
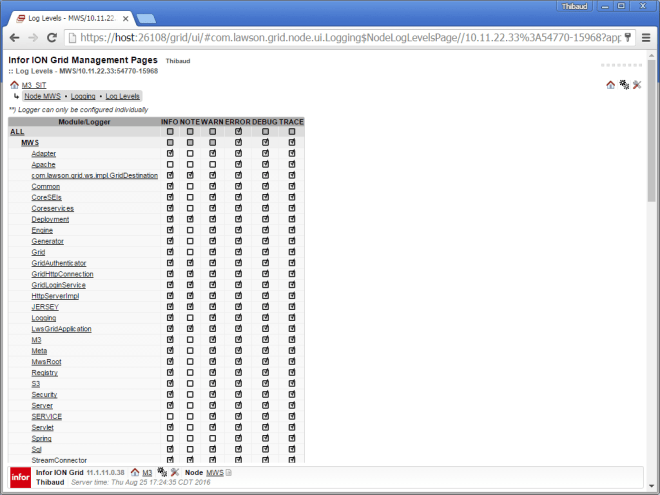
Set the MWS logs to DEBUG level:
logs
logs3

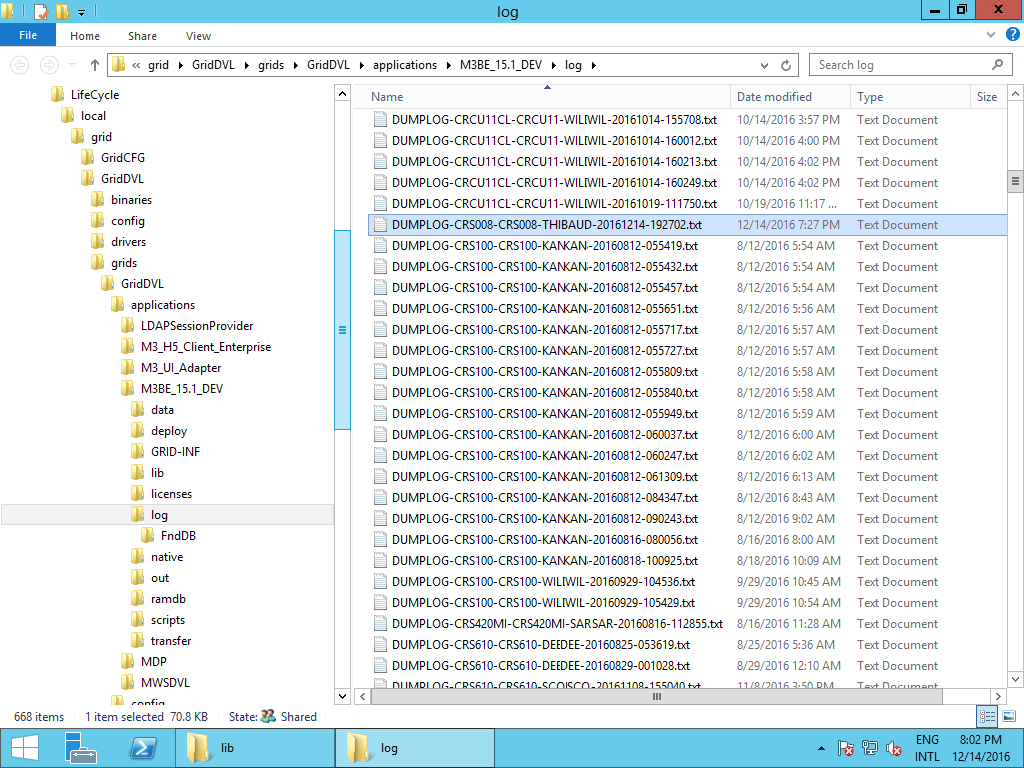
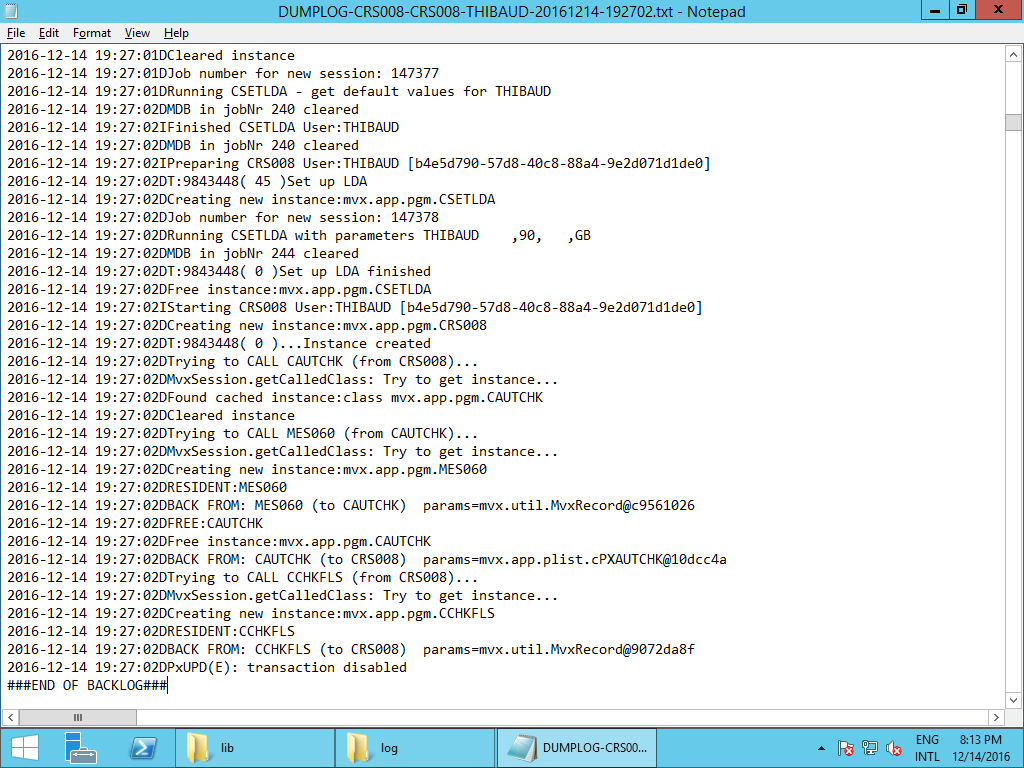
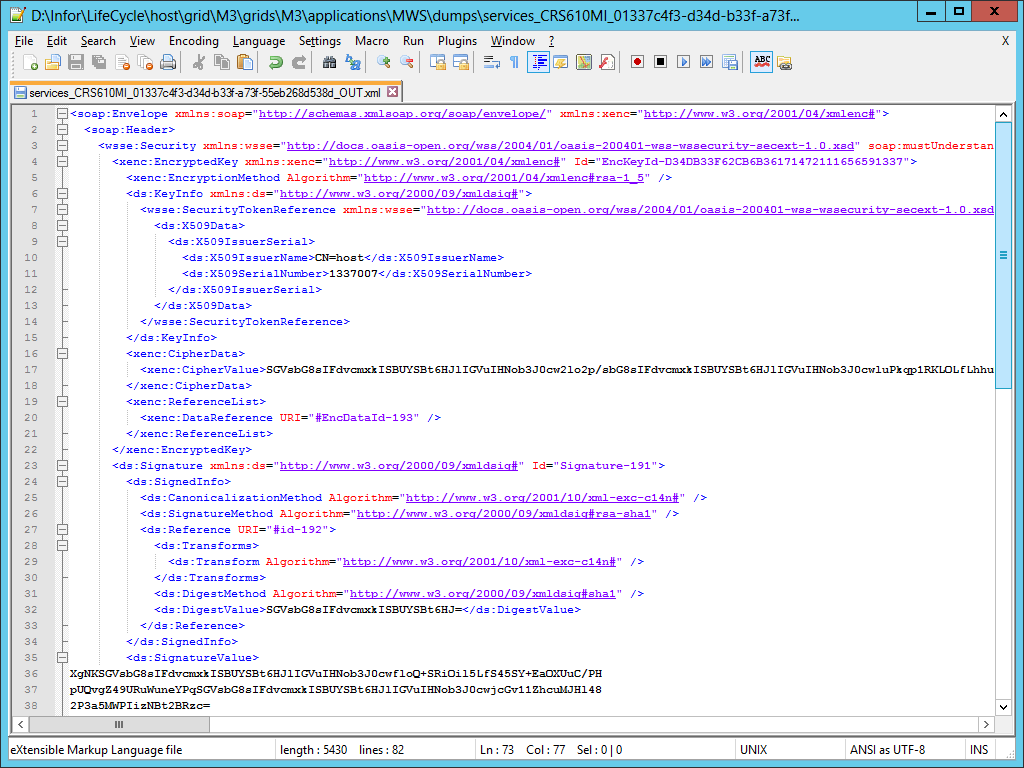
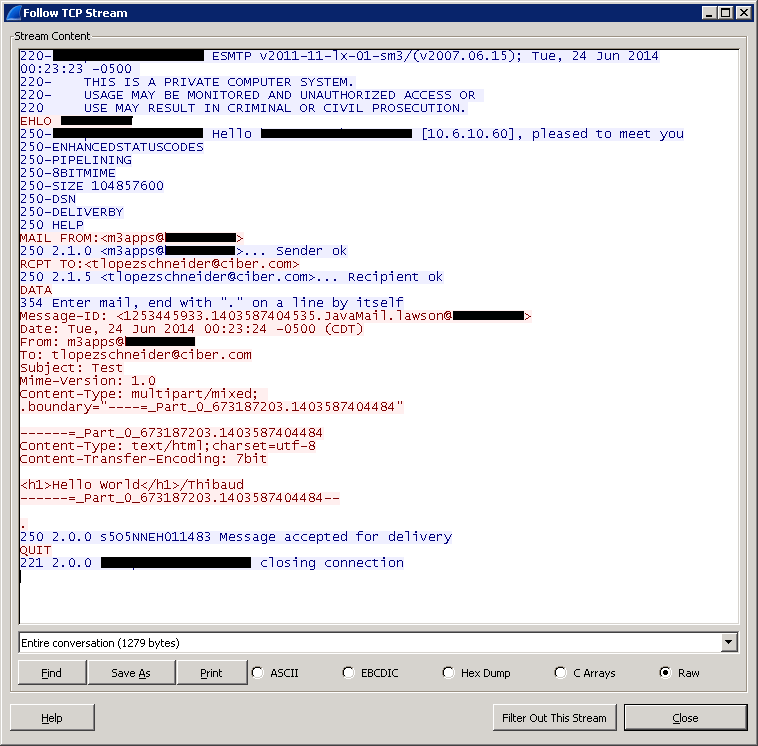
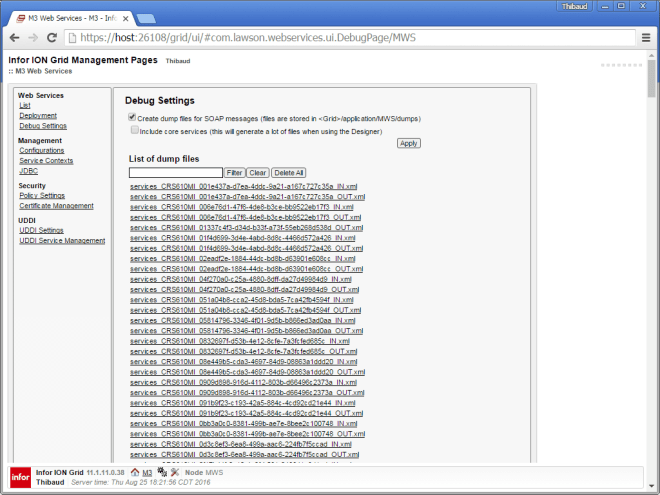
Set the MWS Debug Settings to create dump files of all the encrypted and signed SOAP requests (_IN.xml) and responses (_OUT.xml) in the MWS\dumps folder:
logs4
logs2

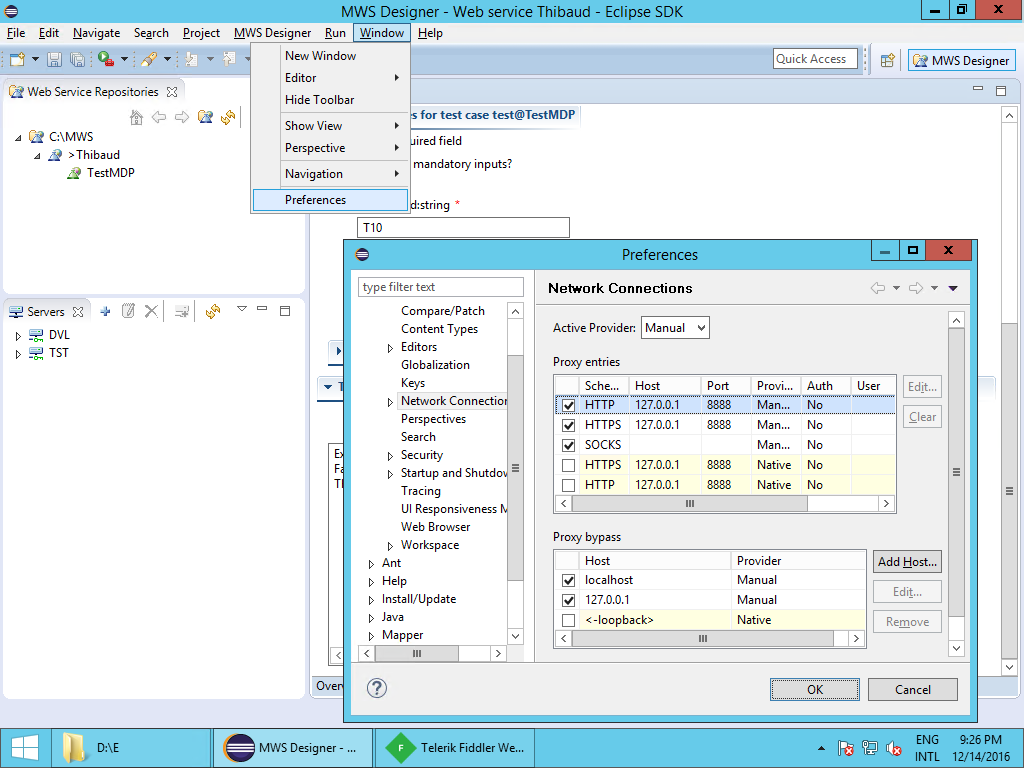
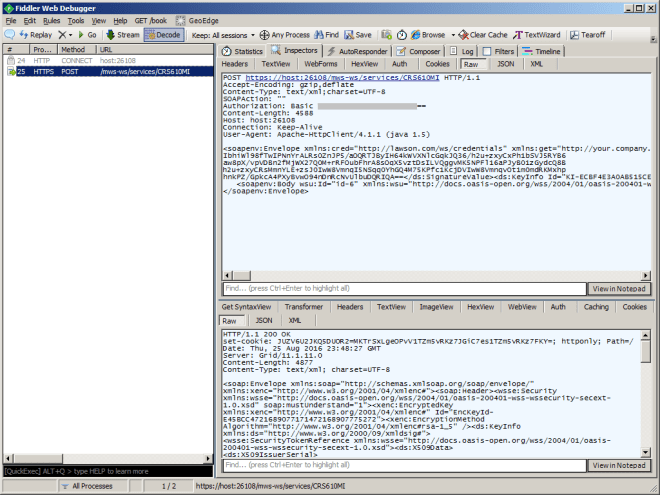
Set your SOAP client to use a proxy like Fiddler:
Fiddler_ Fiddler

Conclusion

That was my result of testing X.509 Token policy for M3 Web Services with SoapUI. It requires quite a good understanding of the public-key cryptography concepts (public-private keys, certificates, keystores, the dance between client and server, encryption, digital signatures), and it opened more questions than it answered.

Future work

I may work on the following in the future:

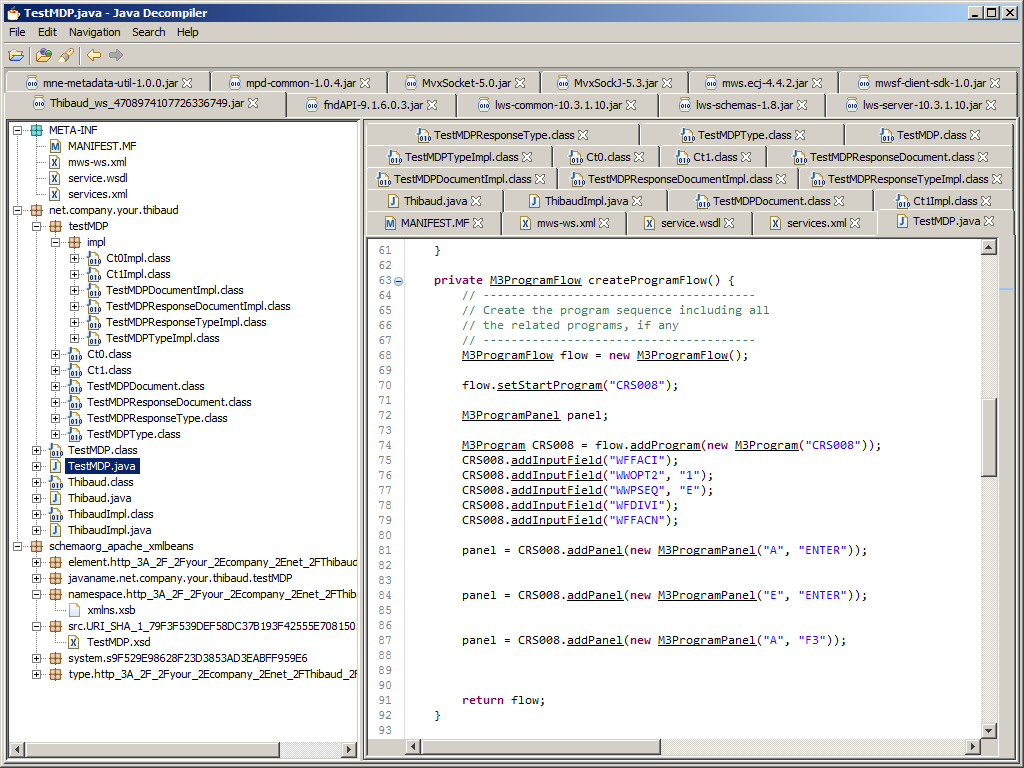
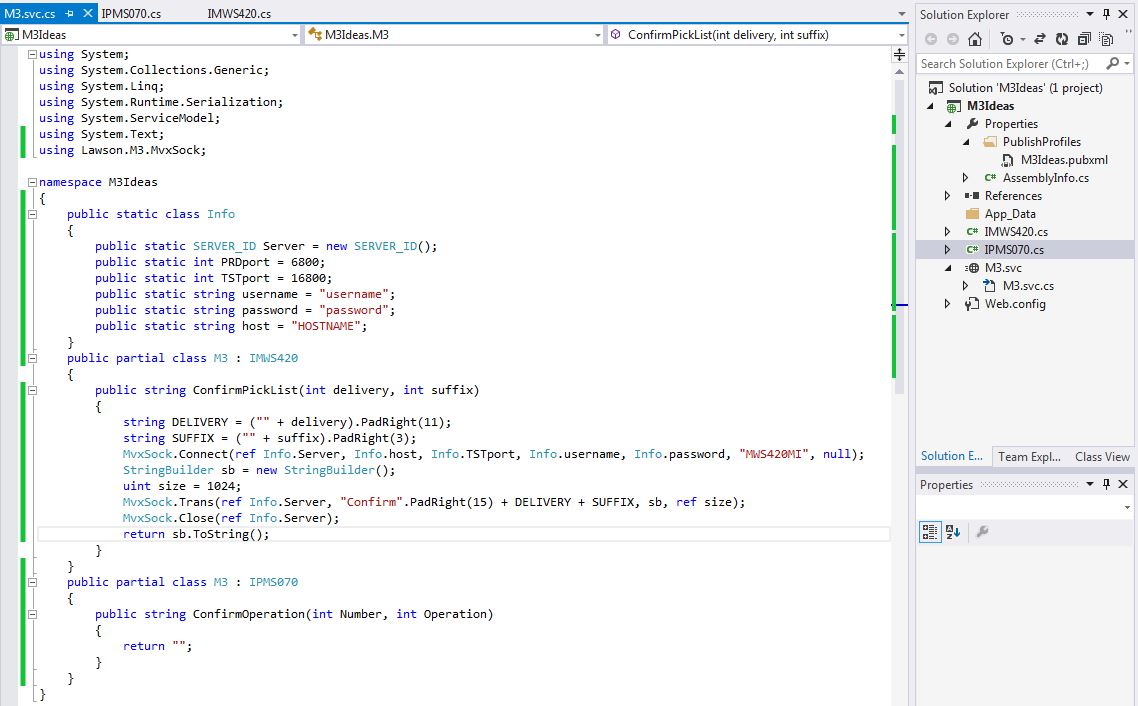
  • Implement a similar test client in Java
  • Upgrade the MWS server to stronger crypto
  • Call the web service over plain HTTP (instead of HTTPS)
  • Authenticate over plain HTTP (maybe Username Token, instead of Basic authentication or <cred:lws>)
  • Test MWS against WS-Attacker

That’s it.

Please subscribe, comment, like, share with your colleagues, write the next idea with us, or start your own blog.

SOAP WS-Security in the context of M3

Here is my high-level understanding of SOAP Web Services Security (WS-Security, or WSS), at least the WSS X.509 Certificate Token Profile, and how to apply it in the context of Infor M3.

WS-Security

WS-Security is a standard by the OASIS consortium to provide message encryption and digital signature, the usual security properties to prevent eavesdropping and tampering of a message. It uses asymmetric cryptography with public-private keys and digital certificates. There is an additional property which is central to WSS: the security happens at the message level, not at the transport level, i.e. the security follows the message even across proxies and deep packet inspection gateways, for end-to-end security. WSS is common for example in financial institutions that need to inspect and route a message through several nodes that can read the non-secure part of the SOAP envelope yet not reveal the secret in the message, until it reaches the appropriate destination. If a node on the path gets compromised, the security of the message is not compromised. Despite its continued use, WSS has only had few major updates in 10 years, is not considered secure [1] [2], the Internet agrees it is complicated and design-by-committee, and there is no industry momentum behind it.
versus1_

SSL/TLS, on the other hand, provides similar security properties with encryption and digital signature, using public key cryptography as well, but the security happens at the transport level, i.e. before the message level, for point-to-point security only. Thus, intermediate proxies and deep packet inspection gateways are unable to reveal the message to inspect it and route it, unless they have a copy of the destination’s private key. The workaround is to setup a chain of TLS segments, but the compromise of a node on the path, would compromise the message. TLS has additional security properties such as cipher suite negotiation, forward secrecy, and certificate revocation. TLS is constantly being updated with the latest security properties, and is widely supported and documented.

I have seen WSS interfaces used at banks and credit card companies that still have ancient mainframes and old middleware, and WSS is always used in combination with TLS, with peer authentication, thus four sets of public/private keys and digital certificates.
versus3

Infor Grid

Several applications of the Infor Grid expose SOAP web services, but I could not find how to setup WS-Security at the Grid level, so I assume it is not supported at the Grid level, only at the application level; that’s OK as SOAP over HTTPS is sufficient for the Grid’s needs.

grid

M3 Web Services (MWS)

The MWS application does have settings to configure WS-Security (X.509 Token policy); that would be useful for an external partner to call M3 with message-level security (otherwise there is always SOAP over HTTPS); I will explore this in a future post:
MWS

M3 Enterprise Collaborator (MEC)

The MEC application on the Grid does not have built-in SOAP web services. But in MEC Partner Admin the MEC developer can setup SOAP. The SOAP client Send Web Service process does not support WS-Security; this is most unfortunate as here is precisely where I want to setup the secure interfaces with the banks and credit card companies, bummer, I will have to develop my own WS-Security client in Java. On the other hand, the SOAP server WebServiceSyncIn does support WS-Security; I will explore this in a future post:
1

Future work

In future posts, I will:

  • Explore WS-Security in MWS
  • Explore WS-Security in MEC SOAP client
  • Explore WS-Security in MEC SOAP server

Conclusion

That was my high level understanding of WS-Security, at least the WSS X.509 Certificate Token Profile, and how to apply it in the context of M3. I am no expert in WS-Security, but this understanding is sufficient for my needs with M3.

That’s it!

Please subscribe, comment, like, share, and come author with us.

–Thibaud


Hosting a Custom Web Service with the M3 API Toolkit

There are a few tools that can be used to communicate with M3 outside of smart office including report writers like DB2 or MySQL for reading, M3 Enterprise Collaborator (MEC) for running transactions and of course my favorite the M3 API toolkit. Out of all these options there are drawbacks to each. The report writing is limited to reading data unless you are living life dangerously. The MEC tool can be complicated and time-consuming to set up and pretty much can’t be done without training or a consultant. The M3 API is not all that user-friendly and can be time-consuming especially with long transactions (like adding new items) and deployment can be a bit of a nightmare.

As mentioned above the M3 API toolkit is by far my favorite way of interacting with M3 outside of smart office typically with some added functionality of table lookups which is a much better way to get info out rather than an API call. The reason for choosing the API is simple. The documentation is excellent and the possibilities are endless! That being said there are still some drawbacks.

  1. While the API toolkit supports many different languages if you want to use more than one platform transactions will have to be completely rewritten.
  2. Deployment can be difficult. The toolkit needs to be installed on every computer or device that wants to communicate with M3.
  3. If database access is desired drivers are required and permissions will need to be granted for every client.
  4. Some transactions are long and time-consuming to set up.

There is good news though. Hosting your own custom web service using WCF that uses the M3 API toolkit eliminates all of these drawbacks. If your web service is well thought out expanding your functionality and streamlining day-to-day business activities becomes easy.

So let’s get started. Out of all of the transactions in M3 one of the simplest transactions is confirming a pick list because it only requires two inputs. For the sake of getting your feet wet with this new setup without overwhelming you we will start with this transaction. As we run through this example realize that while this transaction is simple the true power of the web service becomes more obvious with more complicated transactions.

Step 1 Start a new project

In Microsoft Visual Studio start a new project using the template WCF Service Application. I’ve named my project M3Ideas. (creative right?)

OpenProject

Once the project opens you will see two important files in the solution explorer on the right. One will be called Service1 and the other will be called IService1. Service1 is a class where all of the code for actually running transactions using the API will take place and IService1 is an example of what our client applications will see and be able to use. Notice that there is both Service Contracts with Operation Contracts which are the functions that our tablets or computer programs will call and there are Data Contracts with Data Members which is how data will be presented to our software. This is what makes the Web Service powerful, we get the ability to create our own objects and essentially make a wrapper class for the M3 API Toolkit that can be used by any program we want that needs to interact with M3.

NewWebService

So lets start renaming the items to suit our needs. Since our goal is to report Pick Lists I’ll chose to rename the IService1 interface to MWS420 after the M3 program for reporting pick lists. Do this in the solution explorer on the right and Visual Studio will rename it everywhere. I’ll also make just one Operation Contract for now called ConfirmPickList which takes two integers, the delivery number and the suffix. Right now I’ll go ahead and delete the CompositeType class below but don’t forget how to make Data Contracts this interface won’t be using them but with longer transactions they are pretty much the greatest thing on earth. At this point my interface looks something like this.

MWS420

Remember this is just a prototype for what the client applications will get to use. You might be wondering why I named the interface after only one program. What if you want to use more than one program in you web service? The reason I did this is simply for organization and clarity when making the client applications. When I go to run transactions in other programs I will make new interfaces which will look just like this one only with their own name. This will make it so that the client has to not only specify which transaction to run but which interface the transaction comes from. This enables me to use similar function names for more than one program and still know exactly which program the transaction goes with. A good example of this is if I wanted to confirm manufacturing operations in PMS070 I can use similar function names and the client application will easily know which program each transaction belongs to even if the name isn’t as descriptive as it probably should be. It will become more clear what this will look like in future posts where we connect to the web service from our various clients.

Step 2 Set up the transactions

Ok lets look at the Service1.svc file now which is where the code for this transaction will be placed. Go ahead and rename this file to M3.svc and rename the class M3 as well. This is where all the code for the transactions will go. The single most important thing in this file is the interface implementation right after the class name. In an effort to be organized we will use several partial classes rather than one class. Each partial class will implement one of the interfaces we set up for our program. The code will look like this.

PartialClasses

Notice that each partial class has a colon before the interface name that it implements. Since I’ve used partial classes each one implements just one of my interfaces. If you really wanted you could use just one regular class that implements all of the interfaces. All you would have to do is list them off and separate them by a comma. I think doing it this way will be a bit more straight forward though.

So now lets get to the fun part and set up the M3 APIs and show the program how to connect to M3 and make the transactions come to life. The first thing we need to do is add a reference to the M3 API. In this example we will use the 64 bit library although you can use whichever one you want. It is interesting to know that the target platform that this service will run on is completely unrelated to the programs that will connect to it. This is another huge advantage to using the web service instead of each client using the API toolkit directly.

To add the reference go ahead and right click on references in the solution explorer and select add reference. On the left select browse and again browse at the bottom and locate the file MVXSockNx64.dll. The file should be located in C:\MvxAPI. Once the file is added you should see the file in the list of references.

Reference

Once the reference has been added you can start using the library to communicate with M3. All you need to do is add the using statement at the top of the file and you can start using the library to run transactions. Don’t forget there is a help file that is well documented that will show you how to set up the transactions. Although running these transactions isn’t that elegant the documentation will tell you how to get it done.

To run transactions you will need the port number that the API uses to connect to M3 (there is one of these for each environment), a username and password that is set up in M3 and has permissions to use the APIs that you want to use, as well as the host name. When we are done our transaction will look like this. Note my port numbers might be the same as yours but they don’t have to be. Yours could be different.

ConfirmPickList

I went ahead and put some of the constant Information in a static class called Info. This will make it so I don’t have to type in the data each time and I can use it in all of my partial classes. I’ve also set up the transaction which is exactly how the documentation says to do it. This includes padding the spaces so that each input is in the correct position of the string.

Step 3 Publish

Now that we have our first transaction set up lets publish it and test it. Once it’s been tested we can change to the port to production. To host the web service you will need a computer or virtual machine that is running IIS. You might need to enable the feature in windows. If you are unsure how to enable the feature a simple google search will walk you through it.

Ok to publish the web service right click on project in the solutions explorer and select publish. Set up a publish configuration to publish to the file system in a folder of your choosing. We’ll copy these files to the computer that will host the service. You will also need to locate the file MvxSockx64.dll file and copy that to folder as well. Go ahead and put it in the bin subfolder with the other libraries that got published. Next copy that folder to the C drive of the computer that will host the service and open IIS. On the left side of the screen expand the tree and right click Default Web Site and select add application. Then show IIS what folder your files will be and name your service.

IISSetup

To verify that your service is up and running expand the tree on the left more and select the application you just added. Then on the far right select browse and it should open a browser. Select the SVC file and it should bring you to a screen with directions how to use it. In the next post I’ll run through some samples on how to use the service to streamline reporting pick lists.

Here is the screen that you should be able to get to. If something happened to go wrong it will be displayed on this screen.

BrowserM3Service

If you have any questions on what the web service can be used for please feel free to ask in the comments. Also if you run into any problems please let me know.

Happy coding.

-The Engineer

M3 Web Services from Infor Process Automation

In order to securely call Infor M3 Web Services (MWS) from Infor Process Automation (IPA) we need to import the Infor Grid’s certificate in IPA’s Java truststore; here is how.

MWS authentication

MWS works with SOAP over HTTP over SSL/TLS with the digital certificate of the Infor Grid.

The Infor Grid router for MWS must have Basic authentication enabled over HTTPS (secure) and have all authentication disabled over HTTP (insecure); you can check in the Infor Grid > Configuration Manager > Routers > Default Router:
1.8

MWS from IPA

In the IPA Configuration > Web Service Connection, we set the Basic authentication with the M3 user and password:
3.6

In Infor Process Designer (IPD), we use the SOAP Web Service activity node to the HTTPS URL of MWS:
3.1

Tip: un-hard-code the scheme://host:port and replace it by a variable <!_configuration.main.MWS> to define.

Problem

When we execute the process we get the following exception:

com.sun.xml.internal.ws.client.ClientTransportException: HTTP transport error: javax.net.ssl.SSLHandshakeException: sun.security.validator.ValidatorException: PKIX path building failed: sun.security.provider.certpath.SunCertPathBuilderException: unable to find valid certification path to requested target

That is because IPA does not know the Infor Grid certificate.

The IPA Configuration for the Web Service Connection does not have settings for an explicit truststore. Instead, IPA implicitly relies on the JVM’s truststore; let’s set it up.

Step 1. Infor Grid certificate

Get the Infor Grid certificate file. It is a signed public key that you can get for example from the main Grid Information at something like https∶//host123.local:26108/grid/info.html
3.2  

Note: Preferably get the certificate of the root CA as it usually signs the certificates for all environments (DEV, TST, PRD, etc.).

Step 2. IPA server truststore

Check the path of the IPA server’s JVM as given in the Landmark Grid > Landmark-LM Application > Configuration > Properties > Java executable:
2.5

Import the certificate into that JVM’s truststore using the Java keytool:

keytool -import -keystore lib\security\cacerts -file grid.cer

3.5

Note: I may have mixed up the keystore and the truststore in the command; to be verified.

Step 3. IPD truststore

The path to the Infor Process Designer (IPD) JVM is given by the IPDesigner.ini file:
3.7 3.8

Import the certificate into that JVM’s truststore as well.

Step 4. Test

Now execute the process. The Web Service activity node should not throw that exception anymore.

Notes

If you have a certificate purchased from a certificate authority that is already trusted by the JVM, such as VeriSign, this setup is not necessary.

That’s it. Let me know what you think in the comments below.

Java Debugging an Infor Grid application at runtime

Here is an illustrated example of how to use the Java Debugger in Eclipse to debug an existing Infor Grid application at runtime for which we don’t have the source code; for example I will debug the M3 Web Services (MWS) server, line by line, while I make a SOAP request.

For that, I will use the technique I learned in my previous post, Hacking Infor Grid application development (part 6), where I learned how to use the Java Debugger for my own Grid application for which I had the source code, and I will extend that technique to an existing Infor Grid application for which I don’t have the source code but for which I have the JAR files.

I had to learn this technique in order to troubleshoot a timeout issue we are currently having in MWS when making a SOAP request. This helped me pinpoint the modules, packages, classes, methods and lines of code that were at cause and report the results to Infor Support so they can report them to Infor Product Development for help. To that effect, please join the campaign and sign the petition asking Infor Product Development to make their source code available so we can better troubleshoot issues and learn. Also, this week is Open Access Week and it’s a great opportunity to ask Infor to make more of their documentation available.

Logging and DEBUG level

In order to narrow down the search space for the issue I was troubleshooting, I increased the log level of the application’s node to DEBUG level. In my case, I selected ALL modules: SYSTEM and MWS. I had also selected TRACE but it didn’t produce any log.
2

I then opened the log file and found interesting information about the bottleneck issue, that helps me narrow down which modules, packages, and classes to debug. In my case they are: MWS com.lawson.webservices.m3.program.M3Session, and SYSTEM DistributedLock:
2_

Remember to revert the log level changes after you’re done to avoid clogging the disk space with increasing log.

Setup the Java Project in Eclipse

Let’s setup a new Java Project in Eclipse with the JAR files of the Infor Grid application (e.g. MWS in my case). For that:

  1. Create a new Java Project in Eclipse, give it a name, and select Add External JARs:
    1.6_
  2. Select the JAR files of the Infor Grid application in LifeCycle Manager (e.g. MWS\lib\*.jar in my case):
    1.7
  3. Optionally, you can also add the JAR files of the Grid runtime (grid-core.x.y.z.jar, etc.).
  4. Open the desired Java class (double-click), Eclipse will open that class in the Class File Editor, and for now it will say “Source not found”, we will fix that later:
    1.11

Start debugging

Now let’s debug the application, even without the source code:

  1. Toggle the breakpoints at the desired methods:
    2.0
  2. Prepare the Infor Grid application for debugging as detailed in my previous post:3
  3. Start debugging in Eclipse:
    2.1_
  4. Make the application go through your breakpoint (in my case I make a SOAP request, the application will call M3Session.logon, and Eclipse will suspend at my breakpoint).
  5. At this point, even without the source code, you can use the debugger as usual, to execute line by line, inspect variables, evaluate expressions, etc.; each class will show “Source not found” for now:
    2.6

Add the Java decompiler

Now let’s use a Java decompiler for Eclipse to recover the source code (not the original source code though) and attach it to the classes.

  1. I installed the JD-Eclipse plugin by Emmanuel Dupuy:
    0
  2. JD-Eclipse will change the file association in Eclipse to open class files that don’t have source, decompile them, and attach the decompiled source back to the class:
    1.9
  3. Also, JD-Eclipse will realign the line numbers of the recovered source code so they match with the debug information of the class, otherwise the debugger will show the wrong lines of source code and it will be very confusing:
    1.10
  4. Now open a class file (double-click) and JD-Eclipse will show the recovered source code with line numbers realigned:
    2.1
  5. Now debug again with the breakpoints. This time the debugger will show the source code. This is the ideal scenario for debugging line by line:
    3.3

Problem

I realized that as I’m debugging, JD-Eclipse will not decompile classes which it hasn’t previously decompiled. So if the debugger steps through a class that hasn’t been previously decompiled, the debugger will show the usual “Source not found”.

The workaround is to open all the classes we need the source code for, prior to debugging, one by one, so JD-Eclipse can decompile them, and attach the source code back to the class, and then we can try debugging again.

UPDATE 2014-10-29: That is not true anymore, and I found the solution: we have to change the default file association for the *.class files in order to use Java Decompiler’s Class File Editor, and we must do so every time we start Eclipse because Eclipse will revert to the default Class File Viewer when we exit Eclipse:
0

Future work: batch decompilation with realignment

I tried the plugin Realignment for JD-Eclipse by Alex Kosinsky that does batch decompilation, but it doesn’t realign the line numbers, so that doesn’t work. I also tried the plugin JDEclipse-Realign by Martin “Mchr3k” Robertson, it does decompile, and it does realign the line numbers, but I couldn’t get the source code to show while debugging, even after having previously decompiled the class, and I don’t know if it does batch decompilation.

UPDATE 2014-10-29: Also, I tried Java Decompiler’s > Save All Sources, but it doesn’t realign the line numbers, even though JD-Core’s change log for version 0.7.0 says “Added an algorithm to realign the decompiled source code to the original line numbers”:
y

That’s future work to solve.

Summary

That was an illustrative guide of how to do Java debugging on an Infor Grid application, at runtime, without having the source code of the application, having just the JAR files from LifeCycle Manager. This technique helped my troubleshoot an issue with MWS. I hope it will help you too.

That’s it! If you learned something, please click Like below, click Follow to receive notifications about new blog posts, share around you, sign the petition, and write the next blog post with me, you are great. Thank you.

Calling M3 Web Services with SQL adapter in Smart Office Mashup

Once in a while I receive this question of how to call an M3 Web Service (MWS) with SQL adapter in a Mashup for Infor Smart Office. As a reminder, MWS has three adapters: M3 API, M3 Display Program (MDP), and SQL (JDBC). Each will return a different SOAP response, thus each will need a slightly specific XAML. The trick with the SQL response is the new0Collection.

Here is my sample SQL:

SELECT OKCUNO, OKCUNM
FROM MVXJDTA.OCUSMA
WHERE OKCONO=? AND OKSTAT=?

1b

Here is the web service in MWS Designer (note the new0 result set in the output):
4_
6b

Here is the Web service test tool in Smart Office (note the new0Collection):
8_

Here is the resulting Mashup:
10b

And here is the final XAML source code with the new0Collection binding highlighted:

<Grid xmlns="http://schemas.microsoft.com/winfx/2006/xaml/presentation" xmlns:x="http://schemas.microsoft.com/winfx/2006/xaml" xmlns:ui="clr-namespace:Mango.UI.Controls;assembly=Mango.UI" xmlns:mashup="clr-namespace:Mango.UI.Services.Mashup;assembly=Mango.UI">
	<Grid.Resources></Grid.Resources>
	<Grid.ColumnDefinitions>
		<ColumnDefinition Width="*" />
	</Grid.ColumnDefinitions>
	<Grid.RowDefinitions>
		<RowDefinition Height="*" />
		<RowDefinition Height="Auto" />
	</Grid.RowDefinitions>
	<mashup:DataListPanel Name="CustomerList" Grid.Row="0">
		<mashup:DataListPanel.Events>
			<mashup:Events>
				<mashup:Event SourceEventName="Startup" TargetEventName="list" />
			</mashup:Events>
		</mashup:DataListPanel.Events>
		<mashup:DataListPanel.DataService>
			<mashup:DataService Type="WS">
				<mashup:DataService.Operations>
					<mashup:DataOperation Name="list">
						<mashup:DataParameter Key="WS.CredentialSource" Value="Current" />
						<mashup:DataParameter Key="WS.Wsdl" Value="https://host:26108/mws-ws/SIT/TestSQL?wsdl" />
						<mashup:DataParameter Key="WS.Address" Value="https://host:26108/mws-ws/SIT/TestSQL" />
						<mashup:DataParameter Key="WS.Operation" Value="LstCustomers" />
						<mashup:DataParameter Key="WS.Contract" Value="TestSQL" />
						<mashup:DataParameter Key="LstCustomers1.CONO" Value="750" />
						<mashup:DataParameter Key="LstCustomers1.STAT" Value="20" />
					</mashup:DataOperation>
				</mashup:DataService.Operations>
			</mashup:DataService>
		</mashup:DataListPanel.DataService>
		<ListView Name="Customers" ItemsSource="{Binding new0Collection}" Style="{DynamicResource styleListView}" ItemContainerStyle="{DynamicResource styleListViewItem}">
			<ListView.View>
				<GridView ColumnHeaderContainerStyle="{DynamicResource styleGridViewColumnHeader}">
					<GridView.Columns>
						<GridViewColumn Header="Customer" DisplayMemberBinding="{Binding Path=OKCUNO}" />
						<GridViewColumn Header="Name" DisplayMemberBinding="{Binding Path=OKCUNM}" />
					</GridView.Columns>
				</GridView>
			</ListView.View>
		</ListView>
	</mashup:DataListPanel>
	<ui:StatusBar Name="StatusBar" Grid.Row="1" />
</Grid>

That’s it!

Intercept network traffic from Infor Process Automation

Infor Process Automation (IPA) communicates with other servers over the network – using for example the WebRun, Web Service, SQL Query, and Email activity nodes – but it lacks the ability to dump the network traffic for troubleshooting purposes. Here are my solutions.

Background

The WebRun activity node uses HTTP:

  1. HTTP request header
  2. HTTP request body
  3. HTTP response header
  4. HTTP response body

The Web Service activity node uses SOAP over HTTP:

  1. HTTP request header
  2. HTTP request body
    1. SOAP request header
    2. SOAP request body
  3. HTTP response header
  4. HTTP response body
    1. SOAP response header
    2. SOAP response body

The SQL Query activity node uses JDBC.

The Email activity node uses SMTP.

And IPA has other activity nodes for products such as Landmark, Lawson, ION, Cloverleaf.

IPA and Infor Process Designer (IPD) will only show a fraction of the network traffic. For example for the WebRun activity node it only shows the HTTP response body, and unfortunately it discards the rest of the useful information.

With Wireshark

Wireshark can naturally intercept traffic from IPA and IPD.

Here are my screenshots for the WebRun activity node:
1 2 3

We get the entire HTTP request (header and body) and HTTP response (header and body). From that traffic we learn useful information about the WebRun activity node. For example, we learn what is the User-Agent String being used, we learn that IPA only uses the POST method (not GET), we learn that IPA automatically adds a leading slash to the URL path even if we don’t want it, and we learn that some versions of IPA have a bug in the Content-Type that always sets it to application/x-www-form-urlencoded even if we set it to something else. And we have the rest of the data to do the troubleshooting we may need.

And here are my screenshots for the Web Service activity node:
2.1 2.3 2.4

We get the entire HTTP request (header and body), HTTP response (header and body), SOAP request (header and body), and SOAP response (header and body). From that traffic we learn useful information about the Web Service activity node. For example, we learn what is the User-Agent String being used, and we learn that IPA will send our private M3 user/password to a server on the Internet even if we didn’t specify it (be careful if you leave Configuration blank, that means Configuration main, and if you had set an M3 user/password for M3 Web Services). And we have the rest of the data to do the troubleshooting we may need. This will prove crucial for troubleshooting M3 Web Services.

Here is a screenshot for the Email activity node:
4

You can even decode JDBC traffic from the SQL Query activity node, including JDBC traffic from IPA to its database. For that, in Wireshark select Decode As > TDS.

You can also decrypt HTTPS traffic (encrypted) of internal servers for which you have the private keys, such as M3 Web Services. For that, you can follow my previous post on how to decrypt Smart Office HTTPS traffic. I haven’t applied it here yet as I don’t have the server’s private keys so I can’t show you if it works or not, but I’m confident it would work.

With Fiddler

Fiddler can also capture HTTP traffic from IPA/IPD but we have to tell the JVM to use a proxy. I’ve only tested this with IPD; I haven’t tested this with IPA yet, but I’m confident it would work.

Also, Fiddler only captures HTTP, it doesn’t capture JDBC/SMTP.

Also, Fiddler can intercept and decrypt HTTPS (encrypted) traffic.

To set a proxy for IPD, open the IPD ini files and add the following arguments for the JVM:

-Dhttp.proxyHost=127.0.0.1
-Dhttp.proxyPort=8888
-Dhttps.proxyHost=127.0.0.1
-Dhttps.proxyPort=8888

3.1 3.2

To decrypt HTTPS traffic you have to tell Fiddler to capture and decrypt HTTPS traffic, and you have to import Fiddler’s root certificate into the JVM used by IPD with the keytool:

3.3 3.4

And now you can intercept encrypted traffic from IPD as for example M3 Web Services in this screenshot:
3.5


Cleanup

After your troubleshooting, remember to remove the proxy arguments from the IPD ini files or IPD will break if you don’t have Fiddler running, and remember to remove the Fiddler DO_NOT_TRUST root certificate.

Summary

That was a brief illustration of how to intercept network traffic from Infor Process Automation and Infor Process Designer using Wireshark and Fiddler, and how to intercept and decrypt HTTPS traffic. This is very useful for me to troubleshoot the Web Run and Web Services activity nodes, specially for M3 Web Services.


That’s it! If you liked this, please follow this blog, leave your comments, and share around you.

Git for M3 Web Services

Here is a preliminary illustration on how to use Git version control system with M3 Web Services Designer to manage changes to web services versions in multi-developer distributed projects. Since the M3 Web Services repository points to a folder of XML files it should be possible to use any revision control software like CVS, Subversion, Git, TFS, etc. Here I illustrate Git with some screenshots.

Install Git

  1. Download and install Git from http://git-scm.com/
    1
  2. I use the default options and Next > Next > … > Finish:
    2
  3. Start Git GUI from the Windows Start menu:
    6

M3 Web Service Repository

  1. Let’s suppose we have a remote M3 Web Service Repository at \\collaboration\MWS\Repository\ with our metadata files:
    0
  2. And let’s suppose we want to manage those files in Git.
  3. For that, we’ll take that existing directory and import it into Git.

Create a Git Repository

  1. In Git GUI select Create New Repository:
    20
  2. Enter the path to the web service repository, for example \\collaboration\MWS\Repository\ :
    3
  3. Git GUI shows the files in the Unstaged state:
    4
  4. Selection Edit > Options to identify ourselves:
    5
  5. Enter your User Name and Email Address:
    6
  6. Select Commit > Stage Changed Files To Commit (CTRL-I) to add a snapshot of the files to the staging area, and click Yes to confirm:
    7
  7. The files are now in the Staged state:
    8
  8. Enter an Initial Commit Message and select Commit:
    9
  9. The files are now permanently committed and safely stored in the Git Repository:
    10
  10. And the folder now contains a hidden .git folder:
    11

Install EGit for Eclipse

  1. Let’s install EGit for Eclipse on one of the developer’s computer (you’ll repeat these steps for each developer in your team):
    0
  2. Start MWS Designer and discard the web service repository location to avoid confusion for now:
    1
  3. Select Help > Install New Software:
    1
  4. Select the default Eclipse site, for example Kepler – http://download.eclipse.org/releases/kepler , filter for Git, and select Eclipse Git Team Provider:
    2
  5. Click Next > Next > … > Finish and restart Eclipse for the changes to take effect.
  6. Select Window > Open Perspective > Other > Git Repository Exploring:
    1
  7. It will switch to the Git Repository Exploring:
    2
  8. Repeat the steps for each developer in your team.

Clone the Git Repository

Now we’ll clone the Git Repository to get a local copy of it:

  1. In the Git Repository Exploring, select Clone a Git repository.
  2. Enter the path to the remote Git Repository, for example: \\collaboration\MWS\Repository\ and click Next:
    3
  3. Keep the default master branch and click Next:
    4
  4. Select a local destination, for example C:\MWS\Repository\ and click Finish:
    5
  5. EGit will show the Repository and the Working Directory:
    6
  6. You now have a copy of the web service metadata files in your local directory with a hidden .git folder:
    7
  7. In Eclipse, switch back to the MWS Designer perspective.
  8. Select New Repository Location and enter the cloned Git repository, for example: C:\MWS\Repository\ and click Finish:
    8
  9. Your MWS Designer now has a local copy of the web services:
    9
  10. Repeat for the other developers in your team.

That’s as far as I got for now.

After that I was able to create a branch and make changes. But I got an error when I tried to merge my changes; EGit seems to truncate the path to my shared folder and not recognize it anymore. I’ll explore more about it later.

How to dynamically consume a M3 Web Service in C#

Previous posts have dealt successfully with how to consume a web service and how to use the SmartOffice DynamicWs classes.  This post will help if you need something which is dynamic, yet decoupled from SmartOffice.

This is a sample based on the WCF Dynamic Proxy classes available under a Microsoft Public License in the msdn archive.

For initial reference we have a standard C# invocation using a generated service reference.  The web service we are using is API_MNS150MI_GetUserData.

ScreenShot2390

The only tricky part here is ensuring the http authentication is set so that Web services accepts you as a valid user.

Here is the code for the static call against the generated service reference.

using System;
using System.Collections.Generic;
using System.Linq;
using System.Text;
using System.Net;
using System.IO;
using WebServiceStatic.API131;
using System.ServiceModel;

namespace WebServiceStatic
{
class Program
{
static void Main(string[] args)
{
// Create a client with basic http credentials
API_MNS150MI_GetUserDataClient client = new API_MNS150MI_GetUserDataClient();
System.ServiceModel.BasicHttpBinding binding = new System.ServiceModel.BasicHttpBinding();
binding.Security.Mode = BasicHttpSecurityMode.Transport;
binding.Security.Transport.ClientCredentialType = HttpClientCredentialType.Basic;
binding.MaxReceivedMessageSize = 25 * 1024 * 1024;
client.Endpoint.Binding = binding;

// show endpoint address
Console.WriteLine(client.Endpoint.Address);
Console.WriteLine(client.Endpoint.Name);

// ask for UserID and password
Console.Write("User ID : ");
client.ClientCredentials.UserName.UserName = Console.ReadLine().Trim();
Console.Write("Password: ");
client.ClientCredentials.UserName.Password = Console.ReadLine().Trim();

// Create LWS header
lws header = new lws();
header.user = client.ClientCredentials.UserName.UserName;
header.password = client.ClientCredentials.UserName.Password;

// Create a requests item
GetUserDataItem item1 = new GetUserDataItem();
item1.USID = client.ClientCredentials.UserName.UserName;

// construct a collection for the request item (only 1 accepted?)
GetUserDataCollection collection = new GetUserDataCollection();
collection.GetUserDataItem = new GetUserDataItem[] { item1 };

try
{
// execute the web service
GetUserDataResponseItem[] response = client.GetUserData(header, collection);
// loop through the response items (only 1) and output to console
foreach (GetUserDataResponseItem responseItem in response)
{
Console.WriteLine("User '{0}' description '{1}'", responseItem.USID, responseItem.TX40);
}
}
catch (Exception e)
{
// catch and display any errors
Console.WriteLine(e.Message);
}

// wait for user to press a key
Console.WriteLine("Press any key to continue...");
Console.ReadKey();
}
}
}

The result shows we have connected to the web service and retrieved the Users ID (USID) and description (TX40).

ScreenShot2391

Now we have the basic hard-coded example code as a template, we can use the DynamicProxyLibrary to do the same.

This dynamically creates an Assembly (dll) containing the service reference which we can use in place of a hard-coded Service reference.

This can be done without the DynamicProxyLibrary however as the DynamicProxy handles most of the Assembly/Reflection plumbing it is much easier to read and work with.

First create a project referencing the DynamicProxyLibrary in Visual Studio.

ScreenShot2393

Now it is possible to use the Dynamic proxy to call the web service without using a hard-coded service references, all field/property/class references can be coded as text.

using System;
using System.Collections.Generic;
using System.Linq;
using System.Text;

namespace WebServiceDynamic
{
using WcfSamples.DynamicProxy;
using System.ServiceModel.Description;
using System.ServiceModel;
using System.Reflection;

class Program
{
static void Main(string[] args)
{
string serviceWsdlUri = "https://m3app-2013.gdeinfor2.com:41964/mws-ws/services/API_MNS150MI_GetUserData?wsdl";
if (args.Length > 0)
serviceWsdlUri = args[0];

// create the dynamic proxy factory, that downloads the service metadata
// and create the dynamic factory.
Console.WriteLine("Creating DynamicProxyFactory for " + serviceWsdlUri);
DynamicProxyFactory factory = new DynamicProxyFactory(serviceWsdlUri);

// list the endpoints.
int count = 0;
foreach (ServiceEndpoint endpoint in factory.Endpoints)
{
// create proxy client
Console.WriteLine("Service Endpoint[{0}]", count);
Console.WriteLine("\tAddress = " + endpoint.Address);
Console.WriteLine("\tContract = " + endpoint.Contract.Name);
Console.WriteLine("\tBinding = " + endpoint.Binding.Name);
DynamicProxy clientProxy = factory.CreateProxy(endpoint.Contract.Name);

// Create a client with basic http credentials
System.ServiceModel.BasicHttpBinding binding = new System.ServiceModel.BasicHttpBinding();
binding.Security.Mode = BasicHttpSecurityMode.Transport;
binding.Security.Transport.ClientCredentialType = HttpClientCredentialType.Basic;
binding.MaxReceivedMessageSize = 25 * 1024 * 1024;
ServiceEndpoint clientEndpoint = (ServiceEndpoint)clientProxy.GetProperty("Endpoint");
clientEndpoint.Binding = binding;

// ask for UserID and password
ClientCredentials credentials = (ClientCredentials)clientProxy.GetProperty("ClientCredentials");
Console.Write("User ID : ");
credentials.UserName.UserName = Console.ReadLine().Trim();
Console.Write("Password: ");
credentials.UserName.Password = Console.ReadLine().Trim();

// Create LWS header
Type lwsType = clientProxy.ProxyType.Assembly.GetType("lws");
DynamicObject header = new DynamicObject(lwsType);
header.CallConstructor();
header.SetProperty("user", credentials.UserName.UserName);
header.SetProperty("password", credentials.UserName.Password);

// Create a requests item
Type itemType = clientProxy.ProxyType.Assembly.GetType("GetUserDataItem");
DynamicObject item = new DynamicObject(itemType);
item.CallConstructor();
item.SetProperty("USID", credentials.UserName.UserName);

// Add the user request item to an array of 1
Array itemArray = Array.CreateInstance(item.ObjectType, 1);
itemArray.SetValue(item.ObjectInstance, 0);

// construct a collection for the request item (only 1 accepted?)
Type collectionType = clientProxy.ProxyType.Assembly.GetType("GetUserDataCollection");
DynamicObject collection = new DynamicObject(collectionType);
collection.CallConstructor();
collection.SetProperty("GetUserDataItem", itemArray);

try
{
// execute the web service
Array responseCollection = (Array)clientProxy.CallMethod("GetUserData", new object[] { header.ObjectInstance, collection.ObjectInstance });
// loop through the response items (only 1) and output to console
foreach (object responseItemObject in responseCollection)
{
DynamicObject responseItem = new DynamicObject(responseItemObject);
Console.WriteLine("User '{0}' description '{1}'",
responseItem.GetProperty("USID"),
responseItem.GetProperty("TX40"));
}
}
catch (Exception e)
{
// catch and display exceptions
Console.WriteLine(e.Message);
// catch and display inner exception (this is the real error from the web service call)
if (e.InnerException != null)
{
Console.WriteLine(e.InnerException.Message);
}
}
// close the connection
clientProxy.Close();
}

Console.WriteLine("Press any key...");
Console.ReadKey();
}

}
}

The result shows that we can use the DynamicProxyFactory to get some basic information about the web service, then consume the web service.

ScreenShot2392

Regards,

Lee Flaherty

UPDATE: This was tested against M3 10.1 and M3 13.1 both running on the grid.  It may, or may not, work on other versions.