Today I will revisit my previous articles on H5 Client and M3 API with jQuery DataTables: I will correct a few mistakes in my code, I will update the code to the latest versions of jQuery and DataTables, and I will introduce new features.
Motivation: IBrix conversion
I’m helping a customer convert their old IBrix to HTML5/JavaScript. The IBrix we’re starting with uses a lot of M3 API and M3 Web Services (MWS), as well as IPM <c:table> components to render resulting data in selectable lists of rows and columns. To replace that, we could write Infor Smart Office Mashups that use the controls m3:MIListPanel, m3:MIPanel, and mashup:DataService, but the customer won’t use Smart Office as their main user interface; they’ll use Infor M3 H5 Client instead. Alternatively, we could convert the Smart Office Mashups to Web Mashups for H5 Client, but Web Mashups currently don’t support the MI controls. Infor says they are adding support for more and more controls, but they haven’t released any specific information on which controls they’ll add nor on what timeline. The customer couldn’t wait for Web Mashups to support those controls, so we decided to rewrite the IBrix from scratch using HTML5/JavaScript, and to re-evaluate Web Mashups later when Infor releases something new in the future. We opted for jQuery as the JavaScript library – as opposed to another JavaScript library like Dojo – because jQuery is already used by H5 Client and Web Mashups, so if we have to learn something new we might as well just learn one. As part of this learning process, I will share with you what I learn.
Files & folders
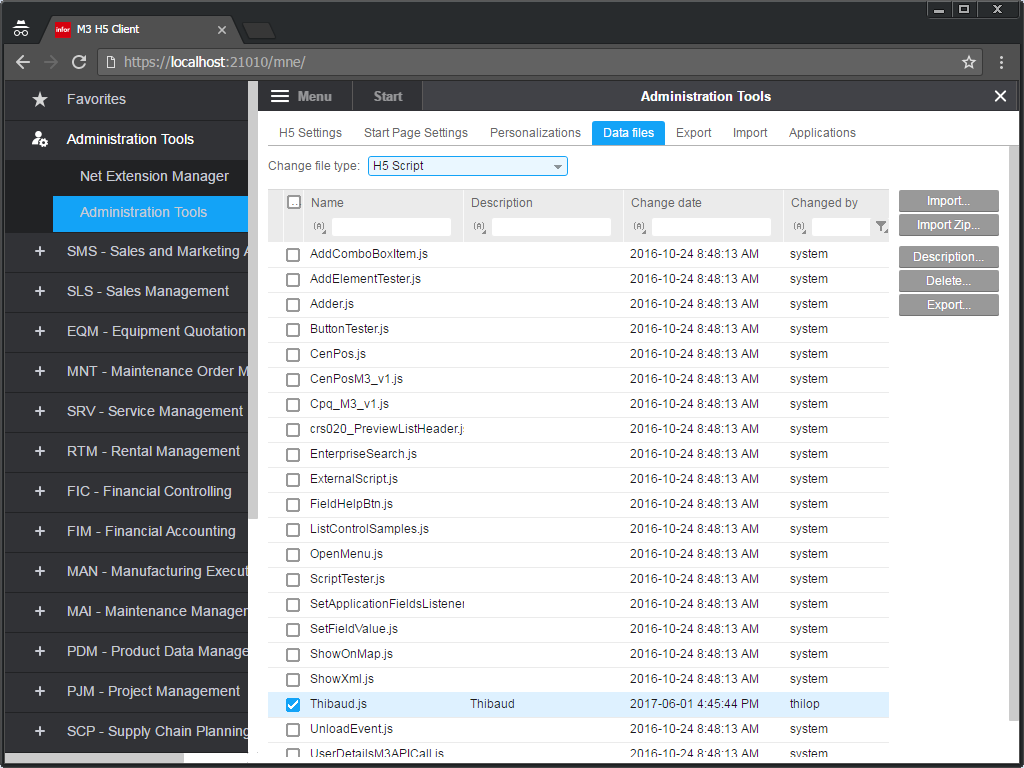
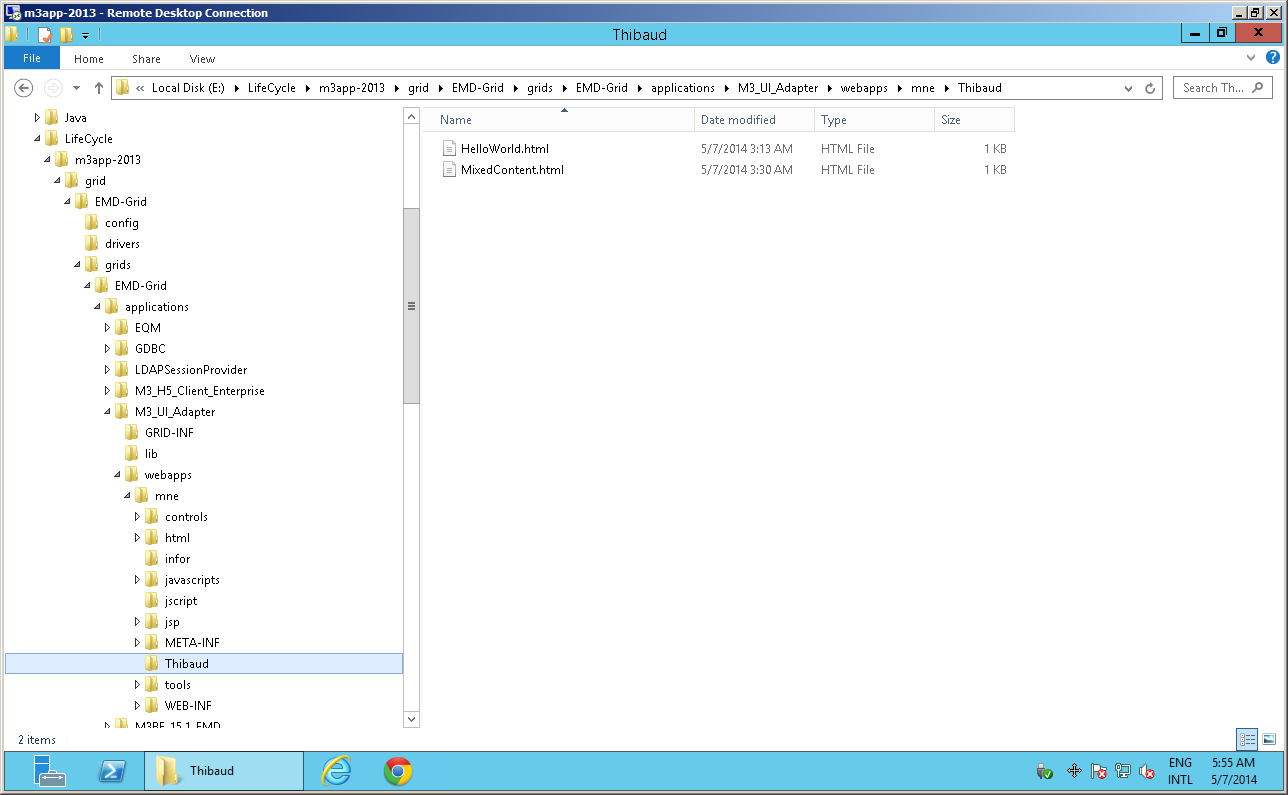
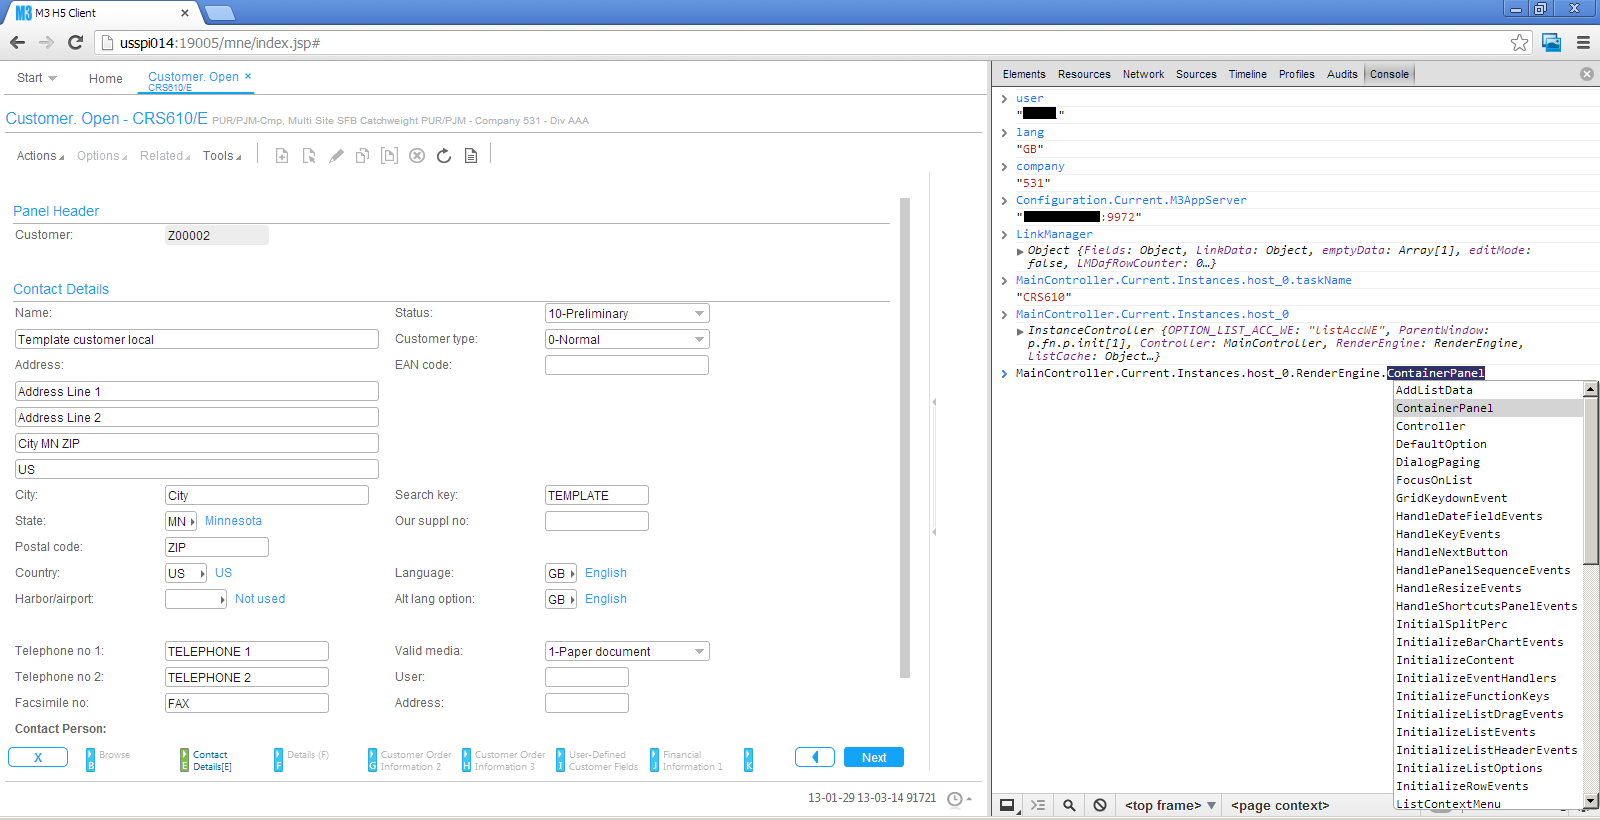
I haven’t yet found a good place to put my HTML5/JavaScript code. So for now I will continue to use the mne folder in Infor LifeCycle Manager where I have my own sub-folder:

It’s probably not the best idea, but we already trust Smart Office Script files in the jscript sister folder, so I don’t yet see a problem with putting other files in a sibling folder. The only problem could be an upgrade or a migration that wouldn’t account for our piggyback folder and our folder could be lost (yikes!).
URI relative references
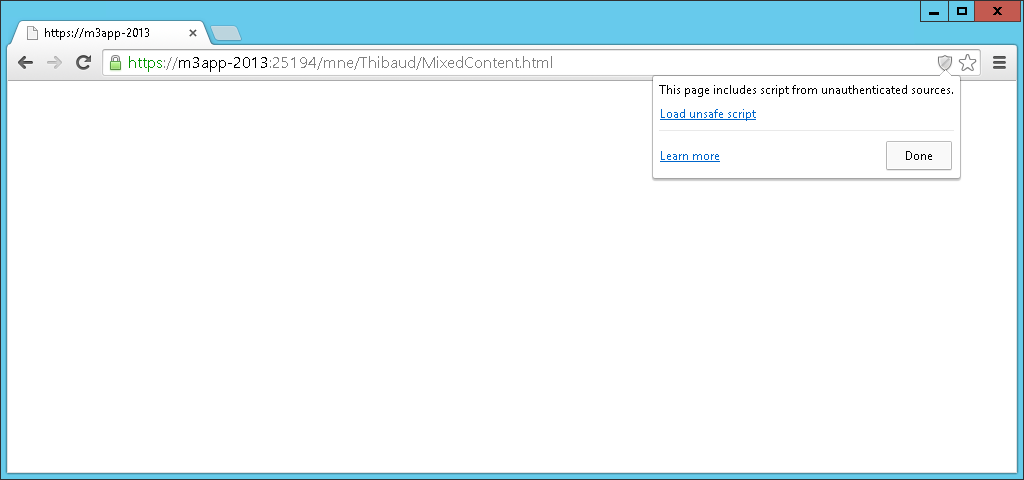
Most resources on the Infor Grid can be accessed over an insecure channel with HTTP, or over a secure channel with HTTPS, like many resources on the web. If our code requests resources over a mix of secure and insecure channels, and the user requests the page over a secure channel, the browser (for example Internet Explorer and Google Chrome) will protect the user: it will show a security icon in the address bar, it will show a security popup, and it will not load the resources that are over the unsecure channel unless the user confirms to do so:


The page behaves seemingly normal in one case and broken in another. It’s tricky to troubleshoot for the developer, users, support, etc.
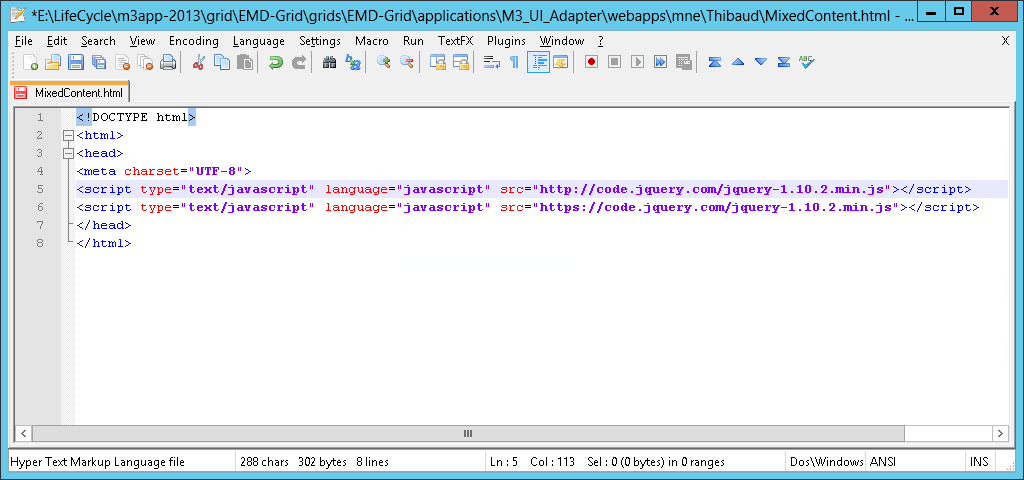
The solution is to use URI relative reference for scheme abstraction, i.e. remove the scheme part of the URI. The browser will then load the resources using the scheme the user chose in the first place, HTTP or HTTPS.
For example, replace this:
http://code.jquery.com/jquery-1.10.2.min.js
https://code.jquery.com/jquery-1.10.2.min.js
with this:
//code.jquery.com/jquery-1.10.2.min.js
The resulting URI looks strange, yet it’s valid. It’s not a well-known technique, yet it has been in the URI specification for a long time. And it’s important in our case to prevent a potentially broken page that’s hard to troubleshoot.
URI relative references cont’d.
Also, the Infor Grid is a distributed system where the same application can run on any of the deployed nodes and any of the binding ports. Thus the variations in the URI can be on the scheme HTTP/HTTPS, the host A or B, and the port number X or Y. For example the user could legitimately request any of these and should get the same Grid application:
So our code must account for this possibility. If we used absolute URI in our code, H5 Client and our code wouldn’t be within the same document origin, and we could run into same-origin policy restrictions.
The solution is to use relative references again, this time just with the path and query parts of the URI, without the scheme://host:port parts.
For example, use:
/m3api-rest/execute/CRS610MI/GetBasicData;returncols=CUNM?CONO=910&CUNO=ACME
instead of:
https://host:48494/m3api-rest/execute/CRS610MI/GetBasicData;returncols=CUNM?CONO=910&CUNO=ACME
Caching
As we’re developing for the web, we have to be cognizant of caching and cookies. In my case I’m developing static HTML pages that I’m updating frequently (within seconds). I’m using a browser to execute the page. The browser caches the page, and there could be proxies along the way that cache the page. I’m using Fiddler to intercept M3 API requests/responses. MNE uses cookies to maintain the session across requests. To prevent caching, I use Fiddler > Rules > Performance > Disable caching, and I switch with the anonymous mode of the browser, InPrivate Browsing in Internet Explorer, and Incognito window in Chrome to start fresh without cookies. And I check my page versions and cookies in the HTTP Responses in Fiddler.
Security vulnerability
H5 Client is one of the Grid applications that will work over both HTTP-only, an insecure channel, and HTTPS, a secure channel. Unfortunately, when using HTTP, the login phase is done over HTTP-only as well, it’s not redirected over HTTPS and back like M3 Workplace did, and as all sites should do. So the user/password is sent Base64-encoded over the network, i.e. in clear text:

I validated this with H5 Client 10.2.1.2 (Enterprise):

That’s a security vulnerability. So I’m looking into if this was an undetected installation/configuration mishap, and how to force HTTPS-only and prevent HTTP, at least for the login phase, or at default for the entire MNE. I reported this to Infor. To be further investigated.
H5 Client is usually confined to the corporate network behind firewall and NAT, so this is not as big a risk as with a vulnerability that would be exposed on the Internet.
UPDATE 2014-05-07: It appears this was a misconfiguration of the particular Grid I tested. Check your Grid in case you too have an undetected misconfiguration. Go to: Grid Management > M3_H5_Client > Web Components > Web Routers > Configure. The WWW Authentication Methods should only be checked for HTTPS, and unchecked for HTTP. I don’t do installations/configurations of the Grid, so this is to be confirmed by a certified installer.
H5 Client lifetime
Let’s learn more about the H5 Client lifetime: login, session handling, keep alive, and logout.
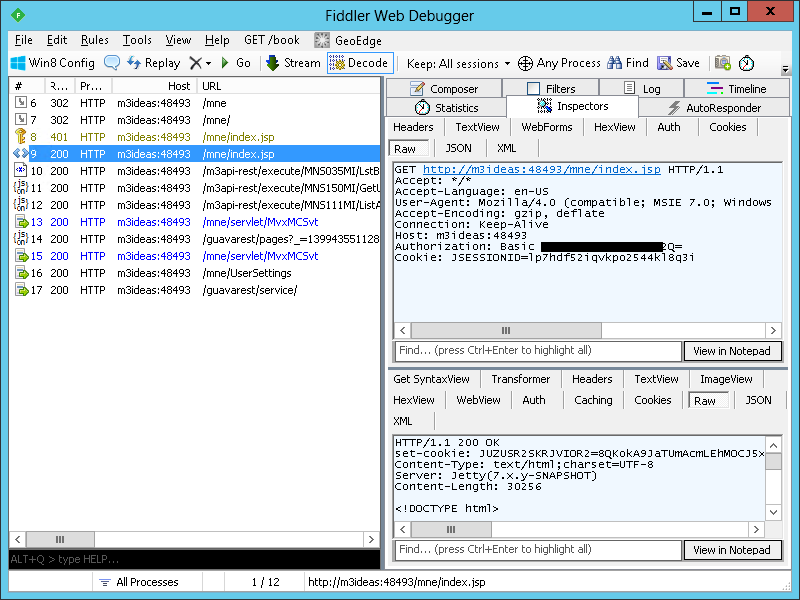
- When the user requests H5 Client at /mne, /mne/, or /mne/index.jsp, the J2EE Jetty server sets a new cookie JSESSIONID for the session. I don’t yet know where that cookie is used.
- At /mne/index.jsp the server will challenge the client for authentication, and the browser will prompt the user for id/password in a popup.
- The user enters the M3 userid/password, and the browser sends that Base64-encoded along with the JSESSIONID cookie. The Authorization header will be transmitted throughout the session.
- The server authenticates the credentials and responds with a new cookie JUZUSR2SKRJVIOR2. This cookie will be used by the browser to maintain the session across requests, and it’s even validated by M3 API and MWS which will be very useful later.
- At this point we can add our HTML5/JavaScript code into an H5 Client Page. The browser will pass along the JUZUSR2SKRJVIOR2 cookie and authenticate our M3 API and MWS requests.
- Also, H5 Client will POST a CMDTP=LOGON to the MNE server with the userid UID and the two cookies. The server seems to ignore the cookies here.
- The server will respond with the MNE session id SID.
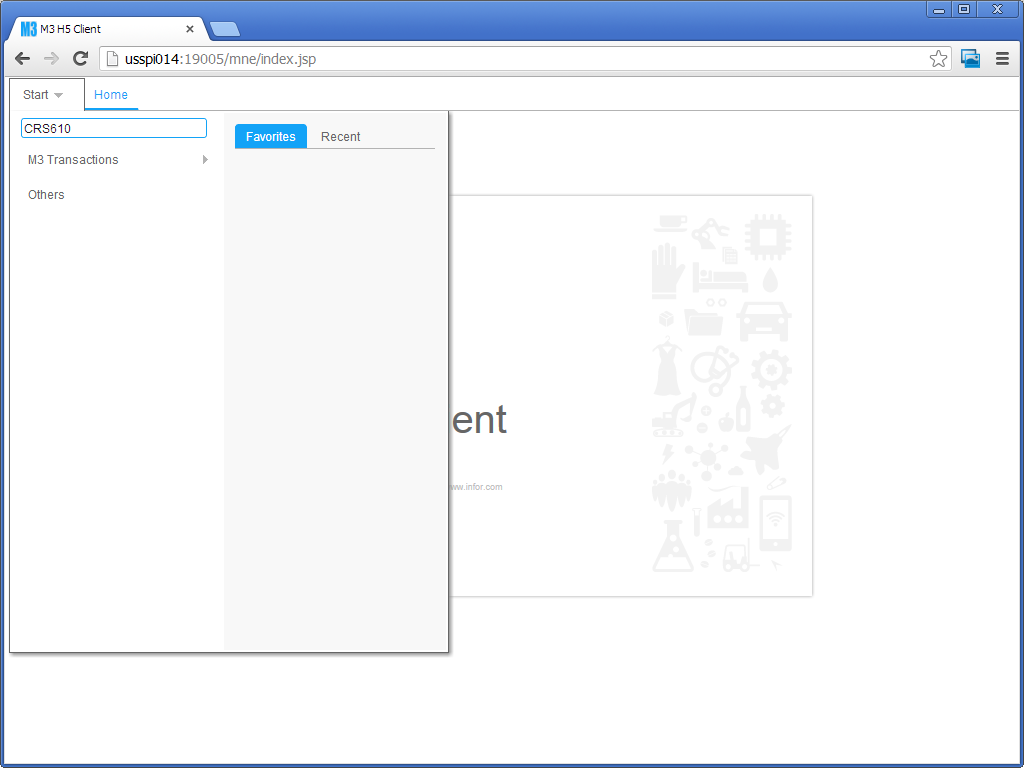
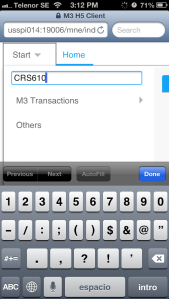
- Then the user optionally opens an M3 Program like CRS610.
- When the user closes the browser, H5 Client will issue CMDTP=QUIT with the SID, and the server will logout that user from M3 and invalidate that SID. However, the cookies are not invalidated. Is that another potential security vulnerability?
- Also, H5 Client does ping with CMDTP=FNC&CMDVAL=PING at about a 25mn frequency to maintain the session alive and not let it timeout.
We can now draw some useful conclusions:
- For H5 Client, we need the SID parameter, and either the HTTP Basic Authorization header or the cookie JUZUSR2SKRJVIOR2.
- For M3 API and M3 Web Services, we can use either the HTTP Basic Authorization header or the cookie JUZUSR2SKRJVIOR2. This will prove very useful later.
The JSESSIONID cookie doesn’t seem to be used anywhere.
In my observations, I saw both a HTTP Basic Authorization header and the cookie JUZUSR2SKRJVIOR2 throughout the session, and that seems redundant to me as we only need one, not both. I don’t see an impact yet.
I did my tests by analyzing the HTTP Requests/Responses with Fiddler, and with forged HTTP Requests in Fiddler Composer to try the various combinations. And I did my tests in a rush so not everything might be accurate. Please comment if you find a discrepancy. All I wanted to know was how to authenticate the M3 API and MWS requests.
M3 API authentication
We now know we don’t need to authenticate our M3 API requests, i.e. we don’t need to hard-code any userid/password in our code nor prompt the user to login, provided we conform to the following:
- Our code must run within the same browser session as H5 Client, i.e. same origin, for example in an H5 Page.
- Remove any authentication from our code, i.e. remove any user/password, and don’t authenticate HTTP Requests to M3 API or MWS.
- Use only the path & query parts of the URL without the scheme://host:port, so for example use just /m3api-rest, in order to be within the same origin, so the browser will pass the cookie along, regardless of scheme HTTP/HTTPS, host/FQDN, port
Alternatively, we could build our own login page, but we would have to deal with password management (password expired, forgot password), session keep-alive, and logout.
M3 API with jQuery.ajax()
In my previous article, I had use the native XMLHttpRequest object to call the M3 API. This time I will use jQuery.ajax():
	$(document).ready(function () {
		$.ajax({
			url : "/m3api-rest/execute/CRS610MI/GetBasicData;returncols=CUNM,TOWN,ECAR,PONO,CSCD?CONO=910&CUNO=ACME",
			"dataType": "json"
		})
	});
jQuery DataTables
Now to render the M3 API into a jQuery DataTable, I won’t do a time and memory consuming row and cell creation anymore. I’ll simply use the jQuery DataTables Custom data source property dataSrc:
	var program = 'CRS610MI';
	var transaction = 'LstByNumber';
	var maxrecs = 100;
	var returncols = 'CUNO,CUNM,CUA1,TFNO,STAT';
	var inputFields = 'CONO=910&CUNO=ACME';
	// construct the URL
	var url = '/m3api-rest/execute/' + program + '/' + transaction + ';maxrecs=' + maxrecs + ';returncols=' + returncols + '?' + inputFields;
	// prepare the columns for dataTable
	var arr = returncols.split(',');
	var columns = [];
	for (var i in arr) {
		columns[i] = { "data": arr[i] };
	}
	$(document).ready(function () {
		var table = $('#CustomerList').dataTable( {
			"ajax": {
				"url": url,
				"dataSrc": function (json) {
					var result = [];
					for (var i in json.MIRecord) {
						var record = {};
						json.MIRecord[i].NameValue.map(function(o){ record[o.Name] = o.Value; });
						result[i] = record;
					}
					return result;
				}
			},
			"columns": columns
		});
	});
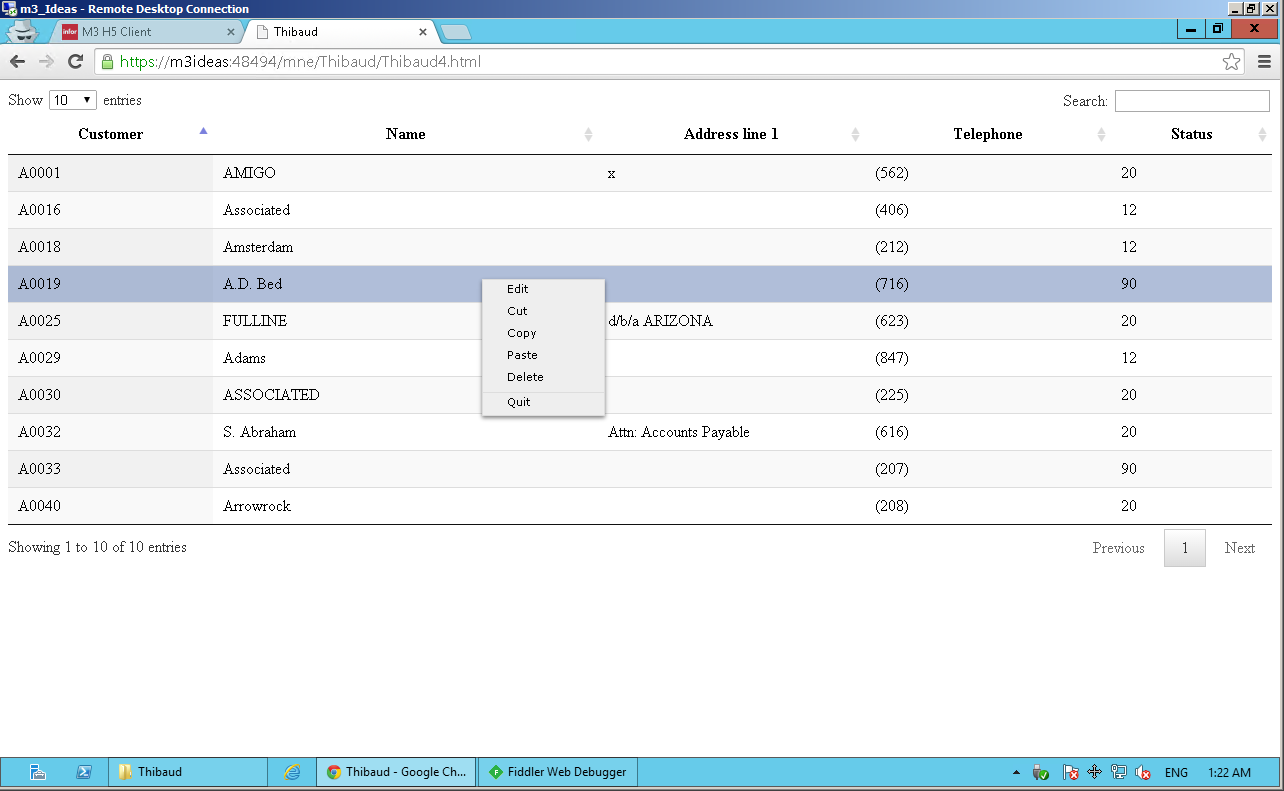
And the HTML fragment with the column headers:
	<table id="CustomerList" class="display" cellspacing="0" width="100%">
		<thead>
			<tr>
				<th>Customer</th>
				<th>Name</th>
				<th>Address line 1</th>
				<th>Telephone</th>
				<th>Status</th>
			</tr>
		</thead>
	</table>
Row selection
To enable row selection:
	$('#CustomerList tbody').on('click', 'tr', function () {
		if ($(this).hasClass('selected')) {
			$(this).removeClass('selected');
		} else {
			table.$('tr.selected').removeClass('selected');
			$(this).addClass('selected');
		}
	});
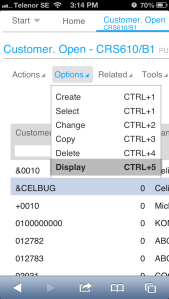
Context menu
To get a context menu (right-click), I use jQuery contextMenu, and it looks like this (unfinished code):
	$(function(){
		$.contextMenu({
			selector: '#CustomerList tbody',
			callback: function(key, options) {
				// PENDING
			},
			items: {
				"Select": {name: "select", icon: "select"},
				"Copy": {name: "copy", icon: "copy"},
				"Change": {name: "change", icon: "edit"},
				"Display": {name: "display", icon: "display"},
				"Delete": {name: "delete", icon: "delete"}
			}
		});
	});
I’m still working on completing this code.
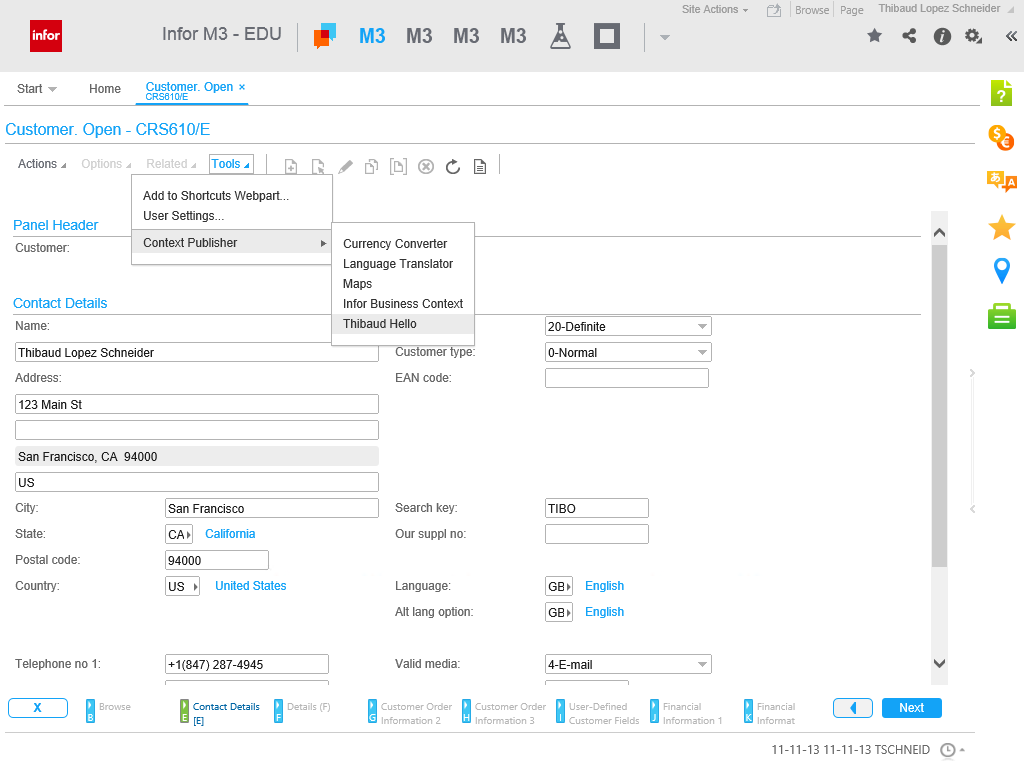
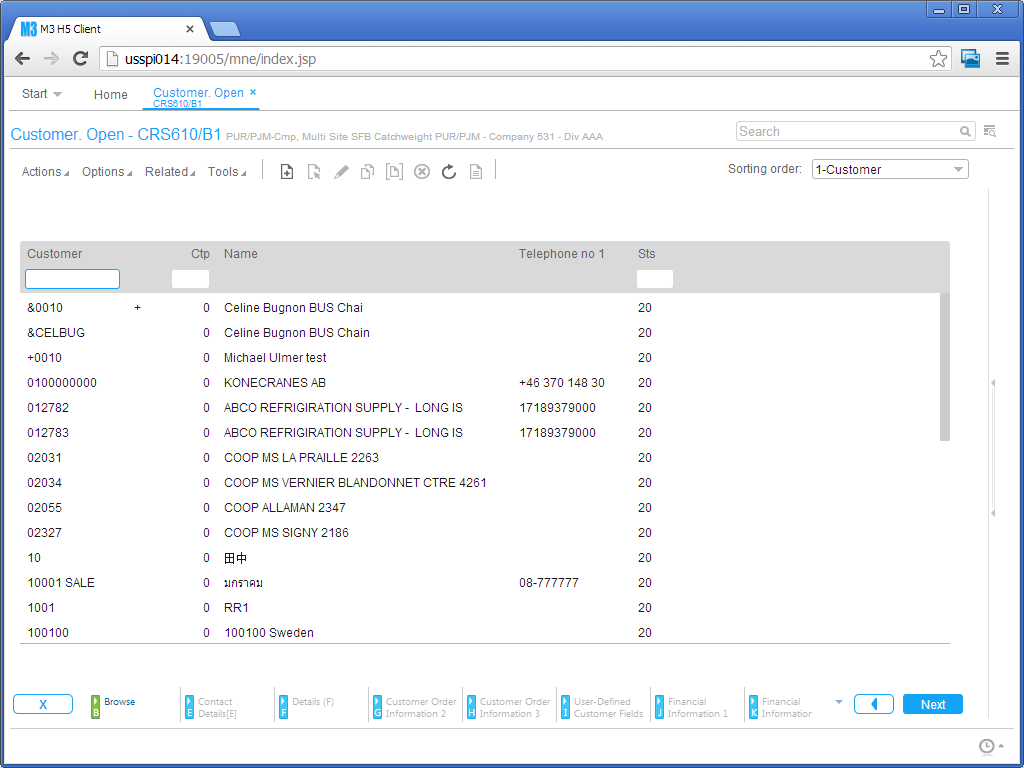
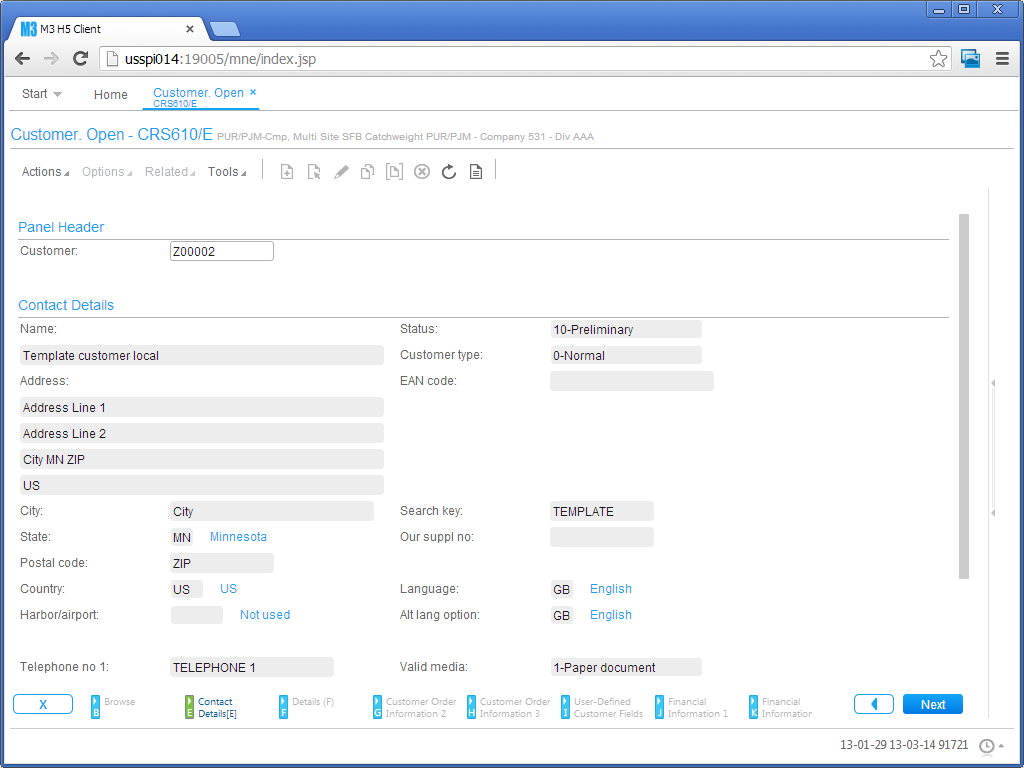
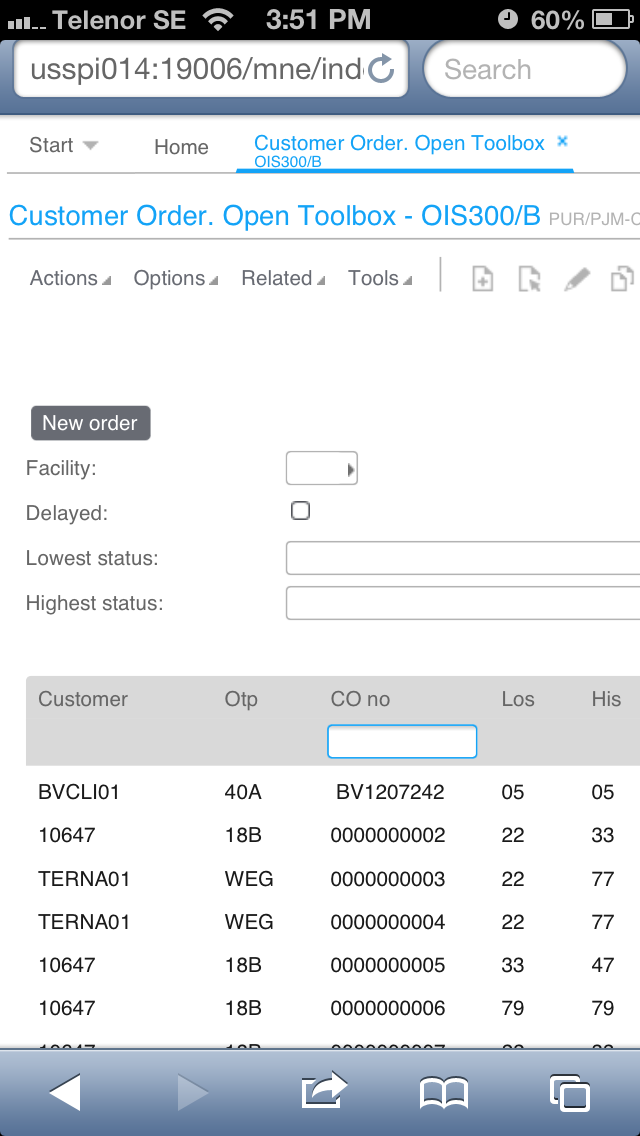
Result
Here’s a screenshot of the result:

Also, jQuery DataTables supports client-side search, pagination, and sorting. It took about 6s to load and render 3,000 rows. That’s about 2ms per row, not bad. But I will look into making this server-side anyway as client-side is not suitable for production.
Conclusion
In this post, we re-visited how to call M3 API with jQuery, how to take care of authentication, how to maintain the session across requests, how to do session keep alive, and logout (in fact H5 Client takes care of it, and the browser passes along the session to our code provide we conform to certain conditions), how to render the result with jQuery DataTables, how to enable row selection, and how to add a context menu.
As future work, I will follow-up on the security vulnerabilities, complete the code for the context menu, I will implement the equivalent of the SelectionChanged event of Mashups, I will render the M3 API Get with jQuery, and I will implement the F4-Browse dialogs of Ken Eric.
With all those simple engineering problems tackled one after the other, I will have a good basis to start converting IBrix to HTML5/JavaScript.
A more tricky engineering problem will be to implement the server-side search, pagination, and sorting.
Related articles
That’s it! This was a sloppy article put together hastily to get it out of my system and anchor it at once. It nonetheless contains useful information. I’ll be posting more. Stay tuned. Subscribe. Comment. Share. Enjoy.