Custom message process in MEC

Here is an unofficial guide on how to create a custom message process in Infor M3 Enterprise Collaborator (MEC).

What is a message process?

A message process in MEC is one of the steps in a process flow. Technically speaking, it is a Java class that reads a stream of bytes as an input, does some processing on it, and writes a stream of bytes as an output, for example transform a flat file to XML, apply XSLT to an XML, remove an envelope, archive the message, or make a SOAP request. Message processes are chained together in a partner agreement in the Partner Admin Tool.

2_

Documentation

The Partner Admin Tool User Guide has some information about message processes:
1__

Java classes

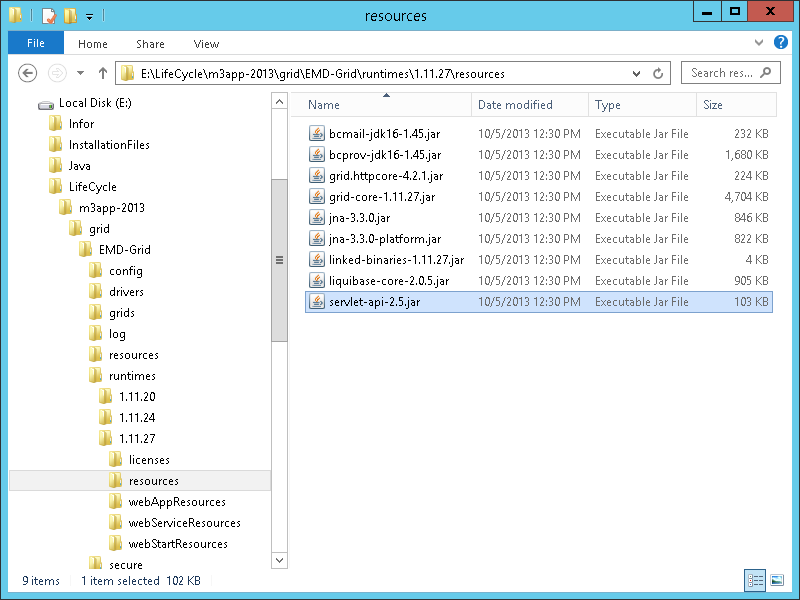
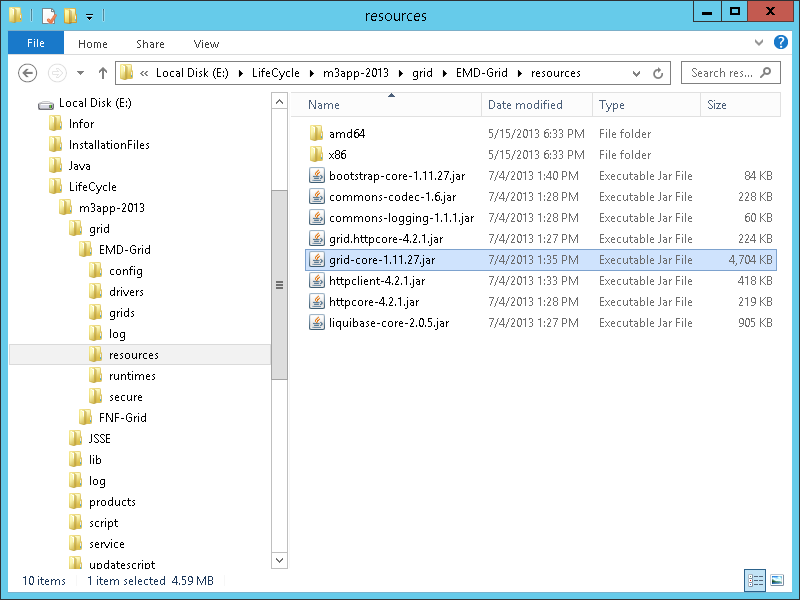
The message processes are Java classes located in MEC’s core library:

D:\Infor\LifeCycle\host\grid\M3\grids\M3\applications\MECSRVDEV\MecServer\lib\ec-core-x.y.z.jar

Each message process is a Java class in package com.intentia.ec.server.process:4

Each message process may have a configuration dialog box in package com.intentia.ec.partneradmin.swt.agreement:
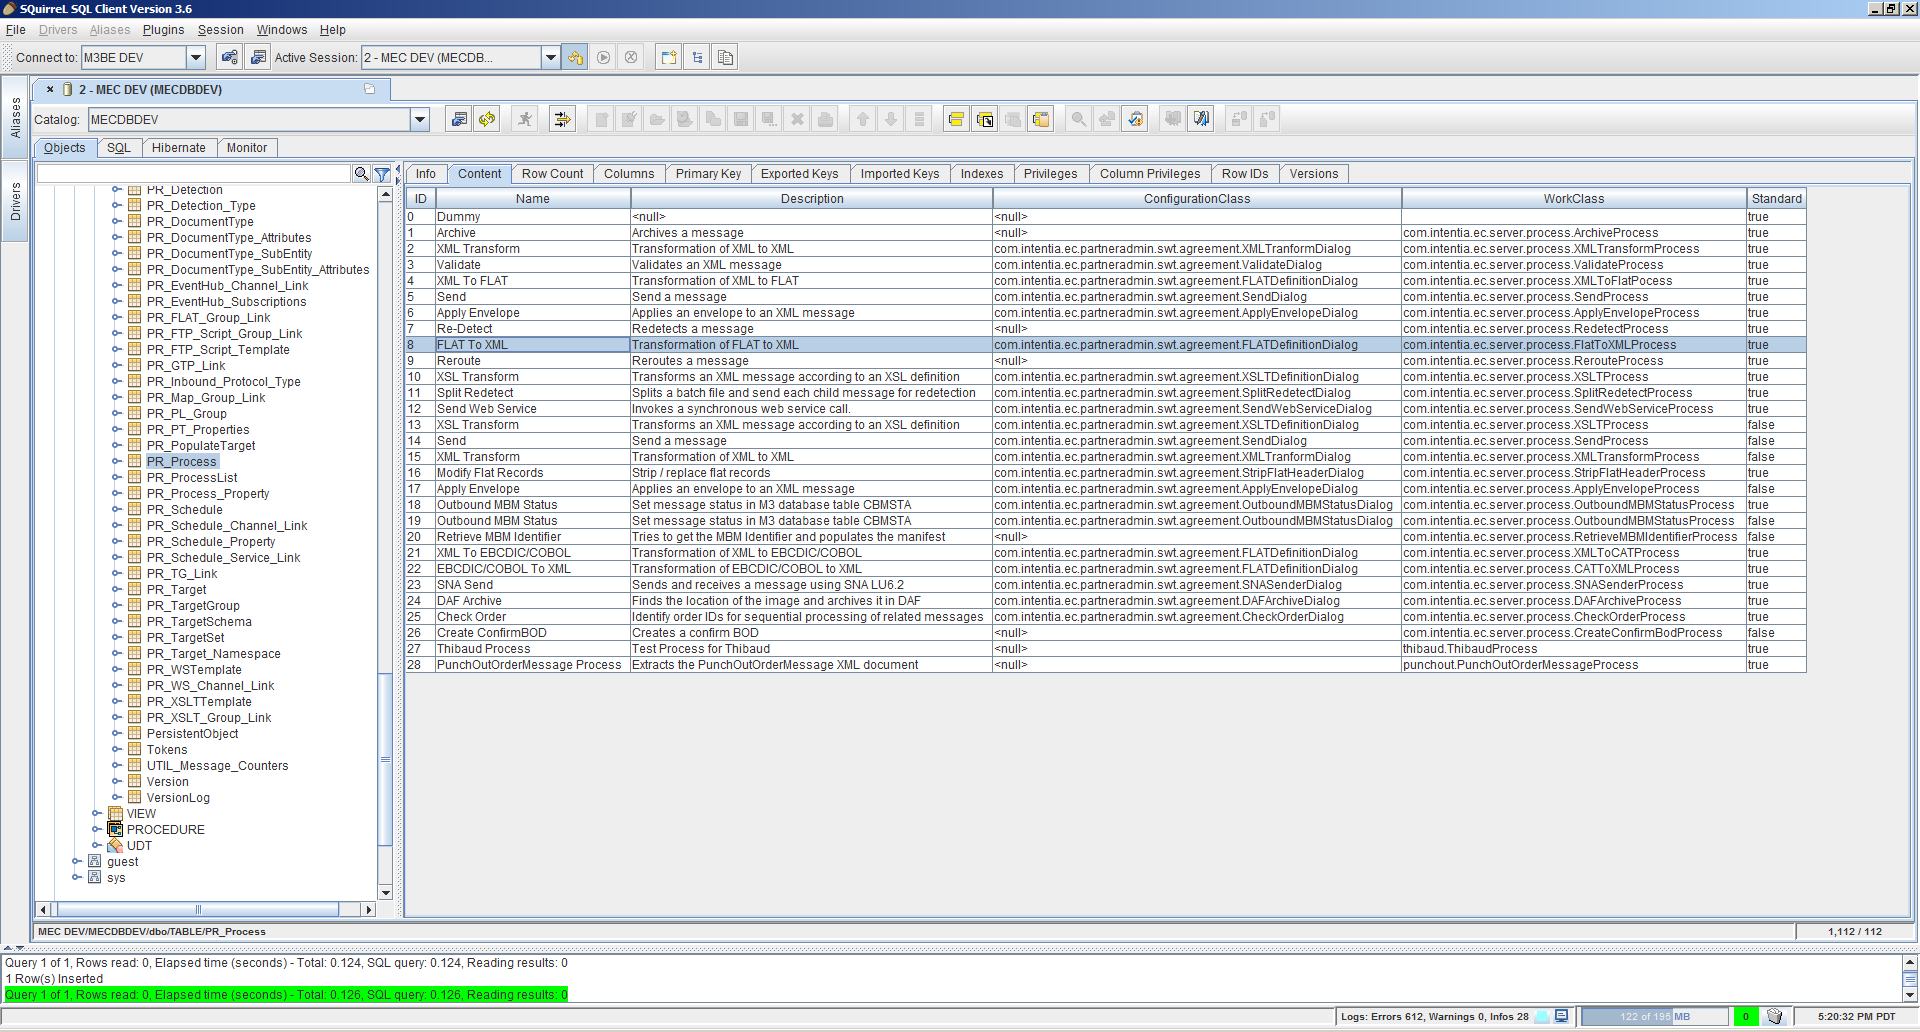
 3

Database

The message processes are declared in the MEC database in table PR_Process:
5

Java code

To create your own message process follow these steps:

  1. Use the following skeleton Java code, fill with your code, set the file extension for the output message (in my example it is .something), use the in input and out output streams to process the message as you need, and eventually use the cat logger to write debug info in the log file:
    package somewhere;
    
    import java.io.InputStream;
    import java.io.OutputStream;
    import org.apache.log4j.Category;
    import com.intentia.ec.server.process.AbstractProcess;
    import com.intentia.ec.server.process.ProcessException;
    
    public class SomeProcess extends AbstractProcess {
    
      private static Category cat = Category.getInstance(SomeProcess.class.getName());
    
      public String getState() {
        return "SomeProcess";
      }
    
      public boolean hasOutput() {
        return true;
      }
    
      public String getFileExtension() {
        return ".something";
      }
    
      public void process(InputStream in, OutputStream out) throws ProcessException {
        // your code here
        cat.info("processing...");
      }
    
    }

    Note: I do not have a sample code for the dialog box, but you can get inspiration from one of the existing classes in package com.intentia.ec.partneradmin.swt.agreement.

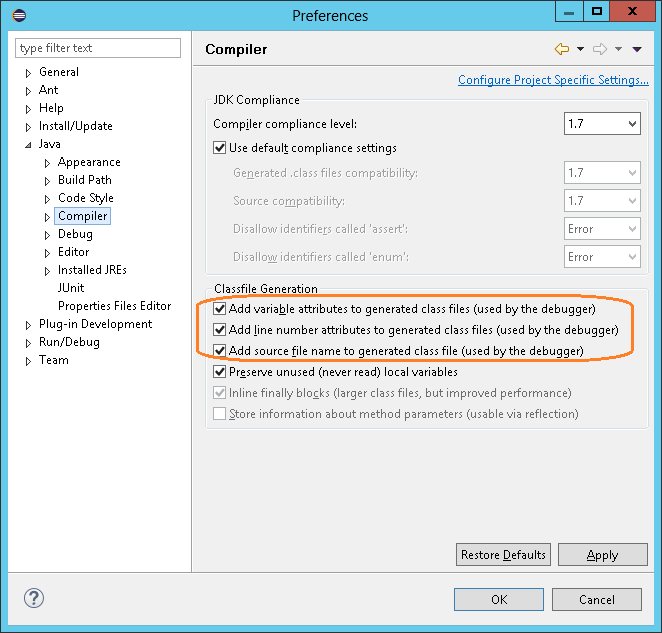
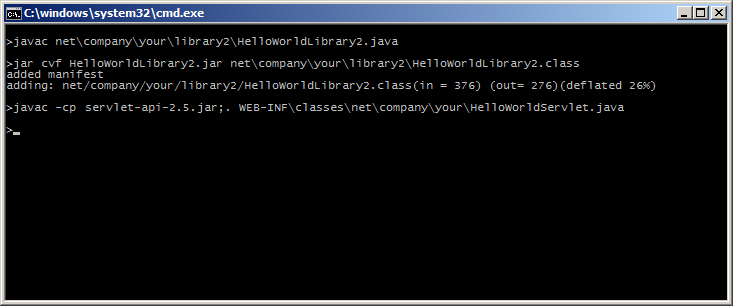
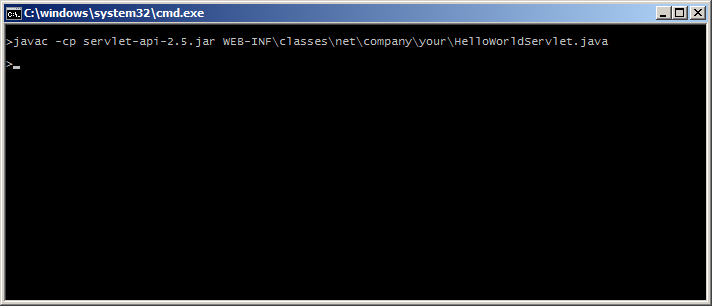
  2. Compile the Java code with:
    javac -extdirs D:\Infor\LifeCycle\host\grid\M3\grids\M3\applications\MECSRV\MecServer\lib\ SomeProcess.java
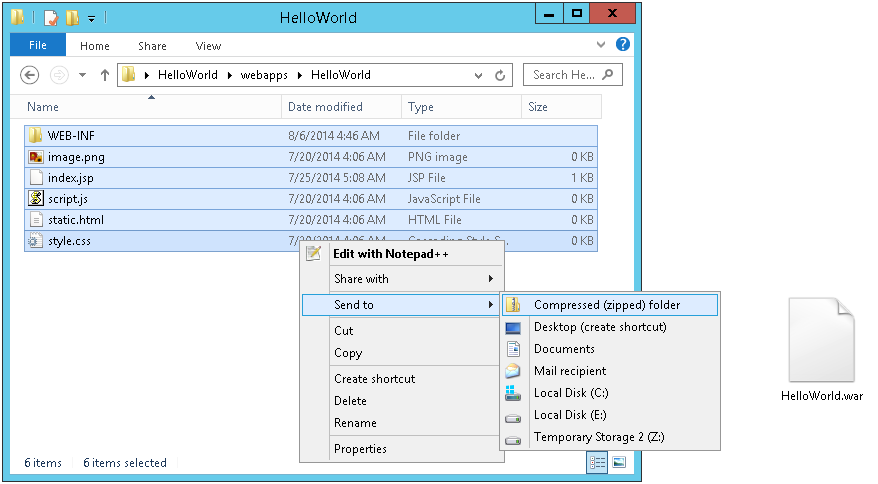
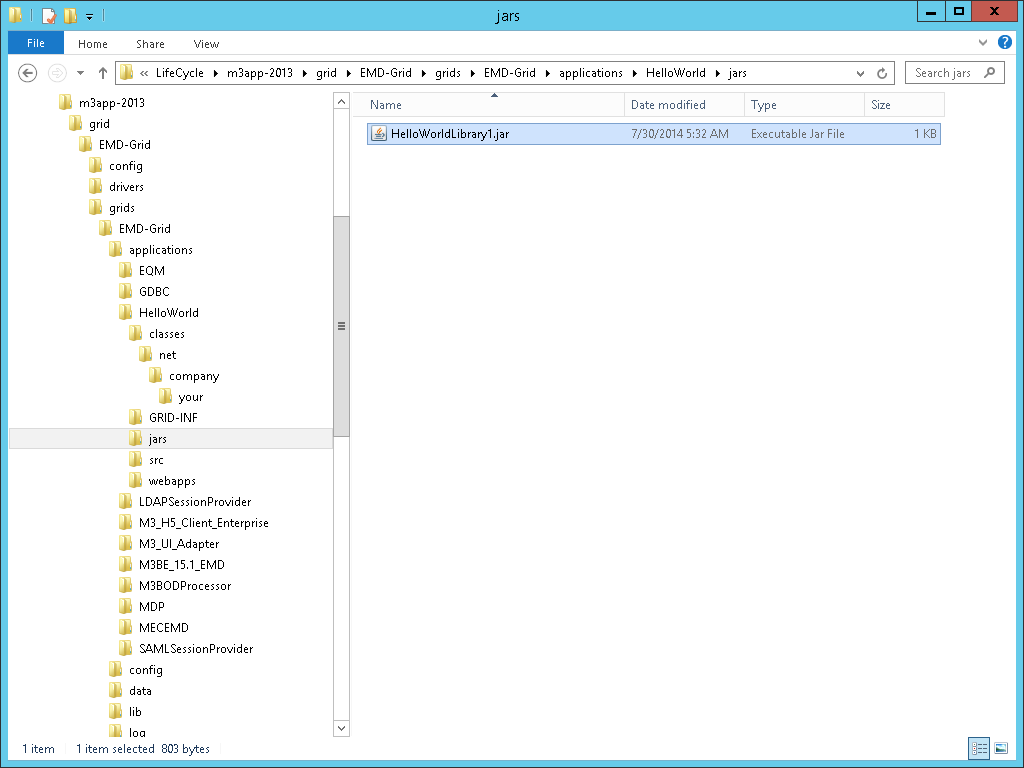
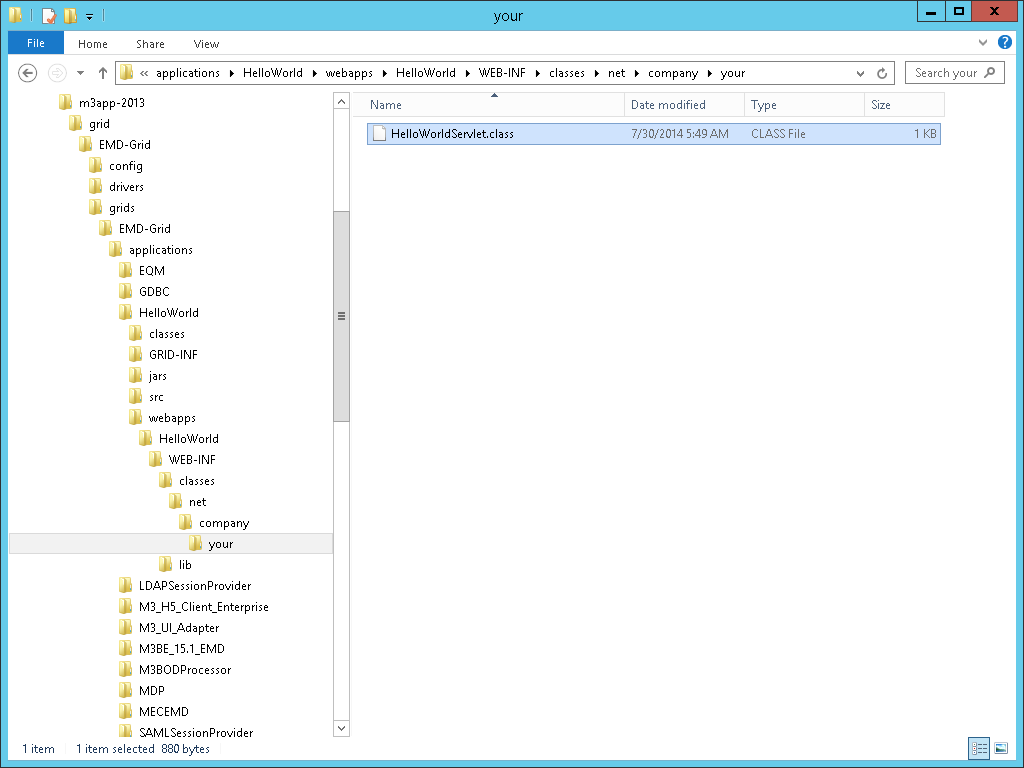
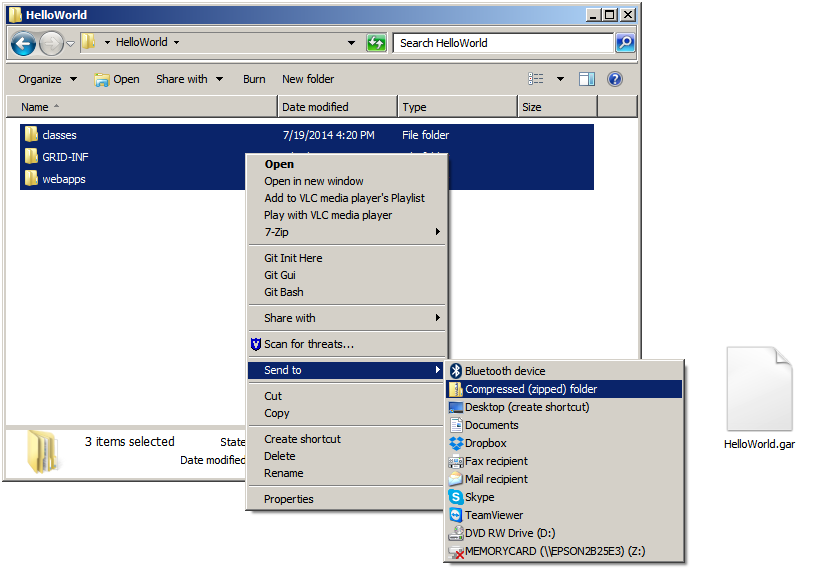
  3. Copy the resulting Java class to the classpath of the MEC server and Partner Admin Tool, in the folder corresponding to the package (in my case it was package somewhere):
    D:\Infor\LifeCycle\host\grid\M3\grids\M3\applications\MECSRV\MecServer\custom\somewhere\SomeProcess.class
    D:\Infor\MECTOOLS\Partner Admin\classes\somewhere\SomeProcess.class

    Note: You can probably also put the Java class in a JAR file; to be tested.

  4. In the MEC database, add the process to the PR_Process table, where ?? is a new ID, for example 27:
    INSERT INTO MECDBDEV.dbo.PR_Process (ID, Name, Description, ConfigurationClass, WorkClass, Standard) VALUES (??, 'Thibaud Process', 'My custom message process', null, 'somewhere.SomeProcess', 1)
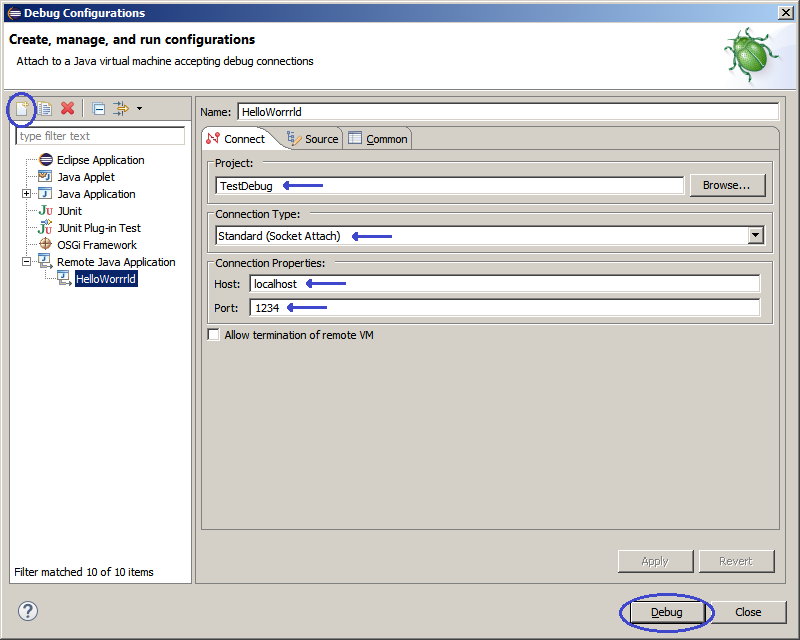
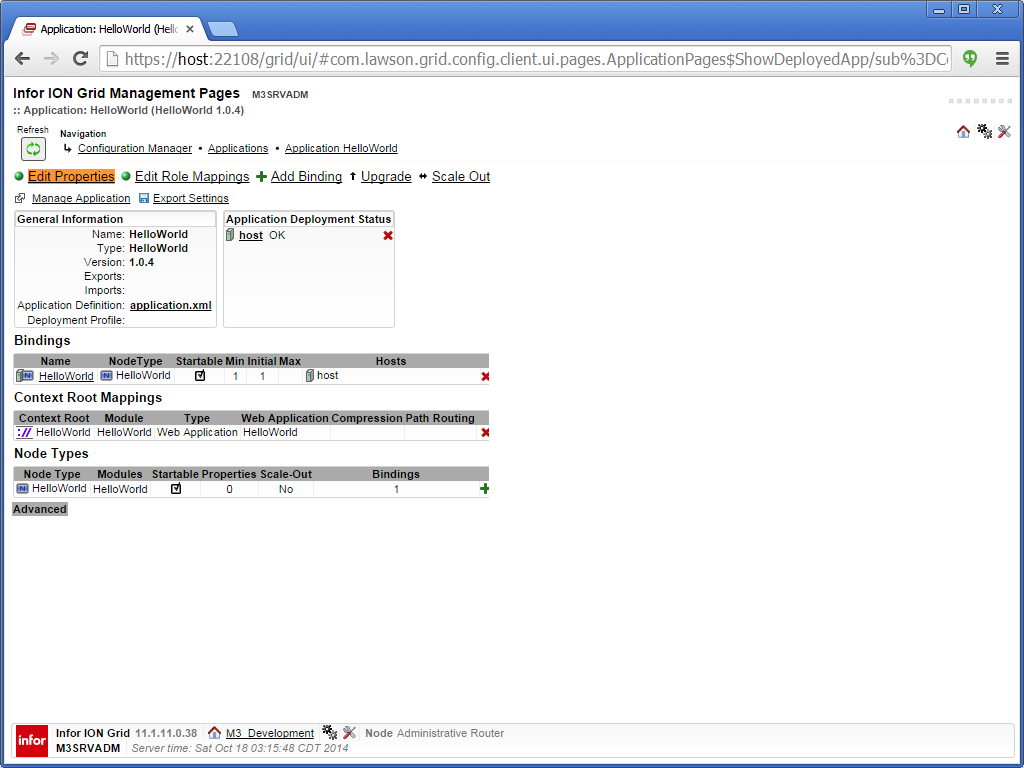
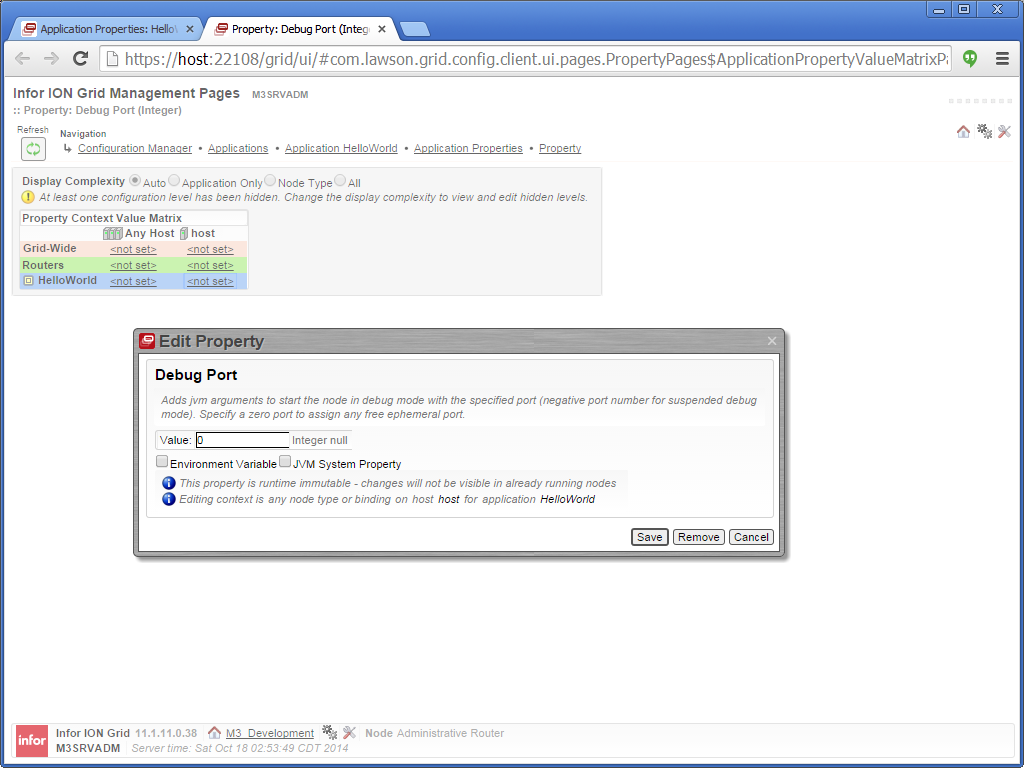
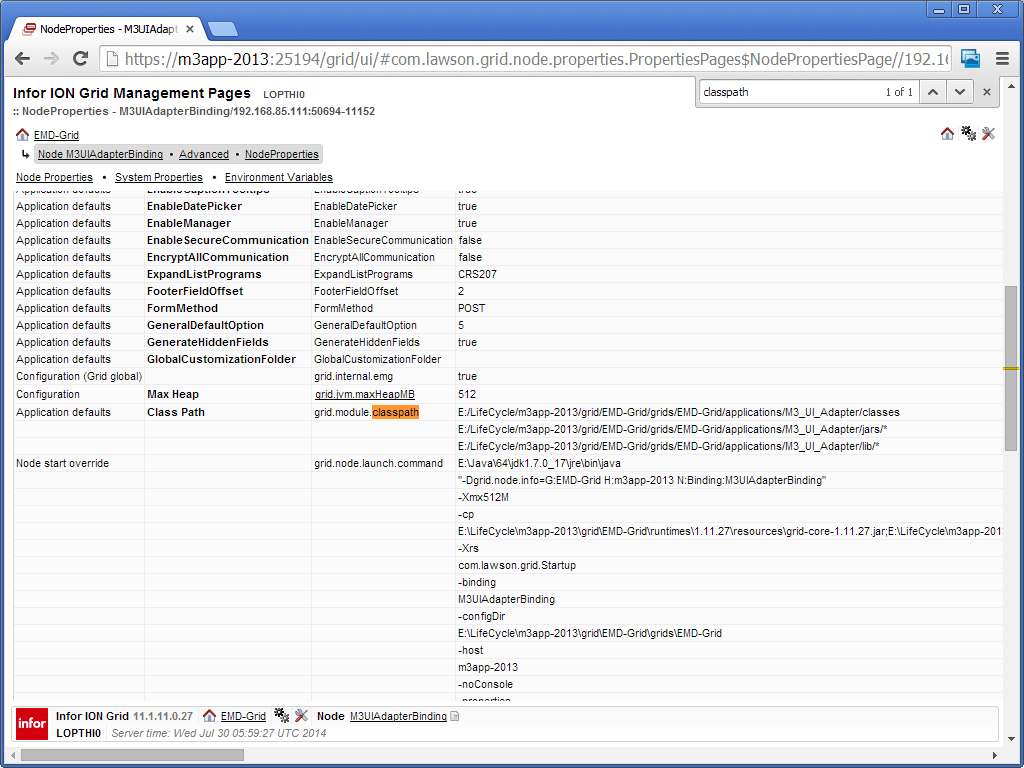
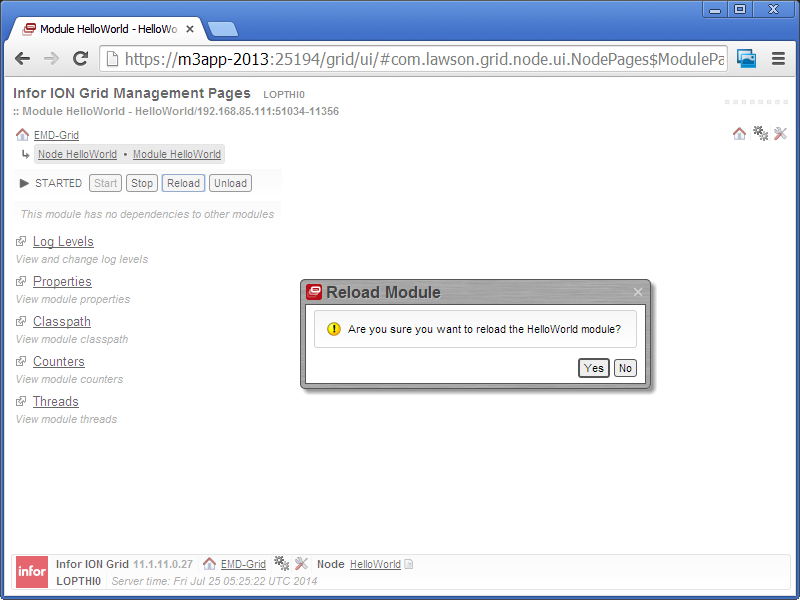
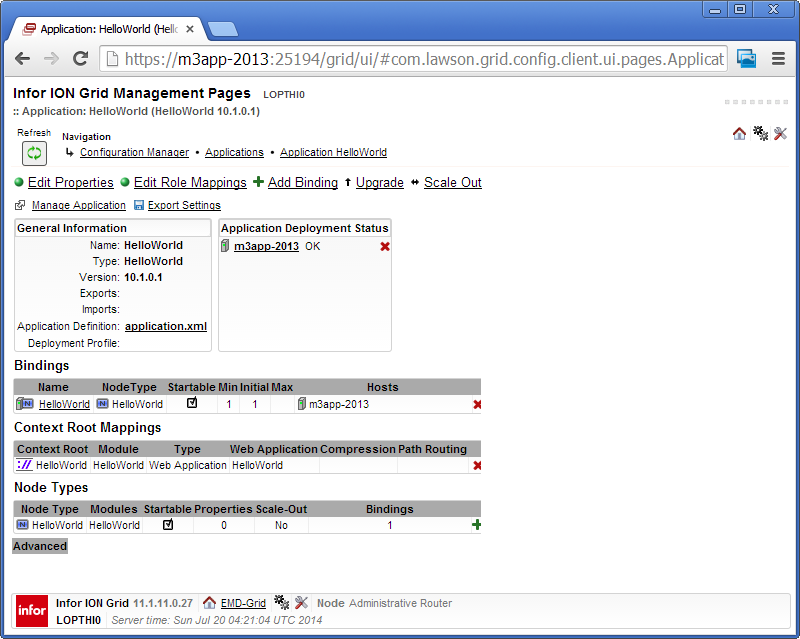
  5. In the Infor Grid, restart the MECSRV application to pick up the new Java class:
    6
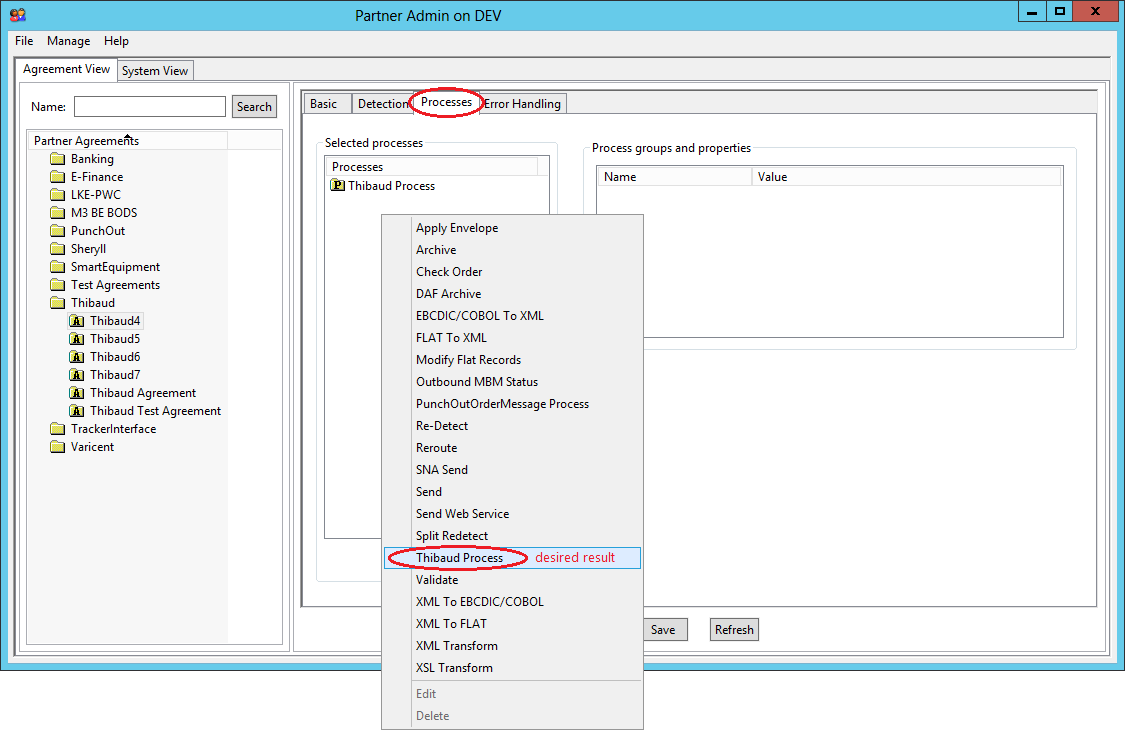
  6. In the Partner Admin Tool, create a partner agreement and add the message process:
    2
  7. Reload the MEC server to pick up the new agreement:
    7
  8. Run the partner agreement, for example I have a channel detection with a HTTPIn receive channel listening on port 8084, and I make an HTTP request to that port number to trigger the partner agreement.
  9. Check the message received (.rcv) and the message produced (in my case it was extension .something); for that, you will need one Archive process in your partner agreement, before and after your custom process:
    128
  10. You can also open the files directly in the folder specified:
    11
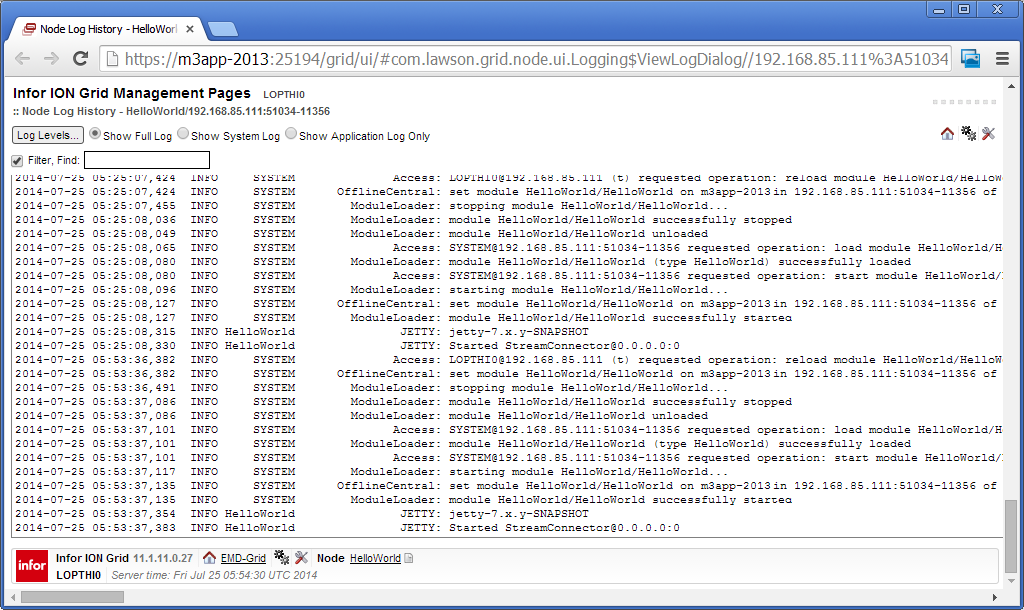
  11. And if you used the logger, you can check your logs in the Event tab:
    10

Real-world example

In my case, I needed a custom message process for the following real-world scenario. My current customer does Procurement PunchOut with its partners using cXML, an old protocol from 1999. In that protocol, there is a step (PunchOutOrderMessage) that sends an XML document in a hidden field cxml-urlencoded of an HTML form. That results in a POST HTTP request (to MEC) with Content-Type: application/x-www-form-urlencoded, with the XML document that is URL-encoded as a value of parameter cxml-urlencoded in the request body. Unfortunately, MEC does not have a message process to extract a specific parameter value of a message, and URL-decode it. So I developed my custom message process as explained above, to take the request body, extract the desired parameter value, URL-decode it, and output the resulting XML. I may write a detailed post about it some day, maybe not.

Conclusion

That was a guide on how to create a custom message process in MEC, doing Java development, to take an input message in a partner agreement, do some custom processing on it, and produce an output message. This is an unofficial solution that I figured out by de-compiling and hacking MEC. There may be a simpler solution, I do not know.

That’s it! Thank you for supporting this blog, please like, subscribe, share around you, and come author the next blog post with us.

Hacking Infor Grid application development (part 6)

Here is the sixth article in the series on Hacking Infor Grid application development, and today I will illustrate how to debug the Grid application at runtime. This is useful for development and troubleshooting purposes. For that, I will use the standard Java Platform Debugger Architecture (JPDA) that is included in Java.

I will do the illustration gradually: I will start by debugging a simple HelloWorrrld class from the command line, then I will debug it remotely, then I will debug it from Eclipse, and finally I will debug the Infor Grid application.

Remember the intention is to hack ethically, to learn and to push the boundaries of what is possible. Also, remember to join the campaign and sign the petition asking Infor Product Development to make their source code available so we can do better work. Also, next week is Open Access Week, and it is a great time to ask Infor Product Development to make more of their documentation available.

Debugging from the command line

Here is a quick illustration of how to use jdb, the Java Debugger, to debug a simple HelloWorrrld class from the command line.

Here is the simple HelloWorrrld class:

public class HelloWorrrld {
    public static void main(String[] args) {
        int i = 11;
        int j = 13;
        int k = i * j;
    }
}

Suppose we want to debug the class at runtime and set a breakpoint at line 6 to see the value of variable k.

For that, we compile the class with the -g command line parameter to generate all debugging information, including local variables; by default, only line number and source file information is generated:

javac -g HelloWorrrld.java

Then, we have jdb launch a new Java Virtual Machine (VM) with the main class of the application to be debugged by substituting the command jdb for java in the command line:

jdb HelloWorrrld

Then, we set the breakpoint at line 6:

stop in HelloWorrrld:6

We could have also stopped execution at the beginning of the main method instead of at a specific line number:

stop in HelloWorrrld.main

Then, we start the execution of the debugged application:

run

The debugger will execute up to the breakpoint, at which point we can display the value of k:

print k

It will display k = 143.

Then, we advance execution to the next line and so on until the end:

step

Here is a screenshot of the steps:
1

Debugging remotely

Now I will illustrate how to debug the same class remotely by attaching jdb to a Java VM that is already running.

First, we find a port number that is available on the host where we will run the class, for example I use netstat, and for example I will try port number 1234:

netstat -an | findstr :1234

If netstat returns LISTENING then that port number is already in use and unavailable; otherwise you can use it.

Then, we start the Java VM (the debuggee) with the following options to load in-process debugging libraries and specify the kind of connection to be made and allow jdb to connect to it at a later time:

java -agentlib:jdwp=transport=dt_socket,address=127.0.0.1:1234,server=y,suspend=y HelloWorrrld

-agentlib:jdwp loads the native agent library for the Java Debug Wire Protocol (JDWP).
suspend=y makes the JVM wait on startup for a debugger to attach before running.
transport=dt_socket sets the transport specification to socket transport using a single stream TCP/IP connection between the debugger application and the target VM.
address=1234 is the port number to which the debugger should attach to the JVM. This number should normally be above 1024. Verify that it is available.
server=y indicates that the JVM is accepting connections from debuggers.

Then, on the remote host (the debugger), we start jdb and attach it to the remote Java VM (the debuggee), and we specify the path of the source files:

jdb -sourcepath ./src/ -connect com.sun.jdi.SocketAttach:hostname=host,port=1234

Here is a screenshot of the steps:
2.1
2.2

Debugging from Eclipse

Now I will illustrate how to debug the same class remotely from Eclipse.

First, create a new Java Project in Eclipse, and import the source code of the Java class, and set the desired breakpoints:
3.1

Then, select Run > Debug Configurations.

Then, click New launch configuration, select the Project, Connection Type Standard (Socket Attach), Host, Port, Source, and click Debug:
3.3

Open the Debug perspective, and debug as usual with threads, stepping, immediate console, local variables, etc.:
3.4

Debugging Infor Grid application

Finally, I will illustrate how to debug our Infor Grid application remotely at runtime. We will need the source code of that Grid application, for example I will use the source code I wrote in part 4 of this series.

As a reminder, an Infor Grid application runs in a Grid Node, and a Grid Node is a Java VM. We will set the JDWP debugging options on that Java VM (debuggee). For that, we must change the Java command line options. Fortunately, there is a convenient node property Debug Port in the Node properties that takes care of it.

Select Infor ION Grid Management Pages > Applications > HelloWorld > Configuration:
4.0

Select Edit Properties:
4.1

Select Debug Port:
4.2

Set the application’s debug port number (specify a zero port to assign any free ephemeral port), and save the configuration changes:
4.3

Then, go to the Node Properties (Node > Advanced > Properties), ensure the debugging options were set, and take note of the port number:
4.4

Now, stop the Node, and wait until it restarts automatically, for the Java VM debug options to take effect:
4.4

Now, open the Java project with the source code in Eclipse, and set the desired breakpoints:
5.1

When you compiled the source code, verify that the Compiler Preferences included the debugging options:
5.2

Now, go to the Debug Configuration, set the port number, and click Debug:
5.2

The debugger will attach to the remote Java VM, and will show the current threads:
5.3

Now, reload the Module so we reach our breakpoints:
5.3

Finally, the debugger will reach our breakpoints, and now we can introspect the variables, step through the code, and so on:
5.4

Conclusion

That was an illustration of how to remotely debug an Infor Grid application at runtime with the Java Debugger and Eclipse. This is useful for learning, development and troubleshooting.

Note that when the Grid application threads are suspended the Node will show as status NOK_STALE, and unexpected consequences might happen in the Grid, such as timeouts or attempts to recover.

Also, remember this technique is not official and untested as we are still learning how to deal with Infor Grid applications.


That’s it! Please thumbs up if you like this, share around you, follow this blog, sign the petition, and author the next article.

Hacking Infor Grid application development (part 5)

Here is the fifth part in the series Hacking Infor Grid application development. This time I will show you how to deploy a web application archive, WAR file. It is trivial and quick as the Infor Grid automatically deploys it.

Create the archive

Simply ZIP the contents of the web application into a WAR file:
1

File & folder structure

Move the WAR file into the webapps folder of the Grid application, and delete the rest of the webapps content (WEB-INF, JSP, etc.) so that there is only the WAR file left:

[...]
|
\---webapps
        HelloWorld.war

Deploy

Create the Grid application archive GAR and deploy it in the Grid as usual. The Infor Grid will automatically deploy the WAR file under webapps:
2

GitHub

I updated the GitHub repository with a Tag for part5.

Petition

Remember to join the campaign in asking Infor Product Development to release their Grid Development Tools and tutorials and to make their source code available so we can learn how to make good Grid applications.

Meanwhile, remember this is a hack with the intention to learn and progress.

Hacking Infor Grid application development (part 4)

Continuing the series Hacking Infor Grid application development, today I will show: how to decompile Java applications, how to write to the Grid application log files, how to read Grid application properties, how to secure the Java web application, and how to start playing with the HelloWorld app on GitHub. Remember this is currently a hack, it is at your own risk, there are limitations as discussed on part 1, and please join the campaign and sign the petition to Infor Product Development for making their source code available. The intention is to learn the internals of the applications we use every day, push their limits, and develop great software.

Decompile Java applications

First of all, check your licenses to determine if you are legally allowed to decompile the Java application you have in mind.

For this series I decompiled the Infor Grid core grid-core-1.11.27.jar to understand how to write to the Grid application log files and how to get Grid application properties. I also often decompile applications like M3_UI_Adapter (MNE), Event Hub, M3 Web Services, and Infor Process Automation to understand how they work, make enhancements, troubleshoot, and find bugs. All the JAR files are located in LifeCycle Manager at E:\Infor\LifeCycle\<host>\grid\<grid>\grids\<grid>\applications\. It is already common practice to decompile Infor Smart Office with RedGate Reflector (C#) to push the limits of Smart Office scripts and Smart Office SDK applications. I wish the source code of all applications were available.

For decompiling Java applications, I use the great Java Decompiler and its GUI. I simply drag and drop a JAR file and it automatically decompiles all files recursively:
1

Write to Grid application log files

To write to the Grid application log files, get the logger and log at the information, warning, error, debug, or trace levels:

import com.lawson.grid.util.logging.GridLogger;
[...]
private static final GridLogger log = GridLogger.getLogger(HelloWorld.class);
[...]
log.info("Yay, I'm writing to the log file :)");
log.warn("Hey, it feels hot in here!");
log.error("Ouch, that hurt :(");
log.debug("Useful data 48656C6C6F576F726C64");
log.trace("Wooohooo 01001000 01100101 01101100 01101100 01101111 00100000 01010111 01101111 01110010 01101100 01100100 00100001");

Set the log levels accordingly:

Check the result in the Grid application log file:
3

The log files are also directly in the log folder for use with a tail program or so:
5

Read Grid application properties

Declare Grid application properties in the application deployment descriptor GRID-INF\application.xml:

<property name="message">Hello Wrrrld!</property>

6

Then, read the properties with:

import com.lawson.grid.node.properties.GridProperties;
[...]
GridProperties p = ModuleContext.getCurrent().getProperties();
String message = p.getProperty("message");
log.info("The message is: " + message);

Re-deploy the application and check the application properties:
7

And here is the result:
4

Secure Java web application

To secure the Java web application in WEB-INF\web.xml:

<security-constraint>
    <web-resource-collection>
        <url-pattern>/*</url-pattern>
    </web-resource-collection>
    <auth-constraint>
        <role-name>grid-user</role-name>
    </auth-constraint>
</security-constraint>

Set the User and Role Mappings in the Grid Configuration Manager accordingly:8

Restart the application.

The Grid will now challenge for authentication:
9

HelloWorld app on GitHub

I published the HelloWorld Grid application source code on my GitHub repository so you can play along, learn, and contribute your code, and I added tags – part1, part2, part3, and part4 – so you can download the source code that corresponds to the desired part in this series:
10

Summary

That was an illustration of how to decompile Java applications, how to write to the Grid application log files, read Grid application properties, secure the Java web application, and start playing with the HelloWorld app on GitHub. Remember to play responsibly, know the limitations, sign the petition, and contribute your findings to the community.

That’s it! If you liked this, please click Like, write your comments, click Follow to subscribe to the blog, share around you, and author your own ideas. Thank you.

Hacking Infor Grid application development (part 3)

In the series Hacking Infor Grid application development, today I will illustrate how to add a JAR file to an Infor Grid application and a JAR file to a dynamic web application in that Grid application (which is trivial).

JAR for Grid application

First, create a simple Java library:

package net.company.your.library1;

public class HelloWorldLibrary1 {
	public static String getMessage() {
		return "Hello World sample library for my Grid application";
	}
}

Then, compile it with:

javac net\company\your\library1\HelloWorldLibrary1.java

Then, add it to a JAR file with:

jar cvf HelloWorldLibrary1.jar net\company\your\library\HelloWorldLibrary1.class

Then, call that library from the Grid application with:

[...]

import net.company.your.library1.*;

public class HelloWorld implements ApplicationEntryPointEx {

	public boolean startModule(ModuleContext paramModuleContext) {
		System.out.println(HelloWorldLibrary1.getMessage());
		return true;
	}

	[...]
}

Then, recompile that Grid application as usual with:

javac -cp grid-core-1.11.27.jar;. net\company\your\HelloWorld.java

Here’s the result in the command prompt:
1.1

Then, create a jars folder in the Grid application and add the JAR file to it:
1.3

The default folder for JAR files is jars. It seems other Infor Grid applications use folder lib instead. We can change the classpath in the Grid application’s properties, for instance the application M3UIAdapter has JAR files in a folder lib:
3.2b

Then, replace the Grid application:
1.2

Then, restart the Module in the Grid Management Pages:
b4

We can see the result in the logs:
1.4

JAR for dynamic web application

Now let’s create a second Java library for the dynamic web application of the Grid application; this is classic J2EE and trivial:

package net.company.your.library2;

public class HelloWorldLibrary2 {
	public static String getMessage() {
		return "Hello World sample library for my dynamic web application";
	}
}

Then, compile it and add it to a JAR file as shown above.

Then, let’s use that library from the servlet (or from a JSP):

[...]

import net.company.your.library2.*;

public class HelloWorldServlet extends HttpServlet {
	public void doGet(HttpServletRequest request, HttpServletResponse response) throws ServletException, IOException {
		[...]
		out.println(HelloWorldLibrary2.getMessage());
	}
}

Then, recompile the servlet as usual.

Here’s the result in the command prompt:
2.1

Then, create a lib folder in the WEB-INF folder of the dynamic web application:
2.3

Then, replace the servlet (or JSP):
2.2

And refresh the servlet (or JSP) to see the result:
2.4

Summary

That was how to add a JAR file to an Infor Grid application and a JAR file to a dynamic web application in that Grid application (which was trivial). Next time I will find out how to add a WAR file.

Also, remember this is a hack that currently has limitations due to our lack of knowledge of how to develop good applications for the Infor Grid, as discussed in part 1 of this series.

Also, remember to join the campaign and sign the petition to Infor Product Development for making their source code available.

That’s it! If you like this, please click the Like button, leave a comment below, subscribe to this blog, share around you, and write about your own ideas here. Thank you.

Hacking Infor Grid application development (part 2)

As a prolongation of my previous post on Hacking Infor Grid application development, this time I will show you how to add a simple HelloWorld servlet to your Infor Grid application.

HelloWorld servlet

Create a simple HelloWorld servlet:

package net.company.your;

import java.io.*;
import java.util.*;
import javax.servlet.*;
import javax.servlet.http.*;

public class HelloWorldServlet extends HttpServlet {
	public void doGet(HttpServletRequest request, HttpServletResponse response) throws ServletException, IOException {
		response.setContentType("text/html");
		PrintWriter out = response.getWriter();
		out.println("<html>");
		out.println("<body>");
		out.println("HelloWorld servlet! The time is " + new Date());
		out.println("</body>");
		out.println("</html>");
	}
}

Compile it with the Servlet API library that you can find in the LifeCycle Manager runtime:

E:\LifeCycle\<host>\grid\<grid>\runtimes\1.11.27\resources\servlet-api-2.5.jar
javac -cp servlet-api-2.5.jar WEB-INF\classes\net\company\your\HelloWorldServlet.java

1 2

Deployment descriptor

Create a simple deployment descriptor web.xml:

<?xml version="1.0" encoding="utf-8" ?>
<web-app xmlns="http://java.sun.com/xml/ns/j2ee"
	xmlns:xsi="http://www.w3.org/2001/XMLSchema-instance"
	xsi:schemaLocation="http://java.sun.com/xml/ns/j2ee http://java.sun.com/xml/ns/j2ee/web-app_2_4.xsd"
	version="2.4">

	<display-name>HelloWorld Servlet</display-name>
	<description>My HelloWorld servlet</description>

	<servlet>
		<servlet-name>HelloWorldServlet</servlet-name>
		<servlet-class>net.company.your.HelloWorldServlet</servlet-class>
	</servlet>

	<servlet-mapping>
		<servlet-name>HelloWorldServlet</servlet-name>
		<url-pattern>/sup</url-pattern>
	</servlet-mapping>

</web-app>

File & folder structure

Set the following file & folder structure in a WEB-INF directory:

\---HelloWorld
    ...
    \---webapps
        \---HelloWorld
            ...
            \---WEB-INF
                |   web.xml
                |
                \---classes
                    \---net
                        \---company
                            \---your
                                    HelloWorldServlet.class

b3

With Eclipse

You can also use Eclipse to create the servlet and deployment descriptor and to compile:
e8

Deploy

You can create and deploy your servlet as a new application, or you can add WEB-INF to an existing application in LifeCycle Manager at:

E:\LifeCycle\<host>\grid\<grid>\grids\<grid>\applications\HelloWorld\webapps\HelloWorld\WEB-INF\

If you choose hot deployment, reload the Grid application module:

b4


Result

You can now test the result in a browser:
b5

And you can check the logs:
b6

Summary

That was how to add a simple servlet to your Infor Grid application. Next time, I will explore how to add JAR files and how to deploy a WAR file.

That’s it! Like + comment + subscribe + share.

Hacking Infor Grid application development

I just learned a technique to develop a custom application for the Infor Grid. The idea is to build a simple J2EE app using the Infor Grid as an application server. My understanding is that the Infor Grid is closed, and that this technique is currently unofficial, undocumented and unsupported. I will label this technique as a hack for now until we establish a recommended path.

History

In the past, official products such as Movex Workplace (MWP) and IBrix were built for IBM WebSphere Application Server (WAS), and software developers that needed custom J2EE applications unofficially deployed their code in that same WAS; it was a somewhat symbiotic relationship. With the switch to the Infor Grid, WAS is gone and replaced by a cloud of distributed servers with embedded Jetty – that is a leap forward for M3 – but there is no official solution for custom apps.

As a workaround, we continued to sideload our JSP and HTML files in the MNE folder of the Grid alongside Smart Office Scripts; that was a parasitic relationship subject to potential loss during upgrades. There is also the option to install our own separate application server like Microsoft IIS, but there are advantages to having a unified solution. I know of the Grid Development Tools for Eclipse and the Grid Application Developer Guide and tutorials, but to my knowledge they are internal to Infor products and not available for developing custom applications.

A former colleague of mine found an alternative workaround. He told me he had managed to create a GAR file for the Infor Grid, so now he has an application called “intentia” where he puts the JSP and HTML files instead of the MNE folder. He said it involved decompiling one of the Grid applications and then compiling it back with the new application name. I invited him to write a blog post about his solution, but he responded because it is unofficial he did not want to post it and wanted to remain anonymous. After a couple of email exchanges discussing a disclaimer, he accepted that I post his solution and acknowledge him for his contribution. So thank you, Jonathan Amiran of Intentia Israel.

Call for action

This is my call to Infor Product Development. If you are reading this, please jailbreak the Grid, release the tools and documentation and embrace the community. Help us reach a mutually beneficial relationship where great ideas can get out of anonymity and flourish. I understand there are risks involved in opening up a sensitive system to all sorts of inexperienced developers and misuse as that leads to you having to assume the role of support and troubleshooting until you can prove negligence on the part of the third-party developer. But don’t be closed. Share the good practices with us, certify us, or if it’s a risk, build a system that defends against byzantine failures from third-party developers.

For you readers, please call your Infor representatives and tell them the importance of being open and working together. Meanwhile, please understand the following hack has not yet been peer reviewed so it may be either favorable or damaging.

Find the Grid core

First, go to your LifeCycle Manager server and find the JAR file for the Grid core:

E:\LifeCycle\<host>\grid\<grid>\resources\grid-core-1.11.27.jar

b1

Create the application entry point

Then, create a simple Java class that implements ApplicationEntryPointEx:

package net.company.your;

import com.lawson.grid.node.application.ApplicationEntryPointEx;
import com.lawson.grid.node.application.ApplicationEntryPointEx.GlobalState;
import com.lawson.grid.node.application.ApplicationEntryPointEx.RemainingTaskCount;
import com.lawson.grid.node.application.ModuleContext;

public class HelloWorld implements ApplicationEntryPointEx {

	private boolean isInitialized = false;

	public boolean startModule(ModuleContext paramModuleContext) {
		return true;
	}

	public void onlineNotification() {
		this.isInitialized = true;
	}

	public void offlineNotification() {
		this.isInitialized = false;
	}

	public void stopModule() {
		this.isInitialized = false;
	}

	public ApplicationEntryPointEx.RemainingTaskCount getRemainingTaskCount() {
		return null;
	}

	public ApplicationEntryPointEx.GlobalState getGlobalState() {
		if (this.isInitialized) {
			return new ApplicationEntryPointEx.GlobalState(true, new String[] { "OK" });
		}
		return new ApplicationEntryPointEx.GlobalState(false, new String[] { "Initalizing" });
	}
}

And compile it with:

javac -cp grid-core-1.11.27.jar net\company\your\HelloWorld.java

Create the application deployment descriptor

Create the application deployment descriptor in a file GRID-INF\application.xml:

<?xml version="1.0" encoding="UTF-8" standalone="no"?>
<application xmlns="http://schemas.lawson.com/grid/configuration_v3" xmlns:xsi="http://www.w3.org/2001/XMLSchema-instance" typeName="HelloWorld" version="10.1.0.1" xsi:schemaLocation="http://schemas.lawson.com/grid/configuration_v3 http://schemas.lawson.com/grid/configuration_v3">
	<description>HelloWorld Grid Example</description>
	<moduleDefinitions>
		<moduleDefinition typeName="HelloWorld" entryPointClass="net.company.your.HelloWorld" horizontallyScalable="false" verticallyScalable="false">
			<webApp name="HelloWorld" distributedSessions="false" sessionAffinity="true" />
		</moduleDefinition>
	</moduleDefinitions>
	<nodeTypes>
		<nodeType name="HelloWorld">
			<module typeName="HelloWorld" />
		</nodeType>
	</nodeTypes>
	<connectionDispatchers/>
	<properties>
		<propertyList name="grid.module.classpath">
			<value>classes</value>
			<value>jars/*</value>
		</propertyList>
		<property name="grid.jvm.maxHeapMB">64</property>
	</properties>
</application>

Add the resources

Add the static (HTML, images, CSS, JavaScript, etc.) and dynamic (JSP) resources in a webapps sub-folder, for example index.jsp:

<%@ page import="java.util.*" %>
<!DOCTYPE html>
<html>
   <body>Hello World! This is my first Grid application. The time is <%=new Date()%></body>
</html>

With the Infor Grid we don’t have a web server plugin to optimize serving static from dynamic content by URL path so I keep everything in the same folder.

Zip to a Grid archive

Create a file and folder structure like so:

+---classes
|   \---net
|       \---company
|           \---your
|                   HelloWorld.class
|
+---GRID-INF
|       application.xml
|
\---webapps
    \---HelloWorld
            image.png
            index.jsp
            script.js
            static.html
            style.css

ZIP the contents of the folder into a file and rename the file extension to .gar (make sure to ZIP the contents of the folder and not the folder itself or you will end up with an incorrect folder structure):

b1_

With Eclipse

You can also use Eclipse for this.

For that, create a new Java project, change the Default output folder from /bin to /classes, and add the grid-core as an external JAR:
b2

Create the file and folder structure as explained above:
b3_

ZIP the entire contents of the folder and change the file extension to .gar as explained above:
b4

Install the application

  1. Go to the Grid Management PagesAdvancedConfigurationConfiguration ManagerApplications and select Install New Application:
    b5
  2. Click Upload, browse to your GAR file, and click Upload:
    b6
  3. Select the hosts on which to deploy the app and click Finish:
    b7
  4. It will say “Operation completed.” Click Close:
    b8
  5. It will say “The application has no bindings defined”. Select Fix this problem:
    b9
  6. Enter Min 1 and Initial 1 and click Add Binding:
    b10
  7. It will say “The web application ‘HelloWorld’ of module ‘HelloWorld’ has no context root defined”. Select Fix this problem:
    b11
  8. Enter a Context Root Name and click Add:
    b12
  9. It will say “There are unsaved changes”. Click Save:
    b13
  10. Click Save to confirm the changes:
    b14
  11. The application is now deployed on the Infor Grid:
    b15

Result

Now we can try the application by going to /HelloWorld/:
18

My understanding of the Infor Grid is that applications run in a node, and that a node runs in its own JVM (probably to avoid collateral damage if the app crashes). We can confirm this by finding our app in the server’s Windows Task Manager:
b16


Updates

[UPDATED 2014-07-24]

At this point, you can update your files (JSP, HTML, JavaScript, etc) directly in the LifeCycle Manager deployment folder, refresh the browser, and the server will serve the new version of your files. This is the same type of updates we do with Smart Office scripts. If you do this, remember to backup your changes.

E:\LifeCycle\<host>\grid\<grid>\grids\<grid>\applications\HelloWorld\webapps\HelloWorld\

Limitations

Because of the distributed topology, fault tolerant, load balanced, scalable, and redundant nature of the Infor Grid, it is our responsibility as grid application developers to design them correctly. But we don’t yet know how to do that on the Infor Grid. Remember to call Infor about that. So keep it simple for now:

  • Make the application stateless until we find out how to store and share and synchronize state and make distributed sessions on the Grid.
  • Don’t make direct connections to any servers with network sockets until we find out how to abstract the communication with the Grid routers.
  • Don’t change any shared resources anywhere to avoid race conditions until we find out how to run critical sections on the Grid.
  • Don’t expect to do parallel programming since we don’t yet know how to communicate with multiple instances of the application.
  • Don’t persist data on disk as we don’t yet know how to abstract storage for failover and redundancy.

Summary

This was a hack to start developing simple applications on the Infor Grid. This technique is unofficial, undocumented and unsupported. It is our responsibility as developers to design applications correctly. Ask Infor to open up and support us.

That’s it! If you liked this, thank Jonathan, click Like, leave your comments below, subscribe to this blog, share with your peers, ask Infor to be open and embrace the community, and be responsible with your code. Thank YOU.

How to decrypt network traffic from Infor Grid

Here is a technique to intercept and decrypt the TLS (HTTPS) network traffic from the Infor Grid using Wireshark and the server’s private keys.

Why does it matter?

This technique is useful for troubleshooting products like M3 Web Services (MWS) and Infor Process Automation (IPA) which don’t log the HTTP requests and responses in their entirety. For instance, MWS Runtime can optionally dump the SOAP requests and SOAP responses but misses the HTTP request headers and HTTP response headers, and IPA only logs the HTTP response body but misses the HTTP request’s header and body and the HTTP response header, and neither MWS nor IPA let us hook to a proxy such as Fiddler. Sometimes it’s necessary to troubleshoot the HTTP requests and responses in their entirety. For example, I’m currently troubleshooting for a customer the case of a rogue white space somewhere in a request that’s throwing a syntax error down stream in a parser, and I need to chase the bug down by analyzing the hexadecimal values of the bytes, and for that I need un-encrypted traffic.

We could use Wireshark to intercept all network packets but if the traffic is encrypted with TLS (HTTPS) it’s unreadable. In public-key cryptography, a client and server initiate a TLS connection using asymmetric cryptography, and then switch to symmetric cryptography for the rest of the session. Fortunately, the Wireshark SSL dissector can decrypt traffic if we give it the server’s private keys. I had previously showed this technique a long time ago to decrypt Lawson Smart Office traffic and more recently to intercept un-encrypted IPA traffic. This time I update the technique for encrypted traffic of the Infor Grid.

Don’t get exited about hacking and don’t freak out about security because this technique is only available for those administrators that have access to the servers private keys and passwords.

Server’s private keys and passwords

First, we will need to find the Infor Grid’s private keys and passwords. I don’t do Grid installations so I don’t know where the keys are stored (if in the same path on any Grid, or if at a path defined by the installer), nor how the keys are generated (if automatically by the Grid, or if manually by the installer). In my case, I was testing on two different Grids and I found the keys in LifeCycle Manager (LCM) server at these two different paths:

D:\Infor\LifeCycle\<host>\grid\<grid>\grids\<grid>\secure\
E:\Infor\LifeCycle Manager\LCM-Server\grid\<grid>\keyStore\

This non-consistency tells me the path is defined by the installer.

Here is a screenshot:
b1

The paths contain many files of type *.ks and *.pw. The KS file type is a keystore encrypted with a password. The PW file type is the password in clear text; it looks encrypted but it’s just long random clear text. In my second Grid, there were about 50 pairs of files where the file names seem to follow a specific naming convention. That tells me the keys and passwords are generated automatically by the Grid.

Export and convert the private key

Now that we have the keystores and the passwords, we need to export the private key from the keystore and convert it to a format supported by Wireshark. For that, we can use the keytool of the JRE to export and OpenSSL to convert, or use KeyStore Explorer that will both export and convert.

Here’s with the keytool (export to PKCS12) and OpenSSL (convert to PEM):

keytool -importkeystore -srckeystore mykeystore.ks -destkeystore myexportedkey.p12 -deststoretype PKCS12
openssl pkcs12 -in myexportedkey.p12 -out myexportedkey.pem -nocerts -nodes -passin file:mykeystore.pw

b2

And here’s with the KeyStore Explorer (directly to PEM):
b3

Now we have a file with —–BEGIN PRIVATE KEY—–:
7

Import the private key in Wireshark

Now we import the key in Wireshark > Edit > Preferences > Protocols > SSL and set the Infor Grid server’s IP address, port and private key (PEM):
b4

Intercept and decrypt traffic

Now we are ready to intercept and decrypt traffic, for example we can go to the Grid Management Pages with HTTPS:
b5

Then we filter for ssl, see the decrypted traffic, the key exchange, and Follow SSL Stream:
b6

Summary

That was a technique to intercept and decrypt network traffic of the Infor Grid using Wireshark and the server’s private keys which is useful for troubleshooting purposes. This technique is only available to the administrators that have access to the servers.

If you know of a simpler technique please let me know.

That’s it. Please like, comment, subscribe, share. Thank you.

Hacking Customer Lifecycle Management (CLM)

Today I will show you how I made simple modifications to Infor Customer LifeCycle Management (CLM), the CRM product for Infor M3. With CLM standard out-of-the-box we only have the ability to show/hide fields, for example choosing whether or not we want the name, address, and phone number columns in the list or the fields in the details view. CLM is a great product, and by design it is intended to be simple to use. In my case I wanted something more: I needed to add a call button next to the phone number. That is not officially possible by default so I had to do some hacking.

I’m working on a project for a customer to integrate Cisco IP phones with CLM, such that when a customer service representative on the phone receives an incoming phone call we automatically pop-up the corresponding customer data on the screen, and conversely, such that they can click a phone number in CLM and make that outgoing phone call. I had already done some work in the past integrating Skype with Smart Office, and integrating ShoreTel phones with Smart Office. This time it’s Cisco IP phones. I cannot show you the entire source code as it’s propriety of the customer and my employer, but I will show you interesting bits and pieces, and the writing helps me clean-up my code too.

I will show you:

  • How to get the list of open CLM windows
  • How to find the phone number field
  • How to add a button to CLM and use the Design System Icons
  • How to make the outgoing phone call

About CLM

To tell if you have CLM, go to Smart Office > Help > About Infor Smart Office > View features, and you will see CLM Application:
1

Then, go to the Navigator widget, you will see the menu Customer Lifecycle Management, expand it and launch My Accounts > All:
2

It will open the list of accounts:
3_

Double-click one of the rows to open the account details:
4_

How to get the list of open CLM windows

Now we have two CLM windows open: the list of accounts, and the details of an account. To programmatically get that list, I use the DashboardTaskService.FindRunningTaskByUri method, to discriminate by Uri lclm://
0


var list /*System.Collections.Generic.List<Mango.UI.Services.FindTaskResult>*/ = DashboardTaskService.Manager.FindRunningTaskByUri("lclm://", TaskMatch.StartsWith);
for (var result : FindTaskResult in list) {
    var runner : IRunner = result.Runner;
    var task : ITask = runner.Task;
    debug.WriteLine(task.Uri);
}

That will return two tasks:
lclm://filter/?ActionType=View&MainTableID=…&FilterGroupID=…&SubFilterID=…
lclm://details/?ActionType=View&MainTableID=…&PrimaryKey=…

Now we need to tell apart the Accounts windows from the other potential CLM windows such as Activities or Contacts:

var host : IInstanceHost = runner.Host;
if (host.HostTitle.StartsWith("Account")) {
    // ...
}

This code will only work for English. Ideally we would use an official CLM API that returns the correct Tasks, but I haven’t found one. Let me know if you find one.

How to find the phone number field

Now that we have the correct window, we can get its contents and find the phone number field. First, I use WPF Inspector to visually introspect the window and find the phone number field in the visual tree:
6

The fields are layed out in one of the ancestor Grids:
5

More specifically the phone number field is itself a Grid of one row and three columns:
6_

That’s where I’ll inject my button. To get there programmatically, I use the VisualTreeHelper, and I do a pre-order depth first search:

function ... {
    //...
    var content : FrameworkElement = host.HostContent;
    if (content.GetType().ToString() == "lclmControls.Custom.TabularDetailsView") {
        var o: DependencyObject = FindPhoneTextBox(content);
        if (o != null) {
            var txtbox: SingleLineTextBox = o;
        }
    }
}
function FindPhoneTextBox(o : DependencyObject): DependencyObject {
    // visit node
    if (o != null) {
        if (o.GetType().ToString().EndsWith("SingleLineTextBox")) {
            var txtbox: SingleLineTextBox = o;
            if (txtbox.Name == "Phone") {
                return o;
            }
        }
    }
    // visit children
    for (var i = 0; i < VisualTreeHelper.GetChildrenCount(o); i++) {
        var child = VisualTreeHelper.GetChild(o, i);
        var result: DependencyObject = FindPhoneTextBox(child);
        if (result != null) {
            return result;
        }
    }
    // not found
    return null;
}

How to add a button to CLM and use the Design System Icons

Now that we found the phone number field and the Grid, we can add a button. I will use the IconButtons of the Design System as illustrated by norpe:

var btn: IconButton = new IconButton();
btn.IconName = "Phone";
btn.ToolTip = "Call this phone number."
btn.HorizontalAlignment = HorizontalAlignment.Left;
btn.Margin = new Thickness(5, 0, 0, 0);
btn.Tag = txtbox; // remember the textbox
Grid.SetRow(btn, 0);
Grid.SetColumn(btn, 2);
Grid.SetColumnSpan(btn, 2);
var grid: Grid = VisualTreeHelper.GetParent(txtbox);
grid.Children.Add(btn);
btn.add_Click(OnCall);

This is the result, with the IconButton hover and ToolTip:
7_

Note: to get the Grid I used the textboxe’s parent. This assumption is true in CLM version 1.0.0.99, but could be false in a future version of CLM in which case this code would break. Ideally we would have an official CLM API for this.

How to make the outgoing phone call

Now you can do whatever with the phone number, for example use the default operating system’s URI handler for the tel scheme which is Skype in my case.

function OnCall(sender: Object, e: RoutedEventArgs) {
    try {
        var btn: Button = sender;
        var txtbox: SingleLineTextBox = btn.Tag;
        var phoneNumber: String = txtbox.Text;
        var uri: Uri = new Uri("tel:" + phoneNumber); // RFC 3966
        ScriptUtil.Launch(uri);
    } catch (ex : Exception) {
        debug.WriteLine(ex);
    }
}

And here’s the result:
8_

The method ScriptUtil.Launch will instruct the operating system to execute the specified command. That’s the equivalent of typing start command at the DOS prompt. In our case it’s:

start tel:+14156247033

9

That means any special characters of the command must be escaped, such as white spaces and ampersands. To escape white spaces in DOS that means enclosing the entire string in double-quotes. I tried enclosing the URI in double quotes, and it didn’t work. I also tried other escaping and encoding techniques like using backslash, plus sign, and %20, and they didn’t work either. So let’s simply strip it out:

phoneNumber = phoneNumber.Replace(' ', '');

Also, in my example I used a phone number that’s already correctly formatted in international E.123 notation which Skype understands. To validate the phone number, we can use a regular expression. A simple one is to strip all characters and keep only the plus sign and the digits, but that’s probably not fully compliant with the E.123 specification so we need to work more on this in the future:

var regex = /[^\+^\d]/g;
phoneNumber =  phoneNumber.replace(regex, "");

Future work

Future work includes:

  • Use an event handler to listen for new CLM windows to automatically add the Call button as the user opens the Account views. I couldn’t find an event, and Karin confirmed it’s not currently supported. I tried MForms.MainController, DashboardTaskService, DashboardTaskBar, lclmControls.EventNotifier, WindowManager, etc. I found an event handler for M3 Forms, an event handler for the Quick Start CTRL+R, and private event handlers that would have worked had they been public. Nothing I could use. I ended up using a worker that’s polling Tasks every second in a background thread (yikes).
  • Remember we added the button so we don’t add it again next time.
  • Add the Call button on all phone number fields: fax, mobile phone, home phone, etc.
  • Validate the phone number with a regular expression that complies with the specifications.
  • Make the outgoing call thru the Cisco IP phone instead of using Skype.
  • Listen for incoming phone calls.
  • Move the script to a widget using the Smart Office SDK.

That’s it! If you like this post, subscribe to this blog. And if you rock, become an author to share your ideas.