Add a Profile fragment with Smart Office SDK

Continuing my previous and previous posts on Infor Smart Office SDK, I will now post on how to add a profile fragment in Smart Office Developer mode. For that, I will follow the instructions from the Developer’s Guide and from Karin’s comments.

We use the <Profile> section of the feature Manifest to merge our settings into the system profile. It gets merged only when the feature is deployed to the server with LifeCycle Manager (LCM). It doesn’t get merged when Smart Office is running in Developer mode. The workaround is to use a local profile.xml and reference it in our Windows Registry. First we need to get the server’s profile.xml.

Find the server’s profile.xml

In old versions of Smart Office, the file profile.xml used to be an actual file on the server. Now with the Infor Grid the file has been moved into a distributed database. Supposing you have such version of Smart Office:

  1. Go to your H2 Web Console following Scott’s instructions, login to the MangoServer application, click on the CATEGORYFILES table, it will display the contents of the table, and copy the CONTENT of profile.xml:
    1anon
  2. HEX-decode the contents, for example with Notepad++ or Ostermiller’s decoder:
    2anon
  3. Save the decoded contents to a file profile.xml somewhere on your computer, and ensure it’s valid XML:
    3anon
  4. That’s the server’s profile.xml.

Add your fragment

Now you can add your settings:

  1. Open the file profile.xml with a text editor like Notepad, add your application group (or extend an existing one), and add your settings, for example:
    <applicationgroup name="Thibaud">
        <A>
            <A1>Hello World!</A1>
            <A2>123</A2>
        </A>
        <B>
            <B1>true</B1>
            <B2>["abc", "def"]</B2>
            <B3>{ "msg": "I'm a value!" }</B3>
        </B>
    </applicationgroup>
    
  2. Ensure the file is still valid XML:
    4
  3. Optionally, you can add Description attributes at each element, and enabled=”true” on the applicationgroup.

Reference the file in Windows Registry

Now tell Smart Office Developer mode to use that profile.xml:

  1. Start your Windows Registry Editor (C:\Windows\regedit.exe).
  2. Go to the Smart Office SDK Window Registry Key HKEY_CURRENT_USER\Software\Infor\MangoDev
  3. Add a String value ProfilePath, and set the value to the path of your profile.xml:
    5

Test in Smart Office

Now test it in Smart Office Developer mode:

  1. Now re-start Smart Office in Developer mode (from your Visual Studio solution).
  2. Start the Profile Editor from the Navigator widget > Administration tools.
  3. Select your application group, Thibaud in my example.
  4. Select Advanced and your settings are there:
    6

That’s it!

If you liked this, click the Follow link below to subscribe to this blog. And join the authors and share your own M3 ideas with us.

Related articles


Add a feature to Smart Office SDK

After my previous post Hello World of Infor Smart Office SDK, I will now illustrate how to add a feature to Infor Smart Office SDK, for example the Infor Customer Lifecycle Management (CLM) feature. For that, we’ll need to get the feature files and add them to our Visual Studio Solution.

Get the feature files

To get the feature files, we need to find the Manifest and Application extension (DLL) files of our feature.

From the Smart Office server

You can find the feature files in the Infor LifeCycle Manager (LCM) server > products > components folder, and unzip the feature:

From Infor Xtreme

You can also find the feature files by downloading and unzipping the feature from Infor Xtreme. In my case I couldn’t find the same version of CLM to download as my server, but I put screenshots anyway to illustrate the point:

7.2__

From the local deployment

You can also find the feature files locally in the current ClickOnce application deployment folder of your computer:

  1. Start Smart Office from the server (not Smart Office Developer from Visual Studio).
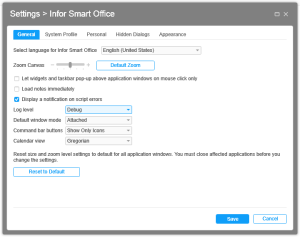
  2. Select Show > Settings > Infor Smart Office, switch the Log level to Debug, and click Save:
    6.2
  3. Logoff Smart Office and logon again.
  4. Select the Help menu (question mark icon at the top right) > About Infor Smart Office > View log file:
    6.2
  5. Filter Origin with RegisterGroups, filter Message with the Manifest of the feature you want to add, for instance LCLM.manifest, and notice the path to the Manifest, for example C:\Users\…\AppData\Local\Apps\2.0\Data\…\…\http…\Data\F\<feature>\ :
    6.4_
  6. And open that path in Windows Explorer:
    3.2___

Reference the files in Visual Studio

Once you found the Manifest and Application extension (DLL) files:

  1. Copy/paste them to the Bin directory of your SDK root directory:
    3.2__
  2. Open your Visual Studio solution, select the MangoClient Project, and select PROJECT > Add Reference:
    3.1_
  3. Browse to the Bin directory, select the DLL files you just pasted, and click OK:
    6.7
  4. Now Rebuild your solution, Start it, and the feature will be there in your Smart Office Developer mode:
    3.9

That’s it!

Note: Instead of copy/pasting the files to the Bin directory, I also tried adding a reference to the files of the ClickOnce directory, i.e. no need to copy/paste, and it worked fine. But the Developer’s Guide states “The feature assemblies and the feature manifest must be copied to the bin directory so that the framework can load the feature when the client starts.” Maybe there’s a reason I don’t know about, so I followed their instructions.

If you liked this post, subscribe to this blog and we’ll send you an email notification when we write a new post. Also, become a contributor and post your M3 ideas.

Hello World of Infor Smart Office SDK

Today I will write a post on how to start with the Infor Smart Office SDK as a continuation of Karin’s getting started post and Scott’s one to eight part series. We use the Smart Office SDK to develop applications in C#/WPF that run inside Smart Office with the benefits of look & feel, session, user information, M3 context, integration to M3 APIs and M3 Web Services, etc. I’m developing an application for a customer to integrate Cisco IP phones with Infor Customer Lifecycle Management (CLM). This is a great opportunity for me to share with you interesting bits and pieces as I progress, and it’s a way for me to anchor what I learn. I will put screenshots galore.

Here are the steps:

  1. Download and install Microsoft Visual Studio for C# and WPF development. I opted for the free Visual Studio Express 2013 for Windows Desktop:
    1.1
  2. Launch it from the Windows Start menu > All Programs > Visual Studio 2013 > VS Express 2013 for Desktop:
    1.2
  3. Download and install the Infor Smart Office SDK from Infor Xtreme > Downloads > ProductsUser Productivity PlatformSmart Office SDK – M3; choose the same version as the target Smart Office server you will develop for, version 10.1 in my case:
    2.1
  4. Unzip to a temporary folder in your computer and move the contents to the SDK root directory, for example C:\InforSmartOfficeSDK\ ; I moved to a folder with the full version number as I might have to switch back and forth between different versions for customer projects:
    2.2
  5. For more information , read the installation instructions in the Infor Smart Office Developers Guide at path Documentation\DevelopersGuide.pdf:
    0
  6. Set an environment variable LSOSDKBin in My Computer > Properties > Advanced system settings > Environment Variables, to the path of the Bin sub-folder, in my case it’s C:\InforSmartOfficeSDK_10.1.1.1_20130920\Bin :
    2.4
  7. Edit the contents of the file RegisterServer.reg in a text editor like Notepad, and change the value of Server to point to the scheme://domain:port of your Smart Office server URL. Then execute the file to merge the new MangoDev Key into your Windows Registry (C:\Windows\regedit.exe); in my case I later manually added String values for Username and Password so I don’t get authentication prompts anymore (beware of this security risk):
    2.5_
  8. Open the Sample Solution Samples\Samples.sln in Visual Studio:
    2.7
  9. Select BUILD > Build Solution F7:
    2.8
  10. Select DEBUG > Start Debugging F5:
    2.9
  11. That will start Smart Office in Developer mode. Select Help (question mark icon at the top right) > About Infor Smart OfficeView features, that will show you the Framework Examples and the Sample Feature:
    2.10_
  12. Start the Hello World application in the Sample menu of the Navigator widget:
    2.12
  13. And try the other samples and widgets:
    2.11

That’s it!

If you like this, subscribe to this blog to receive an email notification when we write posts, and become a contributor and write your M3 ideas.

Smart Office SDK

FYI. Finally, I just attended the official Smart Office SDK training in Stockholm, long after I first saw it and played with it five years ago in Chicago. It was a long wait as I didn’t have a chance to work with it until now. It was worth the wait. Expect to see me write more posts about it to complement PotatoIT’s series and Karin’s series on the subject. If you don’t yet know the Smart Office SDK, it’s Mashups and Scripts on steroids. With it, we can produce more advanced solutions for M3 in Smart Office, beyond what Mashups and Scripts can offer. More soon.