Developing H5 Client scripts – Part 2

I am learning to develop H5 Client scripts for a customer; see my previous post for the beginning.

To give back

My customer Chris Bullock thought client side scripts are pretty awesome, and said it would be cool if there was a library of what other M3 users have done. I proposed to post the script here with his permission, and he agreed for the love to give back.

Functional requirement

The requirement is to develop a script for M3. Purchase Order. Receive Goods – PPS300/E in H5 Client that pulls values from a related field in M3 and populates it in another field. Basically getting attribute values from purchase order line, concatenating their values, then populate that in the Lot number field on the purchase order receipt screen.

More specifically, when the user is receiving goods for a purchase order in PPS300/E, the script should automatically set the Location (WHSL) and Lot number (BANO) with the correct values to not let the user enter incorrect values by accident even with the F4-Browse:

Script

Here is the preliminary script I developed:

var PPS300E_BANO = new function () {
	var color = 'rgb(250, 255, 189)';
	this.Init = function (scriptArgs) {
		var controller = scriptArgs.controller;
		var content = controller.GetContentElement();
		var IBITNO = content.GetElement('IBITNO')[0]; // Item number
		var IBPUNO = content.GetElement('IBPUNO')[0]; // Purchase order number
		var IBPNLI = content.GetElement('IBPNLI')[0]; // Purchase order line
		var WLWHSL = content.GetElement('WLWHSL')[0]; // Location
		var WRBANO = content.GetElement('WRBANO')[0]; // Lot number
		// ensure the Item group is MAT
		ScriptUtil.ApiRequest('/execute/MMS200MI/Get;returncols=ITGR?ITNO=' + encodeURIComponent(IBITNO.value), response => {
			var ITGR = response.MIRecord[0].NameValue[0].Value.trim();
			if (ITGR !== 'MAT') {
				return;
			}
			if (!WLWHSL.readOnly && WLWHSL.value === '') {
				// hard-code the Location to YARD
				WLWHSL.value = 'YARD';
				// color the field
				WLWHSL.style.backgroundColor = color;
				WLWHSL.nextElementSibling.style.backgroundColor = color;
			}
			// get the Attribute number
			ScriptUtil.ApiRequest('/execute/PPS200MI/GetLine;returncols=ATNR?PUNO=' + encodeURIComponent(IBPUNO.value) + '&PNLI=' + encodeURIComponent(IBPNLI.value), response => {
				var ATNR = response.MIRecord[0].NameValue[0].Value.trim();
				// get the attributes
				ScriptUtil.ApiRequest('/execute/ATS101MI/LstAttributes;returncols=AALF?ATNR=' + encodeURIComponent(ATNR), response => {
					// calculate the Lot number
					var BANO = '';
					response.MIRecord.forEach(e => BANO += e.NameValue[0].Value.trim());
					if (!WRBANO.readOnly && WRBANO.value === '') {
						// set the Lot number
						WRBANO.value = BANO;
						// color the field
						WRBANO.style.backgroundColor = color;
						WRBANO.nextElementSibling.style.backgroundColor = color;
					}
				}, (error, message) => MainController.Current.ShowDialog([error, message]));
			}, (error, message) => MainController.Current.ShowDialog([error, message]));
		}, (error, message) => MainController.Current.ShowDialog([error, message]));
	};
};

Development time

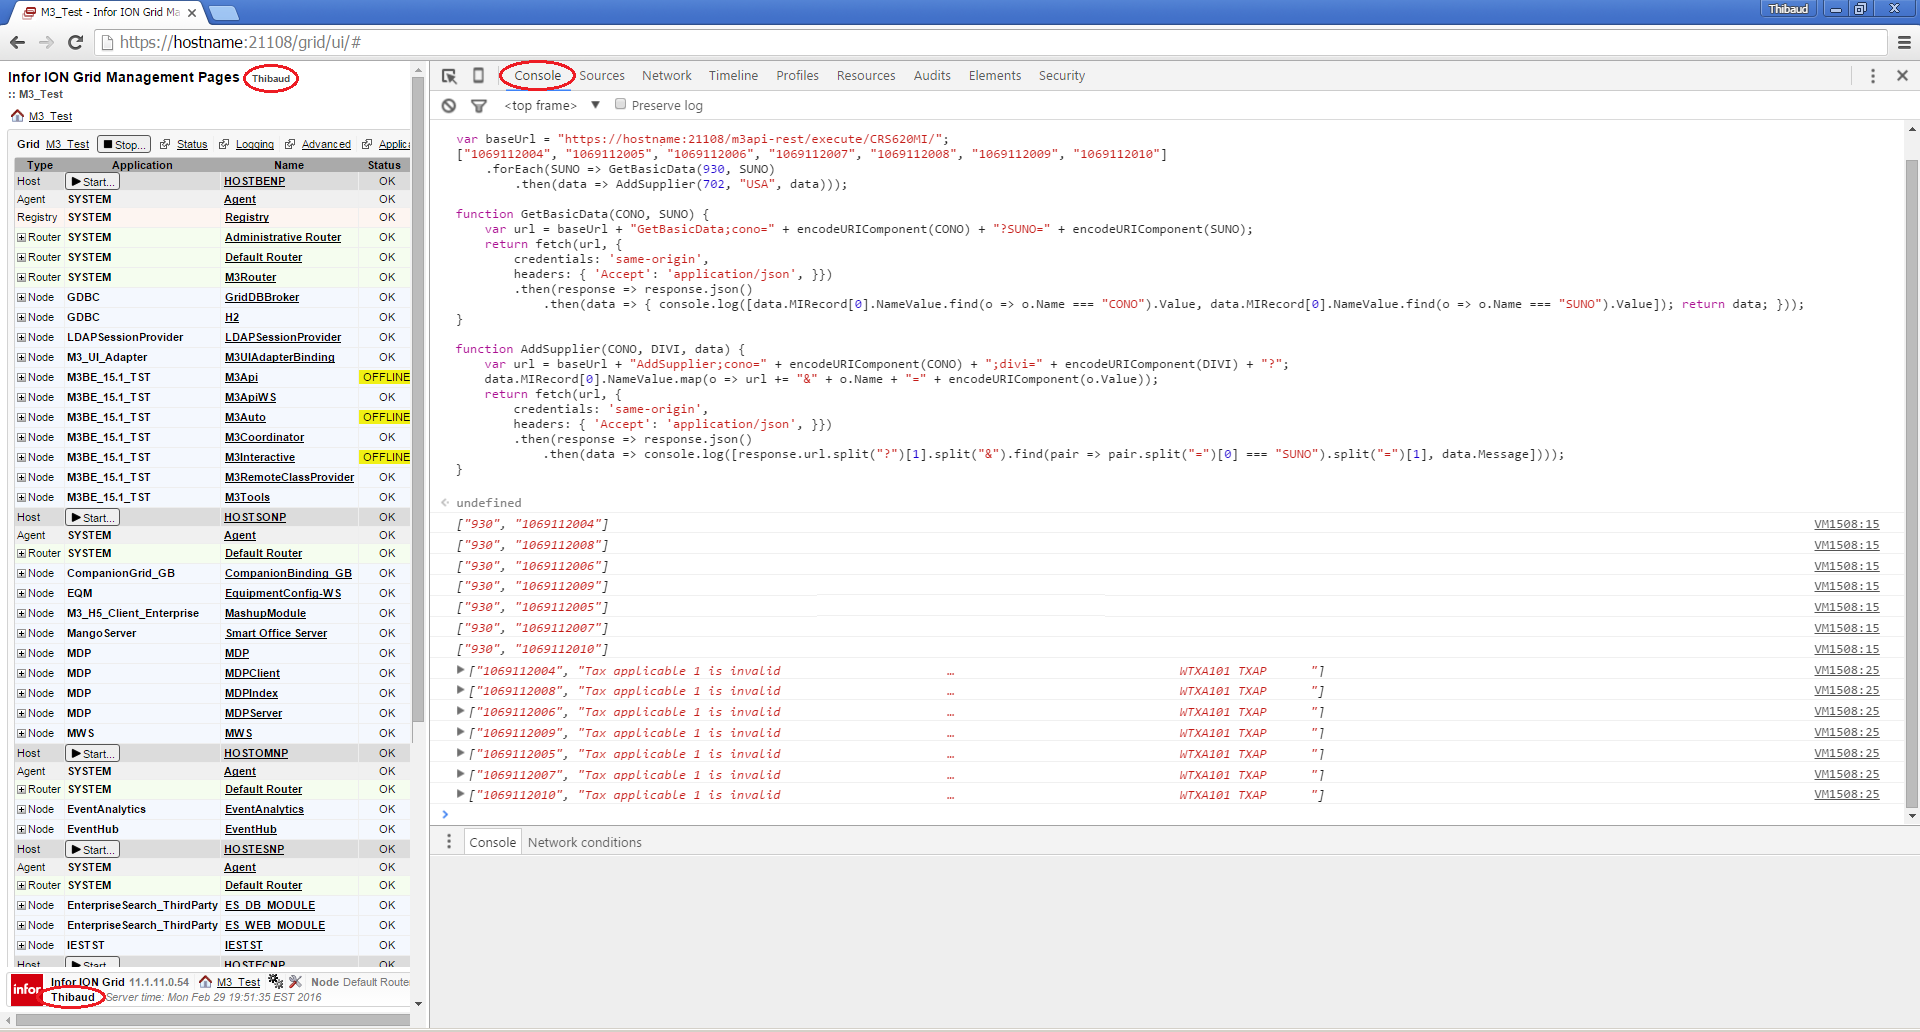
When I develop the script, I alternate between pieces of code in Chrome’s JavaScript console and debugger, and the assembled script in a text editor, iteratively until it’s ready, testing along the way with ScriptName.Init({ 'controller': getActiveController() }):

Result

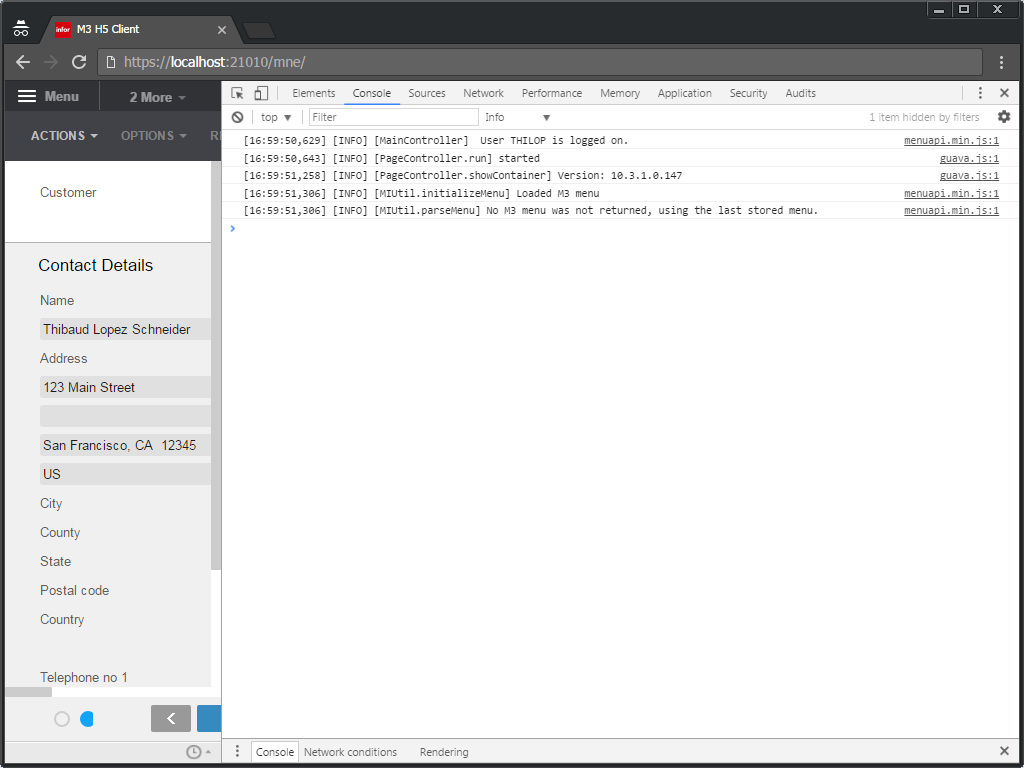
The result is the following, the script sets the Location and Lot number, and highlights them in yellow with the same color as the web browser’s autofill color to indicate that it autofilled the values:

At this point, the user can verify the values and click Next (or press ENTER) to persist the values in M3.

Problems

There are several problems with this script:

  1. The script is not able to tell apart whether the user entered the record with Option 1-Create or with Option 2-Change. In the former case, the script should set the values because the values have never been set; but in the latter case, the script should not set the values because they have already been set. I tried controller.Response.ControlData.Bookmark.Opt but it returns "2" for both Options 1-Create and 2-Change which is wrong. We are running M3 UI Adapter version 10.3.1.0.147. In a thread with Reah, she said if we upgrade M3 UI Adapter to version 10.3.1.0.161, I will be able to use controller.GetMode() instead. To be continued.
  2. To make M3 API calls, I use ScriptUtil.ApiRequest. But as of M3 UI Adapter version 10.3.1.0.195, that method is deprecated and replaced by MIService. See my thread with Reah. To be continued.

Usability

There is this corner case in usability, unrelated to H5 Client scripts:

Initially, the customer wanted me to set the fields and disable them, no matter what. That works if the user creates a new record with Option 1-Create. But if the user enters an existing record with Option 2-Change and there are already values that another user has previously set, what should the script do? Should the script assume the values are correct and let it be? In which case the script could have guessed incorrectly and leave incorrect values behind (false negative). Or should the script assume the values are incorrect and reset them? In which case the script could have guessed incorrectly and contradict the intention of the previous user (false positive). Furthermore, if the script does reset the values, how will the user know those are new values to persist? Will highlighting in yellow be enough? Or will the user incorrectly assume those are the values currently persisted in M3? I have to read more about WebKit’s autofill design decisions and learn from it. For now, I apply the weakest enforcement: if the field is blank, set it; otherwise, do not; and never disable it.

PENDING

There are several pending issues:

  • Upgrade M3 UI Adapter to the latest version
  • Use controller.GetMode() to tell apart Option 1-Create and 2-Change
  • Replace ScriptUtil.ApiRequest by MIService
  • Usability: disable the two fields while calling the M3 API, indicate activity (spinning wheel), revert when done, cancel if gone (ENTER, F3, F5, F12)
  • Add exception handling: if == null, try/catch, if response.Message, if !response.MIRecord
  • Compose the promises sequentially with request1.then(request2).then(request3) or Promise.all([request1, request2, request3]) instead of nesting them with request1({ request2({ request3() }) })
  • Use JavaScript async/await for ease of source code reading
  • Use Visual Studio and TypeScript as recommended by the M3 H5 Development Guide (H5 Script SDK)

Conclusion

That was my preliminary script for H5 Client while I am learning how to develop them. I still have to learn more about H5 scripts and autofill, solve current problems, and address pending issues.

Special thanks to my customer Chris Bullock.

Developing H5 Client scripts – Part 1

The day came I have to develop a script for Infor M3 H5 Client with M3 API calls for a customer. This post will add to my previous post, to Scott’s three previous posts, and to Karin’s previous post.

Disambiguation

Scripts for H5 Client are written in the JavaScript programming language (ECMAScript). Scripts for Infor Smart Office are written in the JScript.NET programming language. Programs for M3 are written in the Java programming language. Despite the similarities, the three languages are different. Smart Office scripts will NOT execute in H5 Client; you will have to re-write most of the code and be familiar with functional programming, jQuery, Deferred, Promises, etc.; it is like back in the days of IBrix.

Documentation

Here is the M3 H5 Development Guide:

Conversion

Here are some tips to convert a Smart Office script to an H5 Client script:

Example of a minimal script for Smart Office:

package MForms.JScript {
	class Test {
		public function Init(element: Object, args: Object, controller : Object, debug : Object) {
			debug.WriteLine('Hello, World!');
		}
	}
}

The equivalent script for H5 Client:

var Test = new function () {
	this.Init = function (scriptArgs) {
		console.log('Hello, World!');
    };
};

Various ways to get a field and its value compared to norpe’s guide for Smart Office:

var controller = scriptArgs.controller;
var host = controller.ParentWindow;
controller.FieldMap.WRCUNM[0]
controller.GetElement('WRCUNM')[0]
H5ControlUtil.GetFieldValue('WRCUNM')
ScriptUtil.FindChild($, 'WRCUNM')[0]
ScriptUtil.FindChild(host, 'WRCUNM')[0]

UPDATE 2017-06-06: According to the H5 Development Guide, the above is not the recommended API, but controller.GetContentElement().GetElement("WRCUNM") instead.

Example to call an M3 API in H5 script:

ScriptUtil.ApiRequest('/execute/CRS610MI/LstByNumber', result => console.log(result), (error, message) => console.log([error, message]))

UPDATE 2017-06-06: According to the H5 Development Guide, the above is not the recommended API, but MIService.Current.execute|executeRequest instead, but I get error ‘MIService is not defined’; perhaps I do not have the latest version of H5 Client.

Chrome Developer tools

Use the Google Chrome Developer tools:

Use it for the list of global variables, code completion, type reflection, console, dynamic execution, debugger, network monitor, DOM, styles:

Pause execution to introspect global variables:

UPDATE 2017-06-06: In the JavaScript console, you can get the current controller with getActiveController() or MainController.Current.Instances.host_X where X is the controller number.

Administrative tool

Use the administrative tool to import/export H5 scripts:

UPDATE 2017-06-06: To update a script, simply re-import it, click Yes to override, and refresh the M3 panel with Actions > Refresh-F5; there is no cache thus no need to add the version number in the script file name unlike Smart Office.

Execute

Attach the script to the panel as usual at Tools > Personalize > Scripts:

Select Actions > Refresh-F5 to load the script:

Use the JavaScript debugger statement in your script to pause execution and invoke the Chrome debugger:

Call M3 API, and refer to my previous post:

Conclusion

That was a quick look at how to develop scripts for Infor M3 H5 Client including calls to M3 API.

Thanks to Scott Campbell of Potato IT for the first look.

Please like, comment, subscribe, share, come author with us, or look at other ways to contribute.

Related documentation

Route optimization for MWS410 with OptiMap (continued)

Today I unbury old scripts from my archives, and I post them here and on my GitHub.

This script illustrates how to integrate the M3 Delivery Toolbox – MWS410/B with OptiMap – Fastest Roundtrip Solver to calculate and show on Google Maps the fastest roundtrip from the Warehouse to the selected Delivery addresses; it’s an application of the Traveling Salesman Problem (TSP) to M3. This is interesting for a company to reduce overall driving time and cost, and for a driver to optimize its truck load according to the order of delivery.

OptiMap_V3

The Warehouse (WHLO) is now detected from the selected rows, and its address is dynamically retrieved using API MMS005MI.GetWarehouse; no need to specify the Warehouse address as a parameter anymore.

Create a view in M3 Delivery Toolbox MWS410/B that shows the address fields in the columns (e.g. ADR1, ADR2, ADR3), and set the field names in the parameter of the script.

8 10 13

OptiMap_V4  [PENDING]

Add ability to Export OptiMap’s route to M3 Loading (MULS) and Unloading sequence (SULS) using API MYS450MI.AddDelivery, closing the loop of integrating M3 to OptiMap.

This is an idea for version 4. Script to be developed…

Source code

I posted the source code on my GitHub.

Related posts

Easy export/import M3 with JavaScript 6

Last week I had to copy several M3 Supplier CRS620 records, from one company CONO into another company, and I found this elegant solution using JavaScript 6.

Classic approach

Traditionally, I would have used M3 API or SQL to export the records to a CSV file in my computer, change the company number, and use M3 Data Import (MDI) to import the CSV into the other company. But the API LstSuppliers does not output all the fields, so I would have had to use GetBasicData, record by record. It is trivial, but it is tedious because of the many steps and tools involved, and it is antiquated.

A new approach

Instead, I have been wanting to learn JavaScript 6 (ECMAScript 6th Edition), so I challenged myself to learn this new solution using the M3 API REST web service and ES6.

Using ES6 is elegant because the result is very concise (only two lines of relevant code), and it is very expressive using: arrow functions (the new anonymous functions), map/reduce and array comprehension, Promises (the new deferred; chaining, fluid programming), and the fetch API (the new XMLHttpRequest).

Here is the source code in ES6:

var baseUrl = "https://hostname:21108/m3api-rest/execute/CRS620MI/";
["1069112004", "1069112005", "1069112006", "1069112007", "1069112008", "1069112009", "1069112010"]
    .forEach(SUNO => GetBasicData(930, SUNO)
        .then(data => AddSupplier(702, "USA", data)));

function GetBasicData(CONO, SUNO) {
    var url = baseUrl + "GetBasicData;cono=" + encodeURIComponent(CONO) + "?SUNO=" + encodeURIComponent(SUNO);
    return fetch(url, {
        credentials: 'same-origin',
        headers: { 'Accept': 'application/json', }})
        .then(response => response.json());
}

function AddSupplier(CONO, DIVI, data) {
    var url = baseUrl + "AddSupplier;cono=" + encodeURIComponent(CONO) + ";divi=" + encodeURIComponent(DIVI) + "?";
    data.MIRecord[0].NameValue.map(o => url += "&" + o.Name + "=" + encodeURIComponent(o.Value));
    return fetch(url, {
        credentials: 'same-origin',
        headers: { 'Accept': 'application/json', }});
}

/*
optional:
console.log([data.MIRecord[0].NameValue.find(o => o.Name === "CONO").Value, data.MIRecord[0].NameValue.find(o => o.Name === "SUNO").Value]);
console.log([response.url.split("?")[1].split("&").find(pair => pair.split("=")[0] === "SUNO").split("=")[1], data.Message]);
*/

We have to run this in the JavaScript console of a browser that supports ES6 and the fetch API, such as Google Chrome, and we have to login to the Infor ION Grid Management Pages to have an authenticated session.

Here is the result:
result1

And we can inspect the request/responses in the network tab:result2

That’s it!

Thanks for reading. Leave us a comment in the section below. And if you liked this, please subscribe, like, share, and come write the next blog post with us.

Application messages in Infor Smart Office

Here is an illustration of application messaging in Infor Smart Office to send, broadcast, and receive messages, and process responses between applications in Smart Office, whether in scripts, Mashups, or other entities.

Documentation

The Infor Smart Office SDK Developer’s Guide has Chapter 19 Application messages, and the Smart Office SDK help file has the API reference for Mango.UI.Services.Messages.ApplicationMessageService:
3

Note: For more information on the Smart Office SDK refer to my previous post.

Scripts

Here are some examples of sending, broadcasting and receiving messages, and processing responses in Smart Office scripts; the other party in the communication can be another script, a Mashup or another entity in Smart Office.

To send a message and process the response:

import Mango.UI.Services.Messages;

package MForms.JScript {
	class ApplicationA {
		public function Init(element: Object, args: Object, controller : Object, debug : Object) {
			// send message
			var message: ApplicationMessage = new ApplicationMessage();
			message.Sender = "ApplicationA";
			message.Recipient = "ApplicationB";
			message.Parameter = "Hello World";
			var response: ApplicationMessageResponse = ApplicationMessageService.Current.SendMessage(message);
			// process response
			response.MessageStatus;
			response.Result;
		}
	}
}

To receive a message and return a response:

import Mango.UI.Services.Messages;

package MForms.JScript {
	class ApplicationB {
		public function Init(element: Object, args: Object, controller : Object, debug : Object) {
			ApplicationMessageService.Current.AddRecipient("ApplicationB", OnMessage);
		}
		function OnMessage(message: ApplicationMessage): ApplicationMessageResponse {
			message.Sender;
			message.Recipient;
			message.Parameter;
			var response: ApplicationMessageResponse = new ApplicationMessageResponse();
			response.MessageStatus = MessageStatus.OK;
			response.Result = "Bonjour";
			return response;
		}
	}
}

To broadcast a message (there is no response):

import Mango.UI.Services.Messages;

package MForms.JScript {
	class ApplicationC {
		public function Init(element: Object, args: Object, controller : Object, debug : Object) {
			var broadcastMessage: ApplicationMessage = new ApplicationMessage();
			broadcastMessage.Sender = "ApplicationC";
			broadcastMessage.Recipient = "GroupX";
			broadcastMessage.Parameter = "HELLO WRRRLD!!!!!!";
			ApplicationMessageService.Current.SendBroadcastMessage(broadcastMessage);
		}
	}
}

To receive a broadcasted message (there is no response):

import Mango.UI.Services.Messages;

package MForms.JScript {
	class ApplicationD {
		public function Init(element: Object, args: Object, controller : Object, debug : Object) {
			ApplicationMessageService.Current.AddBroadcastRecipient("GroupX", OnBroadcastMessage);
		}
		function OnBroadcastMessage(message: ApplicationMessage) {
			message.Sender;
			message.Recipient;
			message.Parameter;
		}
	}
}

Mashups

Here are some examples of sending, broadcasting and receiving messages in Smart Office Mashups (there are no responses); the other party in the communication can be another Mashup, a script or another entity in Smart Office.

To send a message (there is no response):

<Grid xmlns="http://schemas.microsoft.com/winfx/2006/xaml/presentation" xmlns:x="http://schemas.microsoft.com/winfx/2006/xaml" xmlns:ui="clr-namespace:Mango.UI.Controls;assembly=Mango.UI" xmlns:mashup="clr-namespace:Mango.UI.Services.Mashup;assembly=Mango.UI">
	<Button Name="BtnMessage" Content="Send" Width="150" />
	<mashup:ApplicationMessageControl Name="test">
		<mashup:ApplicationMessageControl.Events>
			<mashup:Events>
				<mashup:Event SourceName="BtnMessage" SourceEventName="Click" TargetEventName="Send" Debug="True">
					<mashup:Parameter TargetKey="Sender" Value="MashupE" />
					<mashup:Parameter TargetKey="Recipient" Value="MashupF" />
					<mashup:Parameter TargetKey="Parameter" Value="Hello World" />
				</mashup:Event>
			</mashup:Events>
		</mashup:ApplicationMessageControl.Events>
	</mashup:ApplicationMessageControl>
</Grid>

To receive a message (there is no response):

 <Grid xmlns="http://schemas.microsoft.com/winfx/2006/xaml/presentation" xmlns:x="http://schemas.microsoft.com/winfx/2006/xaml" xmlns:ui="clr-namespace:Mango.UI.Controls;assembly=Mango.UI" xmlns:mashup="clr-namespace:Mango.UI.Services.Mashup;assembly=Mango.UI">
	<mashup:ApplicationMessageControl Name="test" Recipient="MashupF">
		<mashup:ApplicationMessageControl.Events>
			<mashup:Events>
				<mashup:Event SourceEventName="Received" Debug="True">
					<mashup:Parameter SourceKey="Sender" />
					<mashup:Parameter SourceKey="Recipient" />
					<mashup:Parameter SourceKey="Parameter" />
				</mashup:Event>
			</mashup:Events>
		</mashup:ApplicationMessageControl.Events>
	</mashup:ApplicationMessageControl>
</Grid>

To broadcast a message:

<mashup:Event...TargetEventName="Broadcast">

To receive a broadcasted message:

<mashup:ApplicationMessageControl...BroadcastRecipient="Everyone">

Illustration

Here is an illustration of messages going in all directions between scripts and Mashups:
r

More

The ApplicationMessageService API has more methods and properties available:

  • You can send multiple parameters and multiple result values with Dictionary<string, Object>.
  • You can return different MessageStatus values depending on your needs, for example OK, Failed or InvalidMessage.
  • You can send a message asynchronously to not block the UI; but there is no response.
  • You should verify if the recipient already exists before adding a message handler; otherwise you will get the exception “A recipient with the key has already been added.”
  • You can remove recipients.

Refer to the SDK documentation for more information.

That’s it. Please like, comment, share, follow, contribute.

Integrating Zeacom call center with Infor Smart Office

Here is a source code that a customer and I worked out to integrate the Zeacom call center with Infor Smart Office such that their customer service representatives can receive phone calls from their customers and automatically launch the respective M3 customer programs; this is similar to the previous integration work with Cisco Agent Desktop, Twilio, Skype, etc.

This source code is a script assembly in C#; for more information on script assemblies see here and here. The trick was to keep the z variable as a global variable, not as a local variable, so it can survive in memory for the event handlers.

You will need to reference the DLL files from your Zeacom software.

using Mango.UI;
using MForms;
using System;
using System.Collections.Generic;
using System.Linq;
using System.Text;
using System.Windows;

namespace MForms.JScript
{
	public class ZeacomAssembly
	{
		MLINTERFACELib.ZeacomMLI z = new MLINTERFACELib.ZeacomMLI();

		public void Init(object element, object args, object controller, object debug)
		{
			string phoneExt = "1234";
			if (z.AddExtension(phoneExt))
				if (z.Initialise())
					z.OnNewExtensionCall += OnNewExtensionCall;
		}

		private void OnNewExtensionCall(object Extension, object Call)
		{
			Application.Current.Dispatcher.Invoke(new ShowInformationDelegate(ShowInformation), new object[] {Extension, Call});
		}

		private delegate void ShowInformationDelegate(object Extension, object Call);

		private void ShowInformation(object Extension, object Call)
		{
			ConfirmDialog.ShowInformationDialog("Incoming Call", "MLI Event: OnNewExtensionCall(: " + ((MLINTERFACELib.IExtension)Extension).AddressName + ", " + ((MLINTERFACELib.ICall)Call).CallReference + OutputCallInfo((MLINTERFACELib.ICall)Call));
		}
		private string OutputCallInfo(MLINTERFACELib.ICall Call)
		{
			StringBuilder CallString = new StringBuilder();
			if (Call != null)
			{
				CallString.AppendLine("CalledID = " + Call.CalledId);
				CallString.AppendLine("Caller = " + Call.Caller);
				CallString.AppendLine("CallOrigin = 0x" + Call.CallOrigin.ToString("X"));
				CallString.AppendLine("CallReason = 0x" + Call.CallReason.ToString("X"));
				CallString.AppendLine("CallReference = 0x" + Call.CallReference.ToString("X"));
				CallString.AppendLine("CLI = " + Call.CLI);
				CallString.AppendLine("CLIA = " + Call.CLIA);
				CallString.AppendLine("CLIF = " + Call.CLIF);
				CallString.AppendLine("CLIP = " + Call.CLIP);
				CallString.AppendLine("DNIS = " + Call.DNIS);
				CallString.AppendLine("Pilot = " + Call.Pilot);
				CallString.AppendLine("Query = " + Call.Query);
				CallString.AppendLine("QueryName = " + Call.QueryName);
				CallString.AppendLine("Queue = " + Call.Queue);
				CallString.AppendLine("RelatedRef = 0x" + Call.RelatedRef.ToString("X"));
				CallString.AppendLine("TransferredID = " + Call.TransferredId);
				CallString.AppendLine("TransferrerID = " + Call.TransferrerId);
				CallString.AppendLine("Trunk = " + Call.Trunk);
				CallString.AppendLine("Type = " + Call.Type);
				CallString.AppendLine("Wait = " + Call.Wait);

				if (Call.DataCallPayloadString.Length > 0)
					CallString.AppendLine("DataCallPayloadString = '" + Call.DataCallPayloadString + "'");

				CallString.AppendLine("");
			}
			return CallString.ToString();
		}
	}
}

Open source address validation for Infor M3 using UPS

In the series for the open source address validation for Infor M3, I just added to the GitHub repository a sample script to do address validation using the UPS Address Validation – Street Level API.

UPS Address Validation – Street Level

You will need an access key with UPS to access the API, documentation and samples:
2

Sample HTTP request/response

Once you have the access key and documentation, you need to submit an HTTP POST request with two concatenated XML documents:
5

Sample script

Here is the sample TestUPS.js script for Infor Smart Office:

 import System;
 import System.IO;
 import System.Net;
 import System.Xml;
 import System.Xml.Linq;

 /*
     Sample script for Infor Smart Office to validate addresses with the UPS Street Level API
     PENDING: replace authentication and address values + error handling + background thread + user interface
     https://www.ups.com/upsdeveloperkit
 */

 package MForms.JScript {
     class TestUPS {
         public function Init(element: Object, args: Object, controller : Object, debug : Object) {
             // authentication
             var doc1: XDocument = new XDocument(
                 new XDeclaration("1.0", "utf-8"),
                 new XElement("AccessRequest",
                     new XElement("AccessLicenseNumber", "****************"),
                     new XElement("UserId", "******"),
                     new XElement("Password", "********")
                 )
             );
             // address
             var doc2: XDocument = new XDocument(
                 new XDeclaration("1.0", "utf-8"),
                 new XElement("AddressValidationRequest",
                     new XElement("Request",
                         new XElement("TransactionReference",
                             new XElement("CustomerContext", "Infor Smart Office"),
                             new XElement("XpciVersion", "1.0"),
                         ),
                         new XElement("RequestAction", "XAV"),
                         new XElement("RequestOption", "3")
                     ),
                     new XElement("AddressKeyFormat",
                         new XElement("ConsigneeName", "Ciber"),          // Name
                         new XElement("BuildingName", ""),
                         new XElement("AddressLine", "Fiddlers Green"),   // Address line 1
                         new XElement("AddressLine", ""),                 // Address line 2
                         new XElement("AddressLine", ""),                 // Address line 3
                         new XElement("AddressLine", ""),                 // Address line 4
                         new XElement("Region", ""),
                         new XElement("PoliticalDivision2", "Greenwd"),   // City
                         new XElement("PoliticalDivision1", "CO"),        // State
                         new XElement("PostcodePrimaryLow", ""),          // Zip5
                         new XElement("PostcodeExtendedLow", ""),         // Zip4
                         new XElement("Urbanization", ""),
                         new XElement("CountryCode", "US")                // Country
                     )
                 )
             );
             // concatenate both XML docs
             var sw: StringWriter = new StringWriter();
             doc1.Save(sw);
             doc2.Save(sw);
             var docs: String = sw.GetStringBuilder().ToString();
             // HTTP request
             var request: HttpWebRequest = HttpWebRequest(WebRequest.Create("https://onlinetools.ups.com/ups.app/xml/XAV"));
             request.Method = "POST";
             var byteArray: byte[] = System.Text.Encoding.UTF8.GetBytes(docs);
             var dataStream: Stream = request.GetRequestStream();
             dataStream.Write(byteArray, 0, byteArray.Length);
             dataStream.Close();
             // HTTP response
             var response: HttpWebResponse = request.GetResponse();
             var data: Stream = response.GetResponseStream();
             var doc: XmlDocument = new XmlDocument();
             doc.Load(data);
             data.Close();
             response.Close();
             // check for errors
             var error: XmlNode = doc.SelectSingleNode("//Response/Error");
             if (error != null) {
                 debug.WriteLine("Error " + error.SelectSingleNode("ErrorCode").InnerText + ": " + error.SelectSingleNode("ErrorDescription").InnerText);
                 return;
             }
             // show results
             var nodes: XmlNodeList = doc.SelectNodes("//AddressKeyFormat");
             var keys : String[] = [
                 "AddressClassification/Description",
                 "ConsigneeName",
                 "BuildingName",
                 "AddressLine[1]",
                 "AddressLine[2]",
                 "PoliticalDivision2",
                 "PoliticalDivision1",
                 "PostcodePrimaryLow",
                 "PostcodeExtendedLow",
                 //"Region",
                 "Urbanization",
                 "CountryCode"
             ];
             for (var node: XmlNode in nodes) {
                 for (var i: int in keys) {
                     var value: XmlNode = node.SelectSingleNode(keys[i]);
                     debug.Write(value != null ? value.InnerText + ", " : "");
                 }
                 debug.WriteLine("");
             }
         }
     }
 }

That was a sample Smart Office Script to do address validation for M3 using UPS.

Also, check out the samples for USPS and Eniro and the Mashup.

That’s it! Please comment, follow, share, contribute, and donate your source code. Thank you.

UPDATE: I would like to specially acknowledge the contribution of William Dale at Augusta Sportswear for allowing me to use his UPS and USPS accounts so I can do my tests and write the scripts. Thank you William!

Open source address validation of US addresses for Infor M3

As part of the open source address validation project for Infor M3, I just uploaded to the GitHub repository a sample script for Infor Smart Office to validate an address in the US using the United States Postal Service USPS Web Tools API. I provide the script as proof-of-concept for the interested reader to complete to suit their needs.

USPS Web Tools API

The USPS Web Tools API has the Verify and ZipCodeLookup APIs that validate one or more addresses using XML over HTTP GET:
1
2

Sample request/response

Here is a sample XML request and the URL:

https://secure.shippingapis.com/ShippingAPI.dll?API=Verify&XML=…

<AddressValidateRequest USERID="************">
   <Address>
      <FirmName>Ciber</FirmName>
      <Address1>6363 South Fiddlers Green</Address1>
      <Address2></Address2>
      <City>Greenwood Village</City>
      <State>CO</State>
      <Zip5></Zip5>
      <Zip4></Zip4>
   </Address>
</AddressValidateRequest>

Here is the XML response:

<?xml version="1.0" encoding="UTF-8"?>
<AddressValidateResponse>
   <Address>
      <FirmName>CIBER</FirmName>
      <Address1>STE 1400</Address1>
      <Address2>6363 S FIDDLERS GREEN CIR</Address2>
      <City>GREENWOOD VLG</City>
      <State>CO</State>
      <Zip5>80111</Zip5>
      <Zip4>5024</Zip4>
   </Address>
</AddressValidateResponse>

Sample script

Here is the sample script TestUSPS.js in Smart Office:
3

Here are the resulting XML and HTTP request and response:
4


That was how to do address validation for M3 in Infor Smart Office for US addresses using USPS Web Tools.

If you like this, please comment, subscribe, share, contribute to the project, donate your code. Thank you.

UPDATE: I would like to specially acknowledge the contribution of William Dale at Augusta Sportswear for allowing me to use his UPS and USPS accounts so I can do my tests and write the scripts. Thank you William!

Workaround to have Google Maps back in Mashups

I found a quick workaround to have Google Maps back into Infor Smart Office Mashups. There are currently three problems with Google Maps in Mashups. I’m using Smart Office 10.1.1.1.5, on Windows 7 Professional 64 bits, with Internet Explorer 11.0.9600.17207.

Problem 1

The first problem is that some time ago Google Maps changed their service and removed the parameter output=embed from the allowed parameters of the URL. The embed output was great as it used to hide the header, footer, and sidebar making it ideal for limited spaces like Mashups; the default output having been classic. With that parameter now disallowed, it causes Google Maps to display the error “The Google Maps Embed API must be used in an iframe” and that happens whether in a browser or in a Mashup, and it even broke the built-in Mashup sample of Mashup Designer:
9
8

I haven’t investigated all the details of the problem but I found a workaround. Replace the value embed of the parameter with either of these values: svembed, embedmfe, or svembedmfe. sv seems to be the prefix for Street View. I haven’t yet figured out what the suffix mfe means nor if it will remain long lived.

Here’s a sample result of Google Maps embedded in my browser:
10

Problem 2

Instead of using the output parameter we could simply use the Google Maps new look which is lean and sexy and also hides the header, footer and sidebar. But unfortunately, the WebBrowser control of Smart Office Mashups sends the HTTP request header Accept: */* instead of Accept: text/html, application/xhtml+xml, */* and that causes Google Maps to respond with HTTP 302 Found redirecting to output=classic and we’re back at problem 1:
12

Problem 3

The third problem is that Google Maps in a Mashup now throws a JavaScript error popup:
11

I haven’t yet investigated what causes it. It seems to be caused by the old render mode IE7 that Smart Office uses (although in the past the same render mode wasn’t causing the script error). The workaround is to add a registry key to your Windows to force the render mode to IE11 (and you need to install Internet Explorer 11). You can read more about this in Karin’s post. Microsoft has tools to push registry keys to users computers. Here’s the Windows Registry key I just added on my computer:
4

Result

After changing to output=svembed, and after adding the Windows Registry key, here’s the result in my Smart Office: the output is correctly embedded, there is no script error, the map works correctly (zoom/pan/etc.), and the Mashup events still work correctly:
7

That was a quick workaround to get Google Maps back into Mashups. If you know of a simpler solution let me know.

Open source address validation of Nordic addresses for Infor M3

As part of the open source address validation project for Infor M3, I just uploaded to the GitHub repository two sample scripts for Infor Smart Office to do address validation in Nordic countries: Sweden (eniro.se), Denmark (krak.dk), and Norway (gulesider.no). I provide the scripts as proof-of-concept for the interested reader to complete to suit their needs.

Eniro Geocode

The script TestEniroGeocode.js uses the Eniro geocode API. This API seems to be best for address validation, and you don’t need an account for it. But it seems to be deprecated, and I was only able to find an old copy of the documentation.
EniroGeocode
TestEniroGeocode_

Eniro API

The script TestEniroAPI.js uses the Eniro API. This API seems to be for searching places only, like “restaurants in Stockholm”, and doesn’t seem usable for address validation for M3. Also, you will need an account with Eniro, and you will need to sign in to api.eniro.com to see your account profile, key, and documentation.
EniroAPI
TestEniroAPI_


Those were two quick proof-of-concepts scripts for Infor Smart Office to illustrate how to use Eniro to do address validation for Infor M3.

That’s it! Please comment, like, share, follow, author, contribute to the project, donate your source code. Thank you.