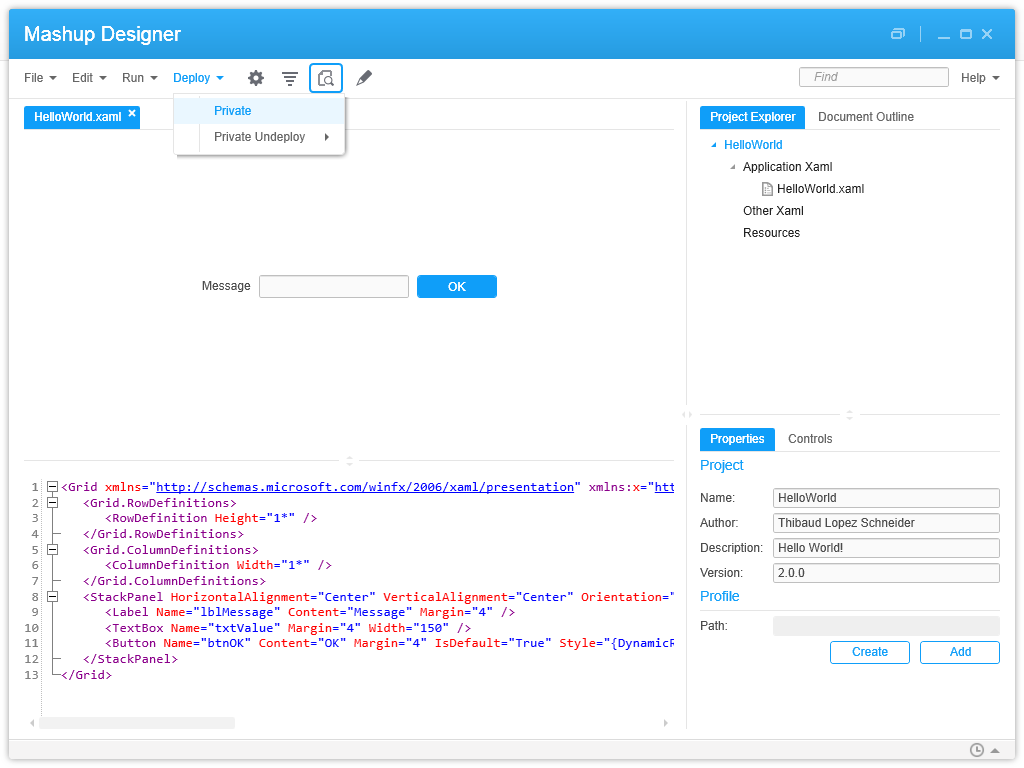
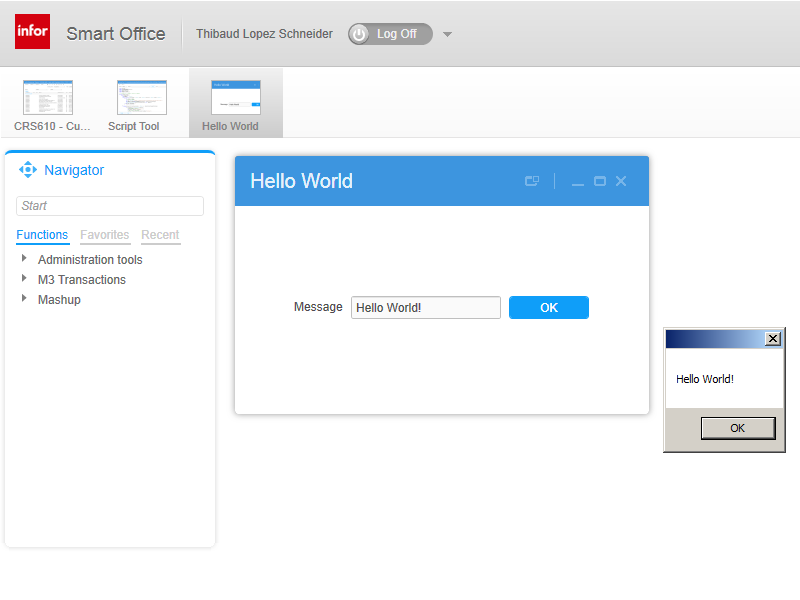
Here are illustrated steps to add a web part to H5 Client. This post follows-up my previous post where I introduced H5 Client. This is useful for creating personalizations in H5 Client.
As a reminder, H5 Client is a web client for M3 (HTML, CSS, JavaScript, jQuery, and XmlHttpRequests running in a browser) and if it runs as part of H5 Enterprise then we can add Web parts which are custom web development parts that we write to interact between H5 Client and our code. This technique is similar to Movex Next Extension Adaptation Interface (MNEAI) scripts for Movex Explorer around 1999 and Movex Workplace around 2000, and it is similar to Smart Office Scripts of today.
DRAFT
I started this post a long time ago, faced some technical issues, moved on to other assignments, and never managed to finish it nor polish it. So the screenshots don’t match with each other, and the steps are not necessarily all in order. It’s very much like a draft post. But I decided to post it anyway otherwise I’ll never post it. And there are enough steps and screenshots so you get the point. That will give you a head start.
M3 H5 Enterprise
First, you will need M3 H5 Enterprise to be able to use Web Parts; H5 Foundation will not be sufficient.
Create a webpage
Then, create a webpage and publish it on a web server of your choice. It will be run in an iframe in Ming.le and will communicate with H5 Client via message passing.
For example, I created a folder jscriptH5 next to the jscript folder that is used for Smart Office scripts, and I dump my HTML and JavaScript files there (this is probably not the best location as the parent folder is managed by LifeCycle Manager and might be deleted with upgrades…although so will the jscript folder):
\\yourhost\d$\Infor\LifeCycle\<yourhost>\grid\<yourgrid>\grids\<yourgrid>\applications\M3_UI_Adapter\webapps\mne\jscriptH5\
You will need to be a bit familiar with jQuery.
Add code like this for message passing:
<html>
    <head>
        <title>Thibauds web part test</title>
        <script src="somewhere/jquery-1.8.2.min.js"></script>
        <script src="somewhere/jquery.json-2.2.js"></script>
        <script>
            jQuery(function ($) {
                // register message handler
                infor.companyon.client.registerMessageHandler('inforBusinessContext', messageHandler);
                // send a message to Ming.le (for instance resize the Web Part)
                infor.companyon.client.sendMessage(window.name, { height : '235px' });
                // receive a message from Ming.le with the values of the Context
                function messageHandler(o) {
                    alert(o);
                }
            });
        </script>
    </head>
    <body>
        Hello World!!!
    </body>
</html>
Message definition
Then, follow these steps to add a message definition to the M3_UI_Adapter (mne) properties in LifeCycle Manager:
- Go to LifeCycle Manager
- In the Applications View, expand your environment (Development, Education, Test, etc.)
- Right-click M3_UI_Adapter and select Configure Application
- Click Edit Properties
- Expand Infor Workspace Settings
- Click the Value of the Property Context List to edit it (it will show the current number of Entries)
- Click Add New Line and select Append
- Enter a message definition as a JSON object, with
uid, title, type, and data, where data is a JSON object with the key/value pairs you want to pass to your Web Part, for example:
{“uid”:”M3_TBO”, “title”:”Thibaud Hello”, “type”:”thibaudHello”, “data”:{“hello”: “”}}
- Validate your JSON object for example with JSON lint
- Here’s a screenshot so far (the JSON in the screenshot was an old test with wrong values):

- Click Save to save changes to disk, a popup will appear
- Click Save again to confirm
- Now let’s verify it’s saved correctly
- Close the tab
- Back in the Applications View, right-click M3_UI_Adapter and select Monitor Application
- Expand the Node for Application M3_UI_Adapter and select M3UIAdapterModule
- Select Properties
- Double-check the Value of the ContextList Property and ensure your JSON object is correct; an incorrect value will break H5 Client without giving you any error messages and that will be difficult to troubleshoot.

Infor Ming.le administration
Then, follow these steps to become an administrator of Infor Ming.le:
- Go to Infor Ming.le at http://yourhost/SitePages/InforSuite.aspx
- Login as an administrator
- Select Site Actions > Site Permissions:

- Select Site Collection Administrators
- Enter the userids of those who will be administrators
- Click OK

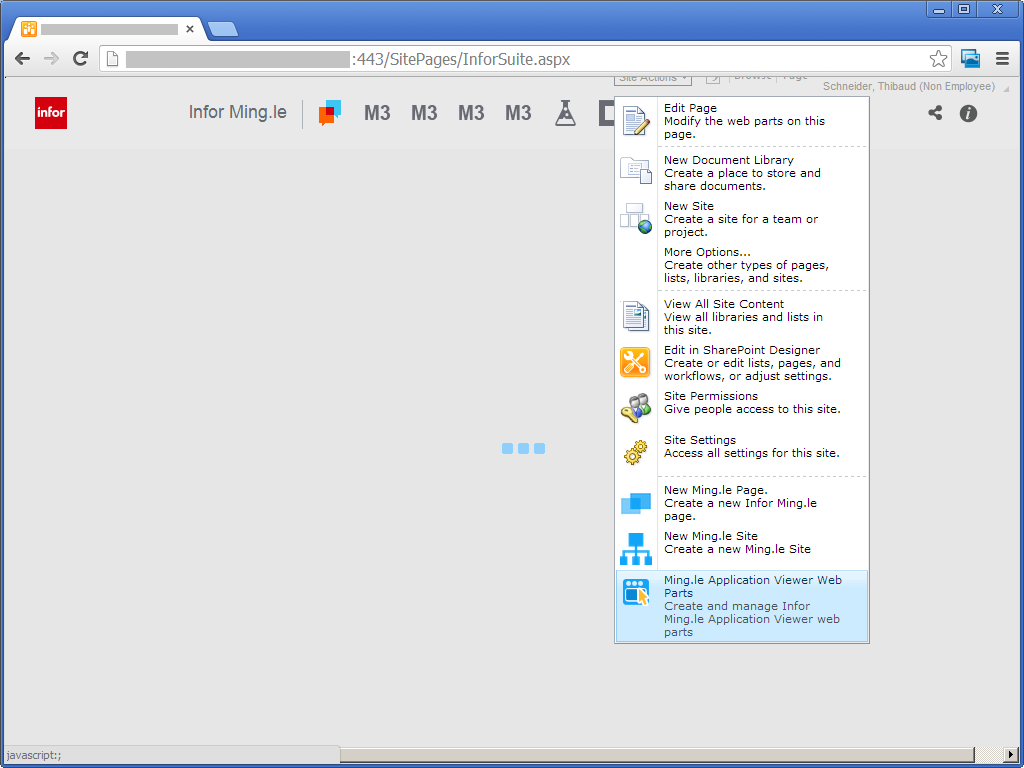
Ming.le Application Viewer Web Part
Then, follow these steps to add your Web Part:
- Select Site Actions
- Select Ming.le Application Viewer Web Part:

- Select the Category, for example Infor
- Enter the Title, Description, and URL
- Select an Icon
- Click Save (the URL when I took the screenshot had an incorrect value):


Context Application Manager
Then, follow these steps to add the Context Application Manager:
- Select Context Application Manager in the top right corner of Ming.le
- Select your Web Part on the left, and click the right arrow
- Click Save (my screenshots don’t match my final test but you get the point):

- Now you have a Web Part on the Right Panel Zone:


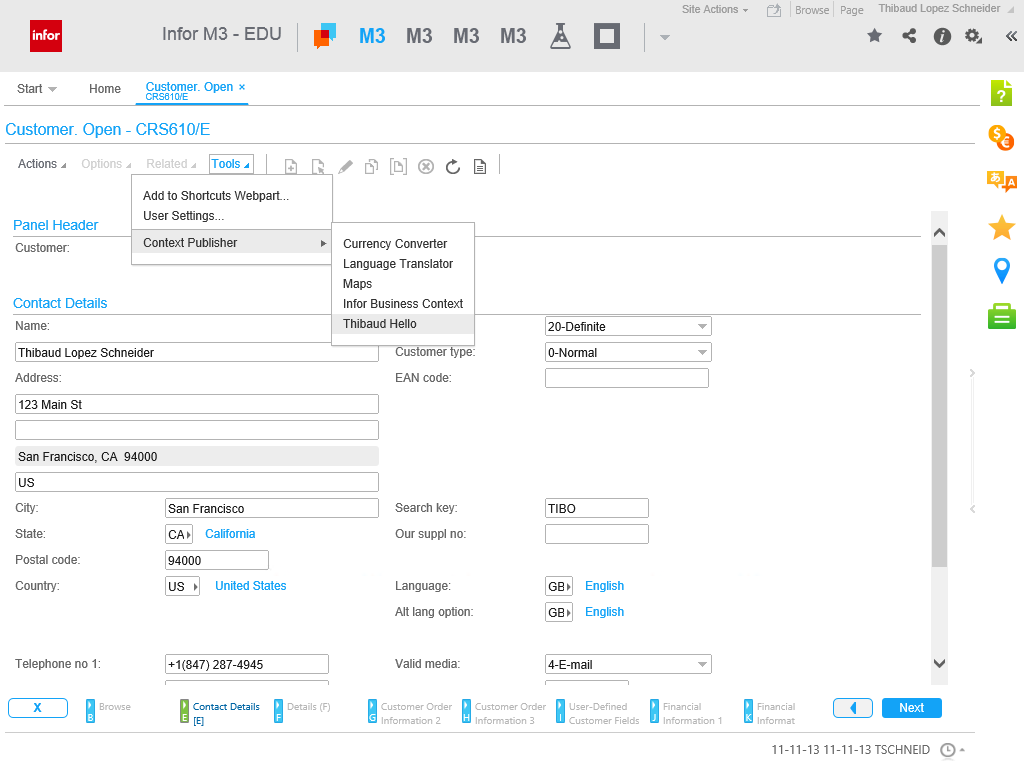
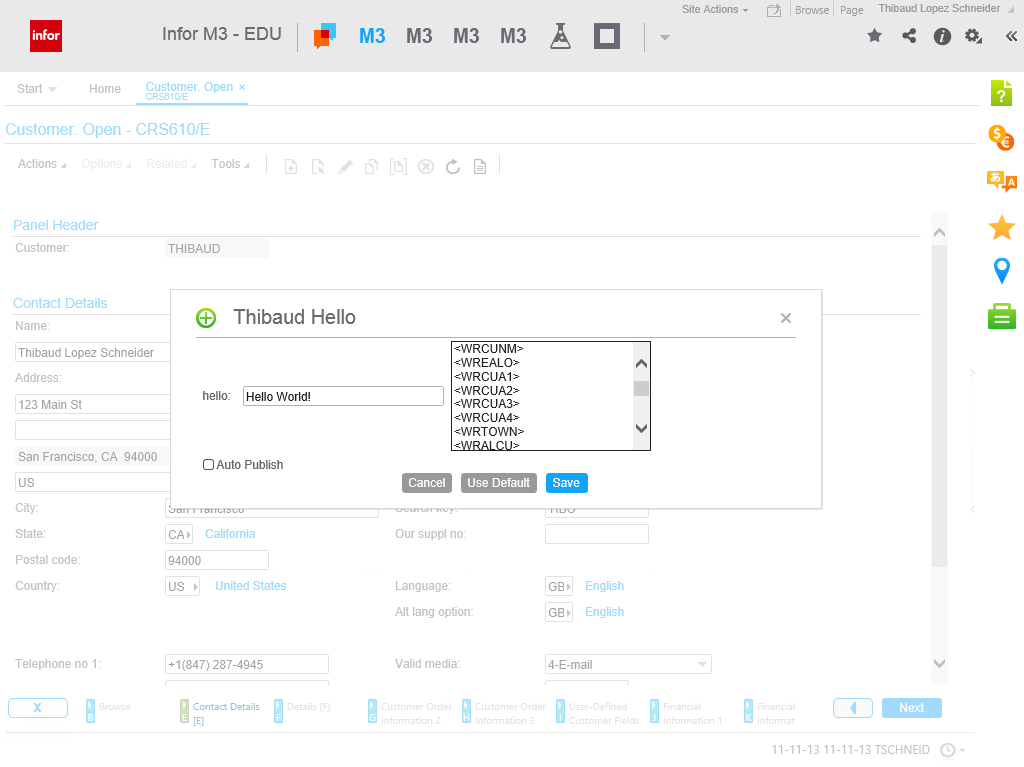
Context Publisher
Then, configure the Context Publisher:
- Go to the desired M3 program/panel, for example CRS610/E
- Select Tools > Context Publisher, and select your Web Part
- Configure your Web Part by setting values for the keys, for example Hello World! <WRCUNM>:

- Click Save:

Start Web Part
Now start the Web Part by clicking on the Panel Zone. You web part code will get the parameters.
Future work
Future work would include:
- Reduce the number of steps it takes
- Configure the Web Part per M3 environment (DEV, EDU, TST, etc.). This seems like it’s not native to Ming.le Web Parts.
- Un-hard-code the Web Part URL
- Get any field dynamically in source code, ideally with a variable like controller or content, instead of having to configure the Message Definition and Web Part (I’m not an expert on this yet so there might already be some functions or variables available that I’m not seeing).
- Apply the Web Part only to a desired program/panel.
Acknowledgement
Thanks to Joakim B. for all the help.
That’s it.