Open source address validation of Nordic addresses for Infor M3

As part of the open source address validation project for Infor M3, I just uploaded to the GitHub repository two sample scripts for Infor Smart Office to do address validation in Nordic countries: Sweden (eniro.se), Denmark (krak.dk), and Norway (gulesider.no). I provide the scripts as proof-of-concept for the interested reader to complete to suit their needs.

Eniro Geocode

The script TestEniroGeocode.js uses the Eniro geocode API. This API seems to be best for address validation, and you don’t need an account for it. But it seems to be deprecated, and I was only able to find an old copy of the documentation.
EniroGeocode
TestEniroGeocode_

Eniro API

The script TestEniroAPI.js uses the Eniro API. This API seems to be for searching places only, like “restaurants in Stockholm”, and doesn’t seem usable for address validation for M3. Also, you will need an account with Eniro, and you will need to sign in to api.eniro.com to see your account profile, key, and documentation.
EniroAPI
TestEniroAPI_


Those were two quick proof-of-concepts scripts for Infor Smart Office to illustrate how to use Eniro to do address validation for Infor M3.

That’s it! Please comment, like, share, follow, author, contribute to the project, donate your source code. Thank you.

AsYouTypeFormatter for Smart Office

In this post I will introduce a proof-of-concept of AsYouTypeFormatter for Smart Office. AsYouTypeFormatter is used to “format phone numbers on-the-fly when users enter each digit.” It’s part of the open source library libphonenumber, “Google’s phone number handling library, powering Android and more.” This post complements my previous post where I discussed International phone number parsing, validation and formatting for Smart Office.

AsYouTypeFormatter

In addition to parsing, validation, and formatting, libphonenumber has a nice AsYouTypeFormatter that formats the phone number as the user types it.

You can test it with the Phone Number Parser Demo. Here’s a screenshot:
AsYouTypeFormatter

Standard Smart Office without AsYouTypeFormatter

Here is a demo of entering a phone number in the field WRPHNO in M3. Customer Open – CRS610/E in standard Smart Office (without AsYouTypeFormatter); the phone number is not validated nor formatted:

Smart Office with AsYouTypeFormatter

And here’s the same demo with AsYouTypeFormatter that’s formatting the phone number on-the-fly as I enter each digit (I typed only the digits):

Here is the complete source code for that demo:

import System;
import System.Collections;
import System.Windows.Controls;
import libphonenumber;
import MForms;

package MForms.JScript {
	class Test {
		var debug;
		var formatter: AsYouTypeFormatter = PhoneNumberUtil.Instance.GetAsYouTypeFormatter("US");
		var textboxes: ArrayList = new ArrayList();
		var isTextChanging: boolean = false; // to avoid infinite loop in OnTextChanged
		public function Init(element : Object, args : Object, controller : Object, debug : Object) {
			try {
				// save global variables
				this.debug = debug;
				// attach to the phone fields
				var content = controller.RenderEngine.Content;
				var supportedPhoneFields: String[] = ["WRPHNO", "WRPHN2", "WRTFNO"];
				for (var i: int in supportedPhoneFields) {
					var fieldName: String = supportedPhoneFields[i];
					var textbox: TextBox = ScriptUtil.FindChild(content, fieldName);
					if (textbox != null) {
						textboxes.Add(textbox);
						textbox.add_TextChanged(OnTextChanged);
					}
				}
				controller.add_Requested(OnRequested);
			} catch (ex: Exception) {
				debug.WriteLine(ex);
			}
		}
		/* User is typing */
		function OnTextChanged(sender: Object, e: TextChangedEventArgs) {
			try {
				if (!isTextChanging) {
					var textbox: TextBox = sender;
					if (textbox.Text.Length > 0) {
						// format the phone number as the user is typing it
						var newChar: char = textbox.Text.Substring(textbox.Text.Length - 1);
						var newText: String = formatter.InputDigit(newChar);
						isTextChanging = true;
						textbox.Text = newText;
						textbox.CaretIndex = textbox.Text.Length;
						isTextChanging = false;
					}
				}
			} catch (ex : Exception) {
				debug.WriteLine(ex);
			}
		}
		/* Clean-up */
		function OnRequested(sender: Object, e: RequestEventArgs) {
			try {
				if (sender != null) {
					sender.remove_Requested(OnRequested);
				}
				for (var textbox: TextBox in textboxes) {
					if (textbox != null) {
						textbox.remove_TextChanged(OnTextChanged);
					}
				}
			} catch (ex : Exception) {
				debug.WriteLine(ex);
			}
		}
	}
}

Limitations and future work

But according to this thread, AsYouTypeFormatter doesn’t support the backspace key, nor emptying the field, nor replacing a selection, nor inserting text somewhere in the middle. The solution is to handle all the cases ourselves in code. All these are already implemented in android.telephony.PhoneNumberFormattingTextWatcher. There is a partial port of Android to C# in XobotOS, “a Xamarin research project that explored porting Android 4.0 from Java/Dalvik to C#”. So to properly implement AsYouTypeFormatter in Smart Office we would need to combine libphonenumber-csharp and XobotOS.


That’s it! That was my proof-of-concept demo of AsYouTypeFormatter for Smart Office to format phone numbers in M3 Programs as the user is typing the digits.

Like, share, comment, enjoy.

/Thibaud


International phone number parsing, validation and formatting for Smart Office

Today I will introduce a simple solution to do international phone number parsing, validation and formatting in Infor Smart Office. The goal is to validate phone numbers entered by users in Infor M3 Programs such as M3 Customer – CRS610/E, or in Infor Customer Lifecycle Management (CLM) Account Details, against international phone number specifications, and to get the resulting phone number in any of the desired output formats: E.164, international, national, and RFC3966. For that, I will use libphonenumber, “Google’s phone number handling library, powering Android and more”, and more specifically I will use libphonenumber-csharp, the known port for C#.

Examples

Here are some examples of parsing, validation and formatting of a US phone number:

  • Valid phone number: 415 535 5452
  • Invalid phone number: 415 535 545222
  • Country code: 1
  • Phone Number region: US
  • Number type: FIXED_LINE_OR_MOBILE
  • E.164 format: +14155355452
  • International format: +1 415-535-5452
  • National format: (415) 535-5452
  • RFC3966 format: tel:+1-415-535-5452
  • Format for out-of-country calling from France: 00 1 415-535-5452

Why does it matter?

Phone number parsing, validation and formatting may be important in some scenarios.

For instance, for one of my customers, I’m integrating Cisco IP Communicator and Cisco Agent Desktop with CLM in Smart Office such that when customer service representatives receive incoming phone calls from their customers, Smart Office automatically searches for that incoming phone number in CLM and displays a list of possible matches. Then, the user can select the desired match and open the corresponding CLM Account Details. It saves precious time during the call. I wrote a previous post about it with some preliminary findings.

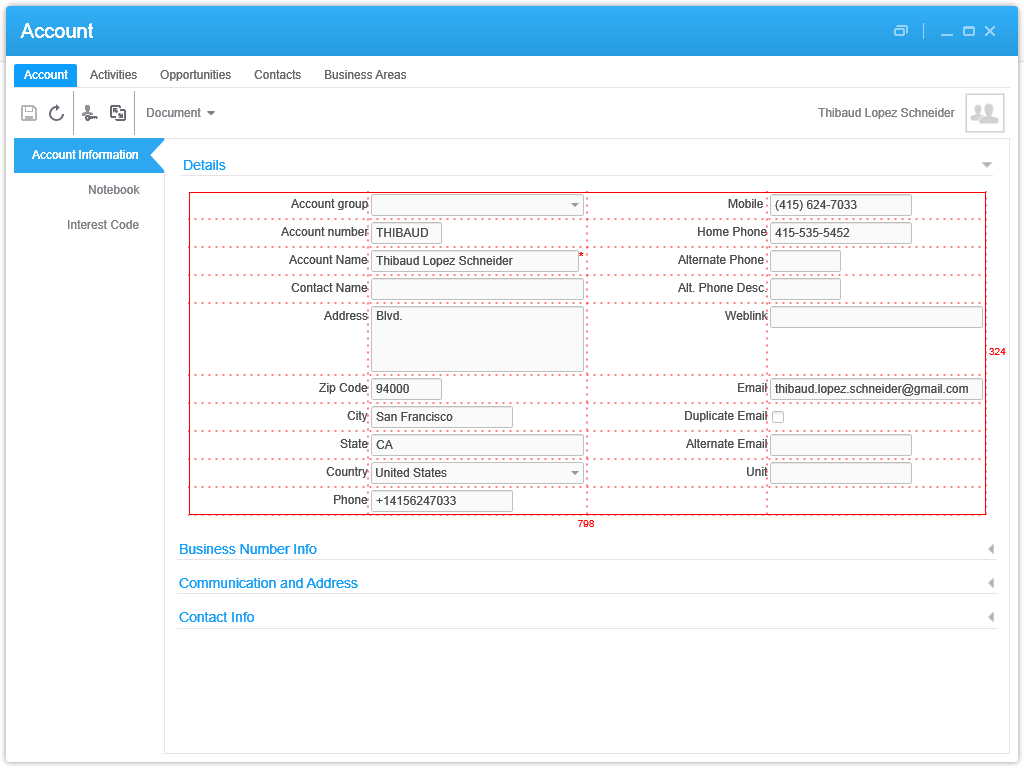
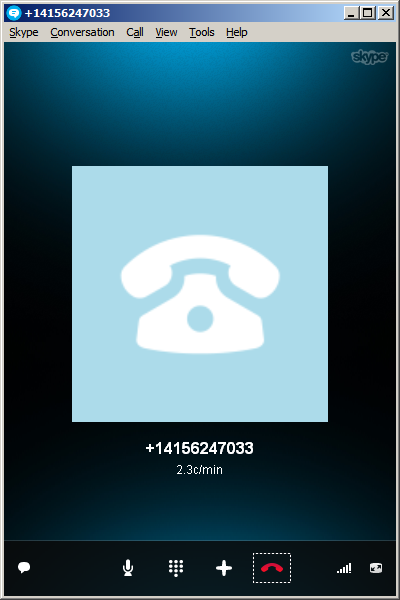
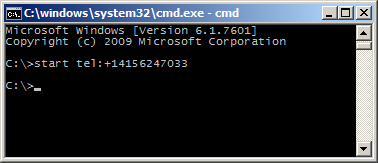
Conversely, users can click a phone number in CLM to make that outgoing phone call.

To implement that programmatically, how do we match the phone number of the incoming call with the phone numbers entered by users in CLM? Cisco Agent Desktop returns the ANI of incoming phone numbers as format 4155355452. What if the user entered the phone number in CLM as format (415) 535-5452? What if another user entered a duplicate record in CLM as format 415-535-5452? What if a user entered the phone number in CRS610 as format +14155355452? Also, for outgoing calls Cisco Agent Desktop will accept phone numbers as format 14155355452. That’s five different formats for the same phone number, and it requires record linkage.

That’s why it’s crucial to normalize the phone numbers so we can compare them.

Also, M3 and CLM synchronize their records with each other via Event Hub. So we have to validate entries on both sides or they would risk polluting each other.

The solution is to do phone number validation and formatting at user input so the user has a chance to enter the correct phone number. But doing it at the user interface level alone is not sufficient. We would also need to cover the other entry points such as M3 API, M3 Web Services of type M3 Display Program (MDP), and REST/SOAP Web Services. Also, as a reminder, we never do direct data entry in the database with SQL CREATE/UPDATE/DELETE as that could potentially break the integrity of the system, so we don’t need to cover that side.

Insufficient solutions

A naive solution to search a record by phone number is to select all records that match the input without normalization.

For example, searching CLM with SQL could be: SELECT AccountID FROM LCLM.Account WHERE Phone=’4155355452′. But that will fail to find the alternate valid numbers (415) 535-5452 and 415-535-5452. And we would have to protect it against SQL injection attacks.

Another naive solution is to strip all non-digit characters and count the resulting number of characters. For example, phone numbers in the United States have 10 digits, so the valid phone number (415) 535-5452 would be correctly validated, but the alternate valid phone number +1 (415) 535-5452 would incorrectly be rejected whereas it’s valid. We could improve the solution and say we now accept 11 digits, but then the valid French phone number +33 6 15 62 07 51 would incorrectly be validated as a US phone number, which is not true.

We could go further and restrict the space of phone numbers to only a specific country, say United States and use the North American Numbering Plan (NANP). But that will just temporarily buy time as there will likely be a need to support international phone numbers at a later point in the future.

Going further, we could use regular expressions. For example, according to this Microsoft pattern & practices document, the regular expression ^[01]?[- .]?(\([2-9]\d{2}\)|[2-9]\d{2})[- .]?\d{3}[- .]?\d{4}$ “Validates a U.S. phone number. It must consist of 3 numeric characters, optionally enclosed in parentheses, followed by a set of 3 numeric characters and then a set of 4 numeric characters.” Unfortunately, that will not validate a valid phone number such as +14155355452; we could improve the regular expression to validate the international prefix +1. Also, it will only validate NANP phone numbers, not international numbers; we could add more regular expressions for other countries.

Also, what about legitimate phone numbers with extensions like (415) 535-5452#1738 ?

We could iteratively improve the solutions, adding more tests and fixes, but it will unfortunately prove to be insufficient unless we spend a tremendous amount of effort. It’s like trying to implement ones own library of time and time zones, or trying to implement ones own cryptographic library.

Advantages of using a known library

libphonenumber is “Google’s common Java, C++ and Javascript library for parsing, formatting, storing and validating international phone numbers. The Java version is optimized for running on smartphones, and is used by the Android framework since 4.0 (Ice Cream Sandwich).”

Using proven robust open source libraries is always a good choice. This library is used by the billion Android phones on the market, so that tells something about its robustness and correctness. And it supports Java and JavaScript so we could use it in M3 Business Engine (Java) and H5 Client (JavaScript). And there is a port for C# so we can also use it in Smart Office, which I will.

Examples for Smart Office

I will use libphonenumber-csharp in a Smart Office script.

For that, I need to create a new feature in Smart Office SDK to add a reference to libphonenumber.dll and to deploy it with ClickOnce. I had originally tried simply using System.Reflection.Assembly.LoadFrom(String), but I couldn’t get it to work.

Once I have a reference to the assembly, I validate the phone number with:

import libphonenumber;
...
var number: PhoneNumber = PhoneNumberUtil.Instance.Parse(phoneNumberStr, "US");
if (number.IsValidNumber) {
    // valid
} else {
    // invalid
}

Then, I format the phone number with:

number.Format(PhoneNumberUtil.PhoneNumberFormat.INTERNATIONAL)
number.Format(PhoneNumberUtil.PhoneNumberFormat.NATIONAL)
number.Format(PhoneNumberUtil.PhoneNumberFormat.E164)
number.Format(PhoneNumberUtil.PhoneNumberFormat.RFC3966)
number.FormatOutOfCountryCallingNumber("US")
number.FormatOutOfCountryCallingNumber("FR")

Example for M3 Programs

The sample source code to validate and format phones numbers in M3 Programs is the following:

import System;
import libphonenumber;

package MForms.JScript {
    class Test {
        public function Init(element : Object, args : Object, controller : Object, debug : Object) {
            var number: PhoneNumber = PhoneNumberUtil.Instance.Parse(element.Text, "US");
            if (number.IsValidNumber) {
                debug.WriteLine(number.Format(PhoneNumberUtil.PhoneNumberFormat.INTERNATIONAL));
                debug.WriteLine(number.Format(PhoneNumberUtil.PhoneNumberFormat.NATIONAL));
                debug.WriteLine(number.Format(PhoneNumberUtil.PhoneNumberFormat.E164));
                debug.WriteLine(number.Format(PhoneNumberUtil.PhoneNumberFormat.RFC3966));
                debug.WriteLine(number.FormatOutOfCountryCallingNumber("US"));
                debug.WriteLine(number.FormatOutOfCountryCallingNumber("FR"));
            }
        }
    }
}

Here is a sample screenshot of the validation and formatting of the field Telephone no 1 (WRPHNO) in M3 Customer. Open – CRS610/E:

2

Example for CLM

My sample source code to validate and format phones numbers in CLM Accounts is the following:

import System;
import System.Windows;
import lclmControls.Classes.UI;
import lclmControls.Common;
import lclmControls.Custom;
import Mango.Services;
import Mango.UI.Core;
import Mango.UI.Services;
import libphonenumber;

package MForms.JScript {
	class Test {
		public function Init(element : Object, args : Object, controller : Object, debug : Object) {
			try {
				var runners: RunnerCollection = DashboardTaskService.Manager.ExecutingTasks();
				var runner: IRunner = runners[4]; // I'm Feeling Lucky
				var task: ITask = runner.Task;
				var view: TabularDetailsView = task.Parameter;
				var detailsView: DetailsView = view.DetailsView;
				var baseDialog: BaseDialog = detailsView.BaseDialog;
				var groups: DataGroup[] = baseDialog.DataGroups;
				var group: DataGroup = groups[0]; // I'm Feeling Lucky
				var sections: DataSection[] = group.GetSections();
				var section: DataSection = sections[0]; // I'm Feeling Lucky
				var dataField: DataField = section.GetField("Phone");
				var dataEditor: FrameworkElement = dataField.DataEditor;
				var txtbox: SingleLineTextBox = dataEditor;
				var number: PhoneNumber = PhoneNumberUtil.Instance.Parse(txtbox.Text, "US");
				if (number.IsValidNumber) {
					debug.WriteLine(number.Format(PhoneNumberUtil.PhoneNumberFormat.INTERNATIONAL));
					debug.WriteLine(number.Format(PhoneNumberUtil.PhoneNumberFormat.NATIONAL));
					debug.WriteLine(number.Format(PhoneNumberUtil.PhoneNumberFormat.E164));
					debug.WriteLine(number.Format(PhoneNumberUtil.PhoneNumberFormat.RFC3966));
					debug.WriteLine(number.FormatOutOfCountryCallingNumber("US"));
					debug.WriteLine(number.FormatOutOfCountryCallingNumber("FR"));
				}
			} catch (ex : Exception) {
				debug.WriteLine(ex);
			}
		}
	}
}

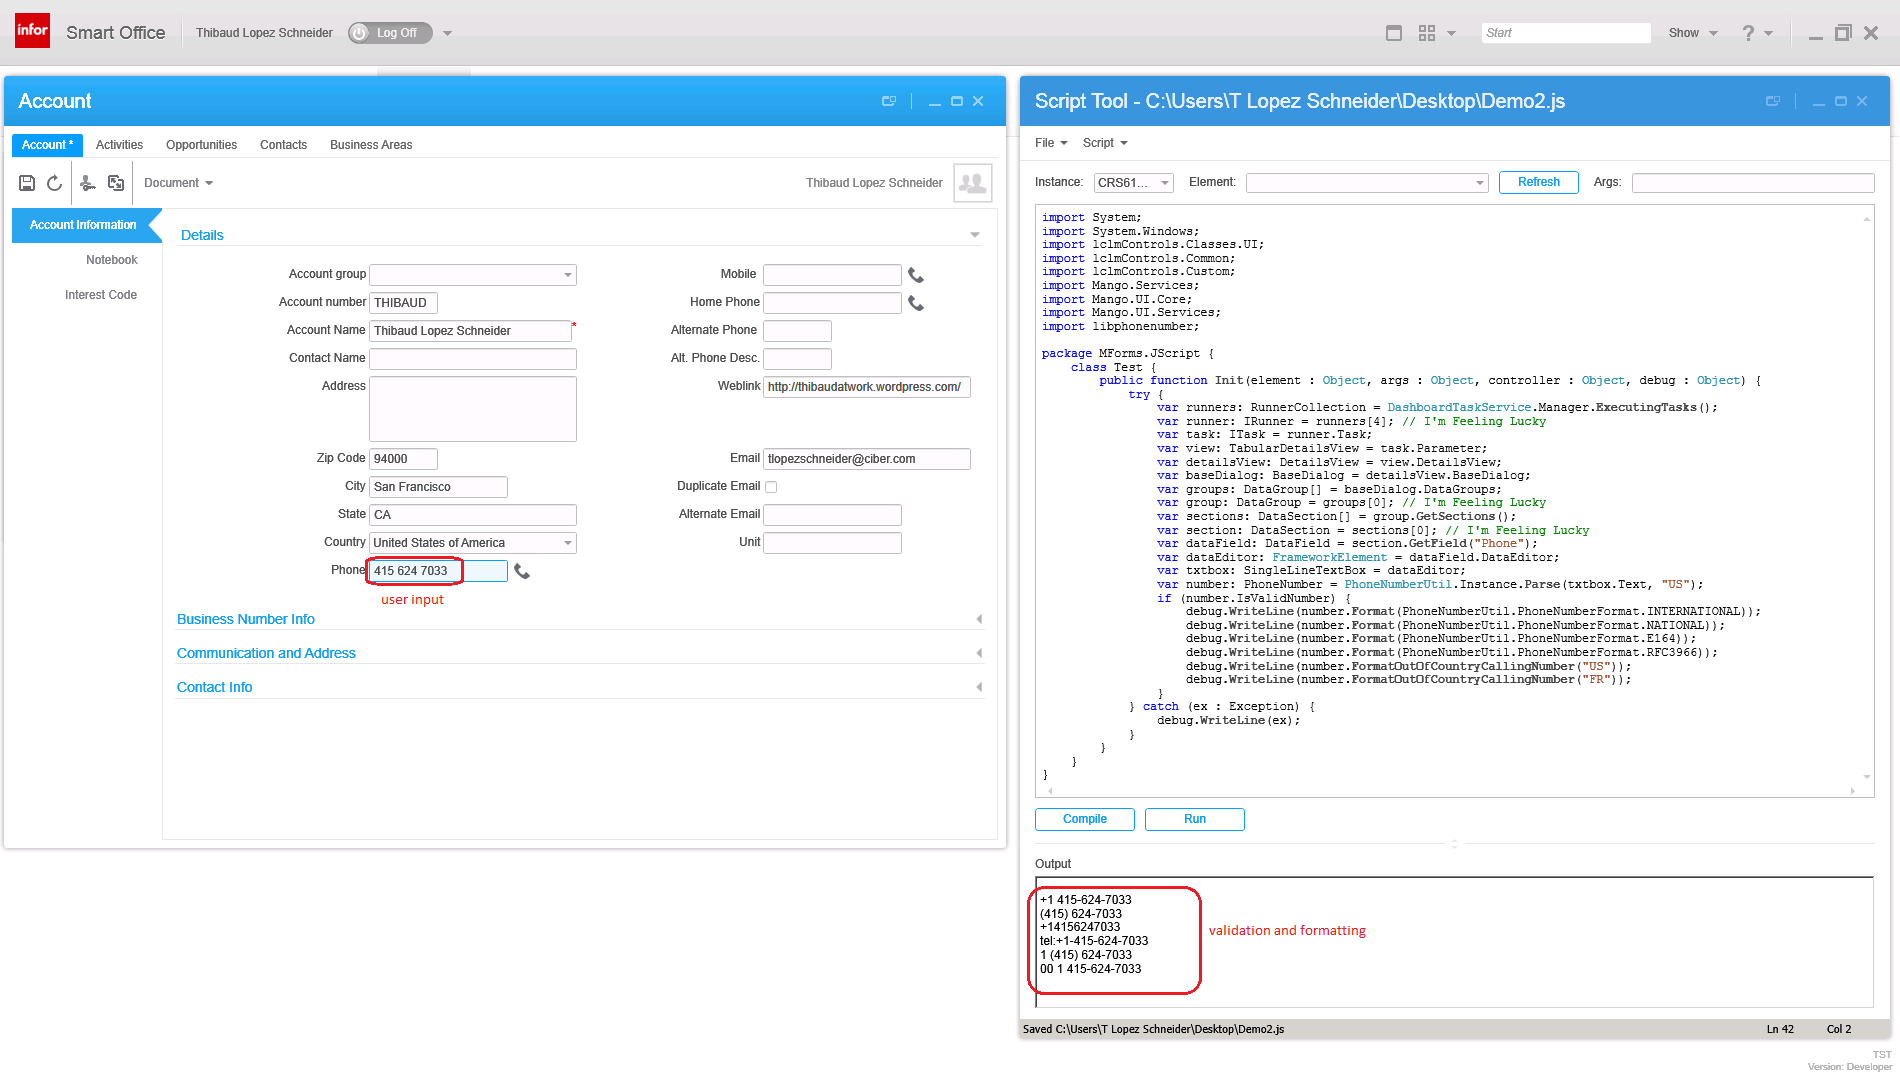
Here is a sample screenshot of the validation and formatting of the field Phone in a CLM Account Details View:
4

This is a proof-of-concept source code for demonstration purposes with “I’m feeling lucky” about the array indexes and not checking if object references are null. I will let the reader write the proper, and more lengthy code.

Completeness

For completeness, a robust solution would need to cover all entry points:

For M3 Programs:

  • MForms in Smart Office
  • MForms in H5 Client
  • M3 API (MvxAPI protocol, REST, and SOAP)
  • M3 Web Services (MWS) of type M3 Display Program (MDP) (REST and SOAP)

For the M3 UI, the solution would involve a combination of Smart Office Scripts in .NET, and H5 Client Web Parts in JavaScript. And for the backend, it would be M3 Java modifications with MAK; using Event Hub would be too late.

For CLM:

  • CLM in Smart Office
  • CLM-Web
  • CLM REST Web Services
  • CLM SOAP Web Services

For the CLM UI, the solution would involve the same combination of Smart Office Scripts in .NET, and H5 Client Web Parts in JavaScript. And for the backend, I’m not a CLM expert but I heard database triggers would do it.

Also, we would need to do retro- validation and formatting of phone numbers that were already entered in the M3 Programs and CLM.

That’s a lot of work.

My wish

My wish is that Infor Product Development implements phone number validation standard into Smart Office. Same for address validation in M3.

Conclusion

In this article I introduced my simple solution to do phone number parsing, validation and formatting for M3 Programs and CLM Accounts in Smart Office using the proven open source library libphonenumber and its known port for C#. I also explained why parsing, validation and formatting of phone numbers matters in some cases. I implemented a demo for M3 Programs and one for CLM Account Details. I also presented my thoughts on insufficient solutions. Then, I discussed what a complete solution would look like.

In my next article, I will present a proof-of-concept of AsYouTypeFormatter to format a phone number as the user is typing the digits.

That’s it!

If you liked this, please Follow the blog by clicking the button below, and let us know your comments in the section below. And share this with your colleagues, customers and partners to grow the community. Or become an author and share your ideas here. Or be a ninja and create your own blog!

/Thibaud

Hacking Customer Lifecycle Management (CLM)

Today I will show you how I made simple modifications to Infor Customer LifeCycle Management (CLM), the CRM product for Infor M3. With CLM standard out-of-the-box we only have the ability to show/hide fields, for example choosing whether or not we want the name, address, and phone number columns in the list or the fields in the details view. CLM is a great product, and by design it is intended to be simple to use. In my case I wanted something more: I needed to add a call button next to the phone number. That is not officially possible by default so I had to do some hacking.

I’m working on a project for a customer to integrate Cisco IP phones with CLM, such that when a customer service representative on the phone receives an incoming phone call we automatically pop-up the corresponding customer data on the screen, and conversely, such that they can click a phone number in CLM and make that outgoing phone call. I had already done some work in the past integrating Skype with Smart Office, and integrating ShoreTel phones with Smart Office. This time it’s Cisco IP phones. I cannot show you the entire source code as it’s propriety of the customer and my employer, but I will show you interesting bits and pieces, and the writing helps me clean-up my code too.

I will show you:

  • How to get the list of open CLM windows
  • How to find the phone number field
  • How to add a button to CLM and use the Design System Icons
  • How to make the outgoing phone call

About CLM

To tell if you have CLM, go to Smart Office > Help > About Infor Smart Office > View features, and you will see CLM Application:
1

Then, go to the Navigator widget, you will see the menu Customer Lifecycle Management, expand it and launch My Accounts > All:
2

It will open the list of accounts:
3_

Double-click one of the rows to open the account details:
4_

How to get the list of open CLM windows

Now we have two CLM windows open: the list of accounts, and the details of an account. To programmatically get that list, I use the DashboardTaskService.FindRunningTaskByUri method, to discriminate by Uri lclm://
0


var list /*System.Collections.Generic.List<Mango.UI.Services.FindTaskResult>*/ = DashboardTaskService.Manager.FindRunningTaskByUri("lclm://", TaskMatch.StartsWith);
for (var result : FindTaskResult in list) {
    var runner : IRunner = result.Runner;
    var task : ITask = runner.Task;
    debug.WriteLine(task.Uri);
}

That will return two tasks:
lclm://filter/?ActionType=View&MainTableID=…&FilterGroupID=…&SubFilterID=…
lclm://details/?ActionType=View&MainTableID=…&PrimaryKey=…

Now we need to tell apart the Accounts windows from the other potential CLM windows such as Activities or Contacts:

var host : IInstanceHost = runner.Host;
if (host.HostTitle.StartsWith("Account")) {
    // ...
}

This code will only work for English. Ideally we would use an official CLM API that returns the correct Tasks, but I haven’t found one. Let me know if you find one.

How to find the phone number field

Now that we have the correct window, we can get its contents and find the phone number field. First, I use WPF Inspector to visually introspect the window and find the phone number field in the visual tree:
6

The fields are layed out in one of the ancestor Grids:
5

More specifically the phone number field is itself a Grid of one row and three columns:
6_

That’s where I’ll inject my button. To get there programmatically, I use the VisualTreeHelper, and I do a pre-order depth first search:

function ... {
    //...
    var content : FrameworkElement = host.HostContent;
    if (content.GetType().ToString() == "lclmControls.Custom.TabularDetailsView") {
        var o: DependencyObject = FindPhoneTextBox(content);
        if (o != null) {
            var txtbox: SingleLineTextBox = o;
        }
    }
}
function FindPhoneTextBox(o : DependencyObject): DependencyObject {
    // visit node
    if (o != null) {
        if (o.GetType().ToString().EndsWith("SingleLineTextBox")) {
            var txtbox: SingleLineTextBox = o;
            if (txtbox.Name == "Phone") {
                return o;
            }
        }
    }
    // visit children
    for (var i = 0; i < VisualTreeHelper.GetChildrenCount(o); i++) {
        var child = VisualTreeHelper.GetChild(o, i);
        var result: DependencyObject = FindPhoneTextBox(child);
        if (result != null) {
            return result;
        }
    }
    // not found
    return null;
}

How to add a button to CLM and use the Design System Icons

Now that we found the phone number field and the Grid, we can add a button. I will use the IconButtons of the Design System as illustrated by norpe:

var btn: IconButton = new IconButton();
btn.IconName = "Phone";
btn.ToolTip = "Call this phone number."
btn.HorizontalAlignment = HorizontalAlignment.Left;
btn.Margin = new Thickness(5, 0, 0, 0);
btn.Tag = txtbox; // remember the textbox
Grid.SetRow(btn, 0);
Grid.SetColumn(btn, 2);
Grid.SetColumnSpan(btn, 2);
var grid: Grid = VisualTreeHelper.GetParent(txtbox);
grid.Children.Add(btn);
btn.add_Click(OnCall);

This is the result, with the IconButton hover and ToolTip:
7_

Note: to get the Grid I used the textboxe’s parent. This assumption is true in CLM version 1.0.0.99, but could be false in a future version of CLM in which case this code would break. Ideally we would have an official CLM API for this.

How to make the outgoing phone call

Now you can do whatever with the phone number, for example use the default operating system’s URI handler for the tel scheme which is Skype in my case.

function OnCall(sender: Object, e: RoutedEventArgs) {
    try {
        var btn: Button = sender;
        var txtbox: SingleLineTextBox = btn.Tag;
        var phoneNumber: String = txtbox.Text;
        var uri: Uri = new Uri("tel:" + phoneNumber); // RFC 3966
        ScriptUtil.Launch(uri);
    } catch (ex : Exception) {
        debug.WriteLine(ex);
    }
}

And here’s the result:
8_

The method ScriptUtil.Launch will instruct the operating system to execute the specified command. That’s the equivalent of typing start command at the DOS prompt. In our case it’s:

start tel:+14156247033

9

That means any special characters of the command must be escaped, such as white spaces and ampersands. To escape white spaces in DOS that means enclosing the entire string in double-quotes. I tried enclosing the URI in double quotes, and it didn’t work. I also tried other escaping and encoding techniques like using backslash, plus sign, and %20, and they didn’t work either. So let’s simply strip it out:

phoneNumber = phoneNumber.Replace(' ', '');

Also, in my example I used a phone number that’s already correctly formatted in international E.123 notation which Skype understands. To validate the phone number, we can use a regular expression. A simple one is to strip all characters and keep only the plus sign and the digits, but that’s probably not fully compliant with the E.123 specification so we need to work more on this in the future:

var regex = /[^\+^\d]/g;
phoneNumber =  phoneNumber.replace(regex, "");

Future work

Future work includes:

  • Use an event handler to listen for new CLM windows to automatically add the Call button as the user opens the Account views. I couldn’t find an event, and Karin confirmed it’s not currently supported. I tried MForms.MainController, DashboardTaskService, DashboardTaskBar, lclmControls.EventNotifier, WindowManager, etc. I found an event handler for M3 Forms, an event handler for the Quick Start CTRL+R, and private event handlers that would have worked had they been public. Nothing I could use. I ended up using a worker that’s polling Tasks every second in a background thread (yikes).
  • Remember we added the button so we don’t add it again next time.
  • Add the Call button on all phone number fields: fax, mobile phone, home phone, etc.
  • Validate the phone number with a regular expression that complies with the specifications.
  • Make the outgoing call thru the Cisco IP phone instead of using Skype.
  • Listen for incoming phone calls.
  • Move the script to a widget using the Smart Office SDK.

That’s it! If you like this post, subscribe to this blog. And if you rock, become an author to share your ideas.

Open source project: address validation for M3

I’m announcing the start of an open source project: address validation for M3.

Address validation is the ability for the user to enter a partial or incorrect address, get a list of possible matches, chose the valid address, and save it in M3. The goals are: reduce data entry time, ensure goods will reach their destination, minimize shipment returns, accurately calculate taxes, etc.

I implemented address validation for several customers in the past years while at a previous job, and I proposed that the source code becomes a product available to every customer. I believe address validation should come standard with M3 as it is of great service. The project was ready for distribution in 2009 but it got stuck in the legal department because of a conflict with the licenses of the respective address providers. For example, it seems the company couldn’t sell software that uses the free Google Maps API. So now that I quit my last job and haven’t started a new one, I decided to re-ignite the idea as free and open source software. In that way there are no legal conflicts.

Also, I cannot re-use any of the source code nor material I wrote while at any previous job since all the data is intellectual property of that company, so I will have to re-write everything from scratch. And I need your help.

The goals are to provide address validation for M3 with choice of the following address providers:

  • Bing Maps
  • Eniro
  • Experian QAS
  • FedEx
  • Google Maps
  • Google Maps Premier
  • UPS
  • USPS

I’m looking to include more local address providers in: Belgium, Denmark, France, Germany, Norway, The Netherlands, etc. If you know of any, let me know.

The product will be self-configurable, starting with the following M3 programs :

  • Customer. Open – CRS610/E
  • Customer. Connect Addresses – OIS002/E
  • Supplier. Connect Address – CRS622/E
  • Customer Order. Connect Address – OIS102/E
  • Internal Address. Open – CRS235/E1
  • Company. Connect Division – MNS100/E
  • Ship-Via Address. Open – CRS300/E
  • Service Order. Connect Delivery Address – SOS005/E
  • Shop. Open – OPS500/I
  • Bank. Open – CRS690/E
  • Bank. Connect Bank Branch Office – CRS691/E
  • Equipment Address. Open – MOS272/E

It will be a client-side implementation for Smart Office using:

  • Script assemblies for Smart Office (C#)
  • Mashups (XAML)

With plans to support H5 Enterprise (HTML5/JavaScript) in the future.

It will be made available as free software under the GNU General Public License V3.0 license. It permits commercial use, distribution, and modification. And it requires source be made available, license and copyright notice be included, and changes be indicated. It’s copyleft instead of copyright.

Also, the resulting code will be subject to the licenses of the respective address providers: Google Maps, etc.

Also, this project is a good opportunity for me to contribute to the community, and to learn Git revision control.

I started a repository on GitHub here: https://github.com/ThibaudLopez/AddressValidation

Send me feedback. Let me know what you think. Tell your colleagues. And if you want to be a contributor, come help us.

/Thibaud

OptiMap_V2

Here is the second version of the OptiMap script for Smart Office that integrates the Delivery Toolbox – MWS410/B with OptiMap – Fastest Roundtrip Solver to calculate and show on Google Maps the fastest roundtrip for the selected Routes. This extends the first version of the script.

In this second version I added the possibility to set the starting address (for example the Warehouse) as the Script argument. See lines 52-54.

import System;
import System.Web;
import System.Windows;
import Mango.UI.Services.Lists;
import MForms;

/*

	OptiMap_V2 for M3
	Thibaud Lopez Schneider, Infor, October 19, 2012 (rev.2)

	This script illustrates how to integrate the Smart Office Delivery Toolbox - MWS410/B with OptiMap - Fastest Roundtrip Solver, http://www.optimap.net/
	to calculate and show on Google Maps the fastest roundtrip for the selected Routes; it's an application of the Traveling Salesman Problem (TSP) to M3.
	This is interesting for a company to reduce overall driving time and cost, and for a driver to optimize its truck load according to the order of delivery.

	To install this script:
	1) Deploy this script in the mne\jscript\ folder of your Smart Office server
	2) Create a Shortcut in MWS410/B to run this script; for that go to MWS410/B > Tools > Personalize > Shortcuts > Advanced > Script Shortcut, set the Name to OptiMap, and set the Script name to OptiMap
	3) Optionally, set the starting address (for example the Warehouse) as the Script argument; the address must be recognized by Google Maps
	4) Create a View (PAVR) in MWS410/B that shows the address columns ADR1, ADR2, ADR3

	To use this script:
	1) Start MWS410/B
	2) Switch to the View (PAVR) that shows the address columns ADR1, ADR2, ADR3
	3) Select multiple Routes in the list (press CTRL to select multiple rows)
	4) Click the OptiMap Shortcut
	5) The Shortcut will run the script, the script will launch OptiMap in a browser and pass the selected addresses as locN parameters in the URL, and OptiMap will optimize the roundtrip

	For more information and screenshots refer to:
	https://thibaudatwork.wordpress.com/2012/10/04/route-optimization-for-mws410-with-optimap/
	https://thibaudatwork.wordpress.com/2013/03/08/optimap_v2/

*/
package MForms.JScript {
	class OptiMap_V2 {
		public function Init(element: Object, args: Object, controller : Object, debug : Object) {
			try {
				// get a reference to the list
				var listControl: MForms.ListControl = controller.RenderEngine.ListControl;
				var listView: System.Windows.Controls.ListView = controller.RenderEngine.ListViewControl;
				if (listControl == null || listView == null) { MessageBox.Show('Error: Couldn\'t find the list.'); return; }
				// get the selected rows
				var rows = listView.SelectedItems; // System.Windows.Controls.SelectedItemCollection
				if (rows == null || rows.Count == 0) { MessageBox.Show('Error: Select multiple routes in the list (press CTRL to select multiple rows).'); return; }
				// get the address columns ADR1, ADR2, ADR3
				var column1: int = listControl.GetColumnIndexByName('ADR1');
				var column2: int = listControl.GetColumnIndexByName('ADR2');
				var column3: int = listControl.GetColumnIndexByName('ADR3');
				if (column1 == -1 || column2 == -1 || column3 == -1) { MessageBox.Show('Error: Couldn\'t find the address columns ADR1, ADR2, ADR3.'); return; }
				// construct the URL
				var query: String = 'http://www.optimap.net/?';
				// set the optional starting address
				var offset: int = 0;
				if (!String.IsNullOrEmpty(args)) { offset=1; query += 'loc0=' + HttpUtility.UrlEncode(args) + '&'; }
				// add the selected addresses
				for (var i: int = 0; i < rows.Count; i++) {
					var row: ListRow = rows[i];
					var ADR1: String = row[column1];
					var ADR2: String = row[column2];
					var ADR3: String = row[column3];
					var address: String = ADR1 + ',' + ADR2 + ',' + ADR3;
					query += 'loc' + (i+offset) + '=' + HttpUtility.UrlEncode(address) + '&';
				}
				// launch OptiMap in a browser
				ScriptUtil.Launch(new Uri(query));
			} catch (ex: Exception) {
				MessageBox.Show(ex);
			}
		}
	}
}

Here is a screenshot of how to set the address as an Argument of the script:

8_

That’s it!

(Oh, and I finally learned how to post source code to WordPress. Duh!)

Related Articles

How to call an M3 Web Service using jQuery

Here’s a simple example of calling an M3 web service using jQuery. In this example, my web service has two input fields and 3 output fields. You’ll obvously need to change the URL to the web service and the format of your soap request to match your WSDL.

<html>
<head>
    <title>example m3 soap web service with jquery</title>
    http://ajax.googleapis.com/ajax/libs/jquery/1.9.1/jquery.min.js
    
        $(document).ready(function () {
            jQuery.support.cors = true;

            $("#submitBtn").click(function (event) {
                var wsUrl = "http://ussplu124.lu123train.lawson.com:20005/lws-ws/learning/JK-CustomerService";

                var soapRequest = '';
                soapRequest += '' + $("#cusno").val() + '' + $("#addressId").val();
                soapRequest += '';
                $.ajax({
                    type : "POST",
                    url : wsUrl,
                    contentType : "text/xml",
                    dataType : "xml",
                    data : soapRequest,
                    success : processSuccess,
                    error : processError
                });
            });
        });

        function processSuccess(data, status, req) {
            if (status == "success") {
                var ois002 = $(req.responseText).find('OIS002');
                var response = ois002.find('Name').text() +
                                "
" + ois002.find('AddressLine1').text() + "
" + ois002.find('AddressLine2').text(); $("#response").html(response); } } function processError(data, status, req) { alert(req.responseText + " " + status); } </head> <body> <h3>Calling Web Services with jQuery/AJAX</h3> <h4>Input</h4> Customer Number / Address ID <input id="cusno" type="text" /> <input id="addressId" type="text" /> <input id="submitBtn" value="Submit" type="button" /> <h4>Output</h4> <div id="response"/> </body> </html>

Here’s the example HTML page, with my input fields and the response I get when I submit the form:

jquery example

/Jessica

Related articles

M3 + Augmented Reality

In this article I introduce the first implementation that I know of Augmented Reality for Infor M3. Augmented Reality is the ability to superpose digital information on top of real world objects. This is achieved by locating the user’s head in space, by determining the user’s point of view, by registering real world objects, and by projecting virtual 3D objects accordingly. Implementing it has been a deer dream of mine. In this example I use fiducial markers and data coming from Item Master – MMS001.

Applications

Augmented Reality for M3 could be used for many applications. For example, it could help a worker find an Item in the warehouse by showing optimized walking directions and distance to possible picking locations. Also, it could help a worker show contextual information at a glance.

I believe Augmented Reality to be a disruptive technology and one of the next big revolutions in the software industry, with positive impacts similar to those of the Internet and mobile devices, that will reshape entire industries in the next 10 years.

Timeline & motivation

In 1998 I got a summer job in a warehouse for a company that sold car brakes. Every few minutes a printer spit out a picking list of items that I had to collect. As a temporary worker unfamiliar with the place, I spent most of my time wandering through the warehouse, searching for the items, and asking the more seasoned workers for help; I found that inefficient and I wished the computer gave me a map with directions of where to go. Also, the picking lists were un-ordered and I often had to go back to a previous location I had just visited; I found that inefficient and I wished the computer optimized the picking lists. Also, once I found the location, I often discovered the boxes were empty and I had to ask a forklift driver to replenish the stock location from a box of a higher shelf; I found that inefficient and I wished the computer planned replenishment ahead of time. That was in 1998 and nowadays ERP and Warehouse management systems are more common. Yet, I kept my wish to make better systems.

Then, In 2001 I read about Professor Steven Feiner’s Augmented Reality KARMA project from 1992 at Columbia University. The system fit in a backpack and had portable computer, batteries, GPS, compass, and head-mounted display. It would give detailed instructions to a user on how to repair a printer. That was my first exposure to Augmented Reality and ever since I have been wanting to implement it.

In 2007 Apple introduced the iPhone, with a stunning user interface, graphics, and processing power, blowing everybody’s mind about mobility and redefining an industry. And in 2009 Apple added a camera to the iPhone 3GS. The hardware technology for Augmented Reality started becoming accessible to the masses.

In 2009 I met with Brad Neuberg of Google at the Google I/O conference and I started working on a client-side search engine for M3 source code. That was my first exposure to HTML5.

In 2010 I implemented my first Warehouse 3D demo using Google Earth, with real data fed from the ERP, and I projected the result on a large touch screen for an immersive experience. That was my first step towards implemented Augmented Reality for M3.

In 2011 I proposed an idea for an internal project for M3 + Augmented Reality on mobile devices.

In parallel, WHATWG and W3C have been working hard to standardize HTML5 with the ability to use the webcam in JavaScript with WebRTC, to access pixel data, to paint on the canvas, and to use WebGL for 3D rendering. The software technology for Augmented Reality is becoming accessible to the masses.

More recently I started working on geo-locating Stock Locations in M3. This opens the door to new applications for geo-coded data in M3.

Then, at the Google I/O conference this year, I met with Ilmari Heikkinen whom pointed me to his article in HTML5 Rocks on Writing Augmented Reality Applications using JSARToolKit. That was the last push I needed to implement actual Augmented Reality for M3. So I did.

Implementation

I used Ilmari’s source code and I added a few lines of code to call an M3 API using REST in JavaScript when a marker is detected. In this example, the marker is mapped to an Item number (ITNO), but it could also be mapped to a Stock Location (WHSL) for example. Then, for that Item number I call the M3 API MMS200MI.GetItmBasic and I display the Name (ITDS), Description (FUDS), Basic unit of measure (UNMS), Volume (VOL3), Net weight (NEWE), Gross weight (GRWE).

Result

Here is a video of the result. Note the section below the canvas that shows M3 data coming from MMS200MI.GetItmBasic for the detected marker. We can see an activity indicator flickering as the markers are detected. For best viewing, watch the video in YouTube, in HD, and in full screen.

Source code

I provide the result for download at http://ibrix.info/ar/demo.zip with HTML and JavaScript source code, sample fiducial markers, and sample images.

Future work

With the simple example I introduced in this article I illustrate that hardware and software technology for Augmented Reality have have already become accessible for the masses. The technology is still maturing. There are on-going projects to provide registration without the use of markers. Also, sensors are becoming better for indoor location.

That’s it for now.

Please click ‘Follow’ to subscribe to my blog.

Route optimization for MWS410 with OptiMap

Here is a script for Lawson Smart Office that integrates the Delivery Toolbox – MWS410/B with OptiMap – Fastest Roundtrip Solver to calculate and show on Google Maps the fastest roundtrip for the selected Routes. It’s a solution to the Travelling salesman problem (TSP) for M3 Routes.

This is interesting for a company to reduce overall driving time and cost, and it’s interesting for a driver to optimize its truck load according to the order of delivery.

To solve the TSP on Google Maps, the authors of OptiMap implemented several algorithms, including brute force, nearest-neighbor, and the Ant Colony Optimization, and released the code for the TSP Solver for Google Maps API as open source with an MIT License. Because the TSP is an NP-complete problem the solution only works well for up to 10 cities on current desktop computers. But OptiMap can apparently solve more than 15 cities. You can read more about OptiMap at Behind the Scenes of OptiMap and OptiMap version 4 is here.

To integrate OptiMap with Smart Office I wrote a simple Personalized Script that gets the addresses of the selected Routes in MWS410/B, and that opens OptiMap in a web browser with the delivery addresses in the URL. The GET parameters are explained in OptiMap’s Optimize Your Trips.

Setup

To install and use the script:

  1. Deploy this script in the mne\jscript\ folder in your Smart Office server:
  2. Create a Shortcut in MWS410/B to run this script; for that go to MWS410/B > Tools > Personalize > Shortcuts > Advanced, expand Script Shortcut, set the Name to OptiMap, set the Script name to OptiMap, click Add, and click Save:
  3. Create a View (PAVR) in MWS410/B that shows the address columns ADR1, ADR2, ADR3:
  4. Select multiple Routes in the list (press CTRL to select multiple rows), and click the OptiMap Shortcut to run the script:

Result

The script will launch OptiMap for the selected Routes, and OptiMap will optimize the order of delivery:

Source code
Here is the complete source code for the script:

import System;
import System.Web;
import System.Windows;
import Mango.UI.Services.Lists;
import MForms;

/*
Integrates the Smart Office Delivery Toolbox - MWS410/B with OptiMap - Fastest Roundtrip Solver, http://www.optimap.net/
to calculate and show on Google Maps the fastest roundtrip for the selected Routes.
This is interesting to reduce driving time and cost, and for a driver to optimize its truck load according to the order of delivery.
1) Deploy this script in the mne\jscript\ folder in your Smart Office server
2) Create a Shortcut in MWS410/B to run this script; for that go to MWS410/B > Tools > Personalize > Shortcuts > Advanced > Script Shortcut, set the Name to OptiMap, and set the Script name to OptiMap
3) Create a View (PAVR) in MWS410/B that shows the address columns ADR1, ADR2, ADR3
4) Select multiple Routes in the list (press CTRL to select multiple rows)
5) Click the OptiMap Shortcut to run this script and launch OptiMap for the selected Routes
For more information and screenshots refer to https://thibaudatwork.wordpress.com/2012/10/04/route-optimizer/
Thibaud Lopez Schneider, Infor, October 4, 2012 (rev.2)
*/
package MForms.JScript {
    class OptiMap {
        public function Init(element: Object, args: Object, controller : Object, debug : Object) {
            try {
                // get the list
                var listControl: MForms.ListControl = controller.RenderEngine.ListControl;
                var listView: System.Windows.Controls.ListView = controller.RenderEngine.ListViewControl;
                if (listControl == null || listView == null) { MessageBox.Show('Error: Couldn\'t find the list.'); return; }
                // get the selected rows
                var rows = listView.SelectedItems; // System.Windows.Controls.SelectedItemCollection
                if (rows == null || rows.Count == 0) { MessageBox.Show('Error: No rows selected.'); return; }
                // get the address columns ADR1, ADR2, ADR3
                var column1: int = listControl.GetColumnIndexByName('ADR1');
                var column2: int = listControl.GetColumnIndexByName('ADR2');
                var column3: int = listControl.GetColumnIndexByName('ADR3');
                if (column1 == -1 || column2 == -1 || column3 == -1) { MessageBox.Show('Error: Couldn\'t find the address columns ADR1, ADR2, ADR3.'); return; }
                // construct the URL
                var query: String = '';
                for (var i: int = 0; i < rows.Count; i++) {
                    var row: ListRow = rows[i];
                    var ADR1: String = row[column1];
                    var ADR2: String = row[column2];
                    var ADR3: String = row[column3];
                    var address: String = ADR1 + ',' + ADR2 + ',' + ADR3;
                    query += 'loc' + i + '=' + HttpUtility.UrlEncode(address) + '&';
                }
                var uri: Uri = new Uri('http://www.optimap.net/?' + query);
                // launch OptiMap
                ScriptUtil.Launch(uri);
            } catch (ex: Exception) {
                MessageBox.Show(ex);
            }
        }
    }
}

That’s it!

Related posts

See also version OptiMap_V2.

Geocoding of Stock Locations in MMS010

Here is a video that illustrates the process to set the Geo Codes XYZ of Stock Locations in MMS010 in Smart Office, i.e. to set the latitude, longitude, and altitude of Stock Locations, a.k.a. geocoding. In my example I determined the coordinates based on an 3D model built in Google SketchUp and geo-located in Google Earth; a GPS receiver with good indoor accuracy would work as well. With geocoded information, we can present data from the Warehouse Management System in a graphical way. This is important for applications such as showing Stock Locations on a map, or finding the shortest path for a picking list.

Demo video

How to proceed

These are the steps I followed in the video to geolocate the Stock Locations in MMS010:

  1. I used this SketchUp model of a 3D warehouse that I had previously geo-located:
  2. I also used this other SketchUp model of the Stock Locations that I had previously uniquely identified:
  3. Then, I used this Ruby script to get the geocoding of the floor plan:
  4. Then, I used this other Ruby script to get the geocoding of each Stock Location:
  5. The result is this CSV file of the floor plan’s geocodes and each Stock Location’s geocodes:
  6. Then, I used this Lawson Web Service of type Display Program to set the values for the fields Geo Code X (GEOX), Geo Code Y (GEOY), and Geo Code Z (GEOZ) in MMS010/F for a specified Warehouse (WHLO) and Stock Location (WHSL):
  7. Then, I used a Visual Basic macro for Microsoft Excel to call the Web Service for all Stock Locations:
  8. Finally, I used this script to display the Geo Codes XYZ in MMS010/B1:

Result

The result is the list of Stock Locations in MMS010/B1 displaying all the Geo Codes XYZ:

Resources

  • Download the SketchUp model of the geo-located 3D warehouse.
  • Download the SketchUp model of the uniquely identified Stock Locations.
  • Download the Ruby script to get the geocoding of the floor plan.
  • Download the Ruby script to get the geocoding of each Stock Location.
  • Download the resulting CSV file of all Stock Locations and their Geo Codes.
  • Download the Lawson Web Service to set the Geo Codes XYZ of a Stock Location.
  • Download the script to display the Geo Codes XYZ in MMS010/B1.
  • Watch the video of the entire process.

Related articles

UPDATE

2012-09-28: I had a bug in the Ruby script that miscalculated the Y and Z geocodes for the Stock Locations. I corrected the script and the resulting CSV file and I updated the links above.