Here is an illustration of how to setup Apache Subversion for source control in Infor e-Commerce Development Studio, such that multiple developers can work on the same e-Commerce project at the same time, for team development.
Problem
The problem is that by design an Eclipse workspace cannot be shared, i.e. there can only be one developer using a workspace at a time, others will get the message “Workspace in use or cannot be created, choose a different one”:

Small teams can setup multiple workspaces, one per team member, share the same source code, and mutually agree on which non-overlapping files to work on, being careful to not touch each other’s files. This is workable in small teams, but is not scalable for large teams or inexperienced team members as there is risk of data loss.
The correct solution is to setup source control software to manage that.
Objective
Supposing there a N team members doing e-Commerce development, we will setup one Subversion server & repository, and N e-Commerce Development Studios & workspaces all using the same Subversion repository. In my case, there are three developers, Thibaud, Chris, and Madan, thus I will setup three workspaces to use the same Subversion respository.
Documentation
There is a dedicated chapter in the Infor e-Commerce Development Studio User’s Guide:
Even better, there is a dedicated document in the M3 Adaptation Kit Version Control Guide, not for e-Commerce, but similar setup:

What about Git?
I wish I could use Git, instead of Subversion. I believe Git would work for e-Commerce just as well as Subversion does. The e-Commerce Development Studio requires Subclipse during installation; I could install Subclipse just to surpass that, then ignore it, and install Git. However, I asked Infor Support if Git would work with e-Commerce, and they responded it has not been tested and certified to completely work, and should problems arise due to an effect from using Git, they cannot provide support for it. So I will skip Git for now, and I will try it another time.
1. Subversion server
Install a Subversion server of your choice (e.g. Apache Subversion, TortoiseSVN, VisualSVN):

Create the users (e.g. THIBAUD, CHRIS, MADAN):

Create a new repository, and save the Repository URL in your notes:
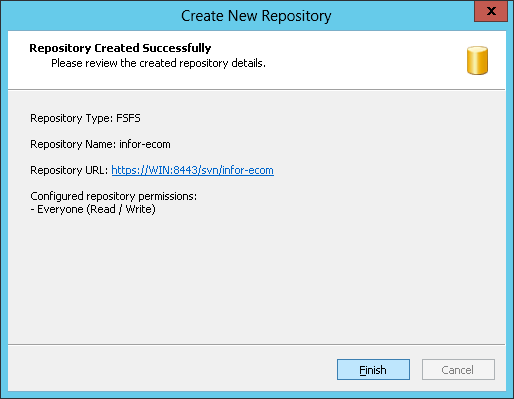

Schedule a regular backup of the repository, e.g.:
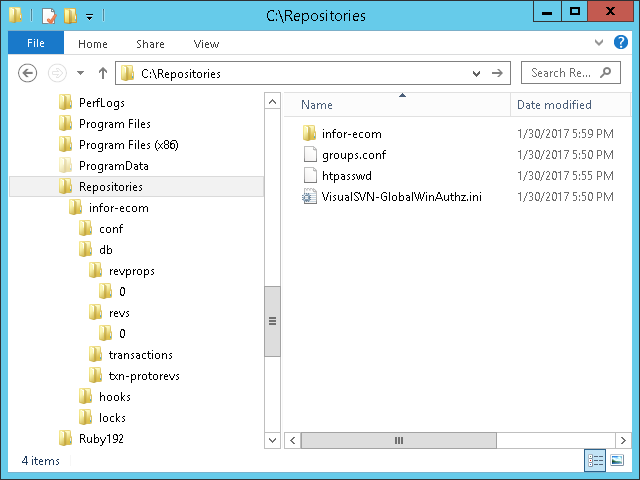
The Subversion repository is now ready to host the e-Commerce projects.
2. Bootstrap
Choose one user (e.g. Thibaud) to bootstrap the e-Commerce projects (e.g. B2C and B2B) to the Subversion repository for the rest of the team (e.g. Chris, Madan).
I make the assumption that the Eclipse workspace is private (non-shared), e.g. C:\Users\THIBAUD\workspace\ , that it already has the e-Commerce Development Studio fully setup, and that the e-Commerce projects (e.g. B2C, B2B) are fully setup (see previous post):

Note 1: If the projects are in a shared workspace, e.g. C:\e-Commerce\workspace\, and you want to move them to the private workspace, simply cut and paste the project folder from the shared workspace to the private workspace.
Note 2: Don’t make a duplicate (copy) of a project, because after we bootstrap the project to the Subversion repository, any duplicate of that project would be out of reach of Subversion and deprecated.
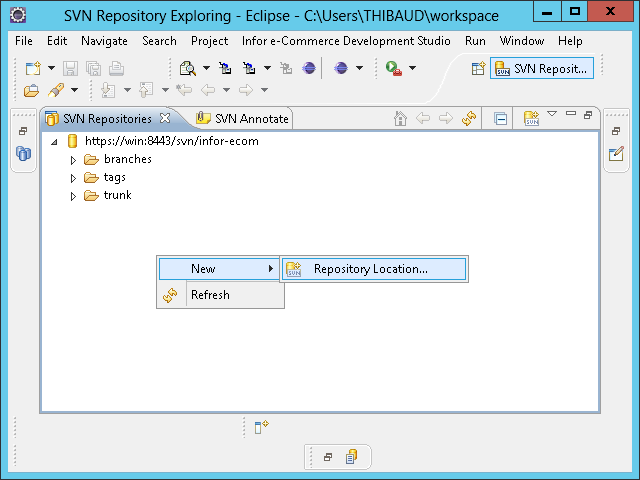
Go to Eclipse > Window > Open Perspective > SVN Repository Exploring, create new Repository Location, and enter the URL of the Subversion repository created earlier, with the username and password of the workspace’s user (e.g. THIBAUD):
For each project (e.g. B2C, and B2B), do the following:
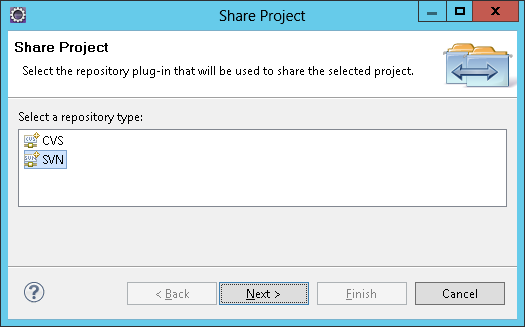
Select > Team > Share Project:

Select repository type SVN:
Use existing repository location:

Change folder to trunk:

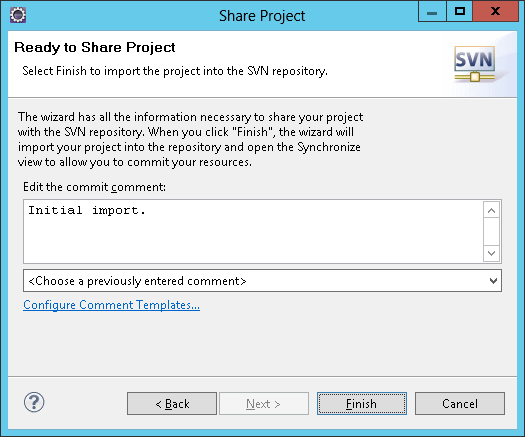
Enter a commit comment, e.g. Initial import:
Wait for the synchronization to finish:

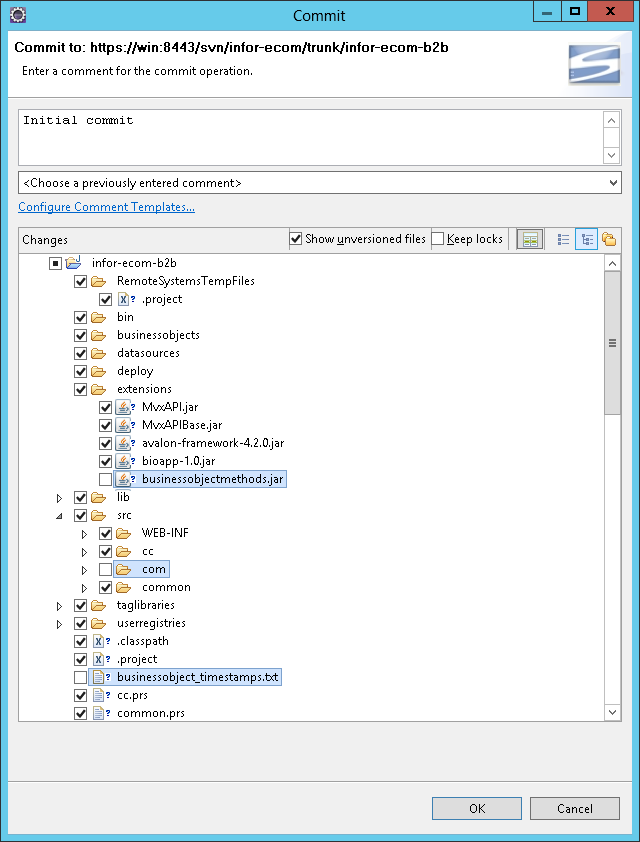
Select Team > Commit:

Select everything except the following files and folders, and enter a commit comment, e.g. Initial commit:
extensions/businessobjectmethods.jar

src/com/

businessobject_timestamps.txt
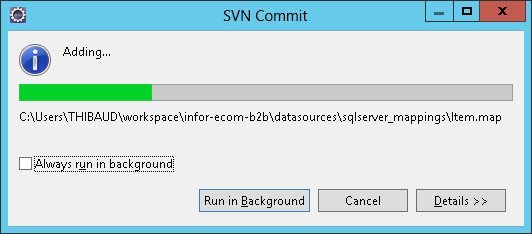
Wait for the SVN Commit to finish:

Each file now has a revision number, date, and author:

Verify in Team > Show history:

Verify the repository in the Subversion server:

The project is now ready for the rest of the team to checkout.
Repeat for each project (e.g. B2C, B2B).
3. Other team members
Now we can setup the Eclipse workspaces and projects for the rest of the team (e.g. Chris, Madan).
Regarding the Eclipse IDE itself, you can choose to use a private install for each user, a shared install for all users, or a shared configuration, see the Eclipse multi-user installs.
I make the assumption that each user has the e-Commerce Development Studio fully setup, with a private workspace, e.g. C:\Users\CHRIS\workspace\ , and with no e-Commerce project (e.g. no B2C, B2B), like so:

Setup the SVN Repository for this user and password (e.g. CHRIS):

Expand the trunk, and checkout the projects (e.g. B2C, B2B):

Leave the default values and click Next:
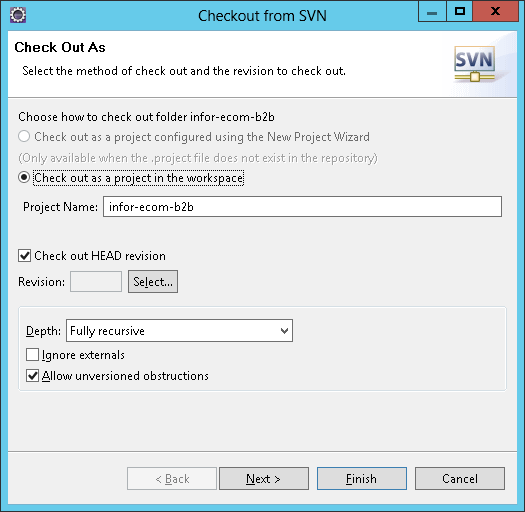
Leave the default workspace and click Finish:

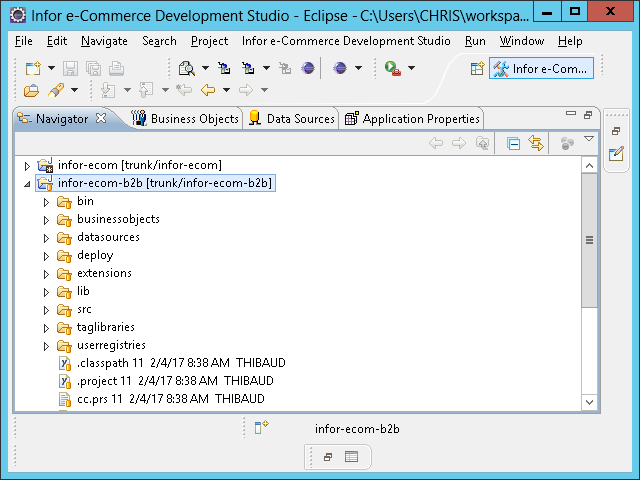
Wait for the SVN Checkout to finish:

Verify the result:
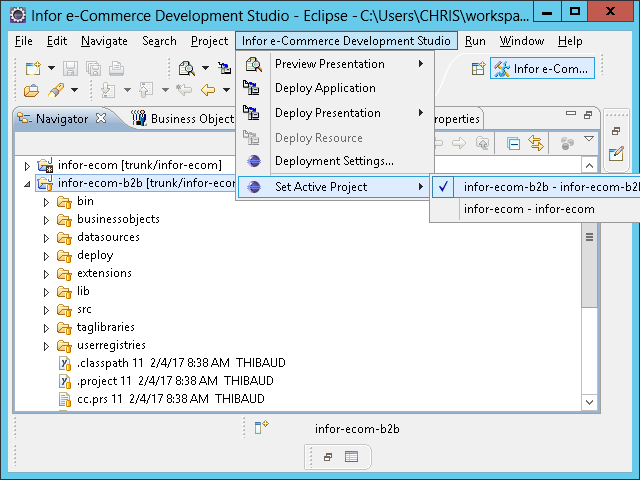
Select the Active project:
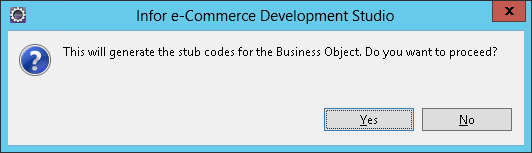
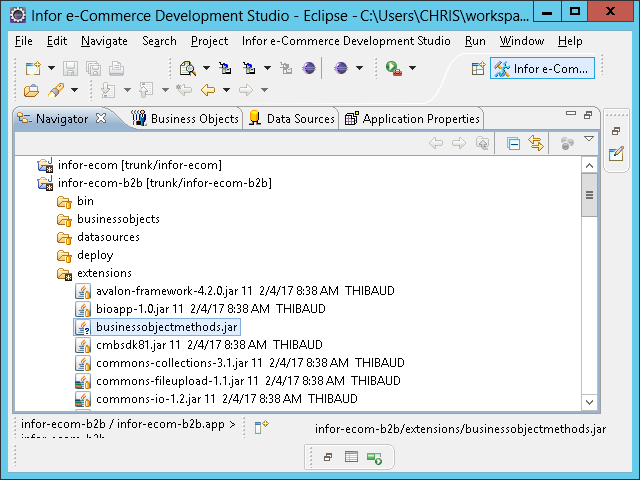
Go to Business Objects tab, click Generate Stub Codes, and wait for it to finish:
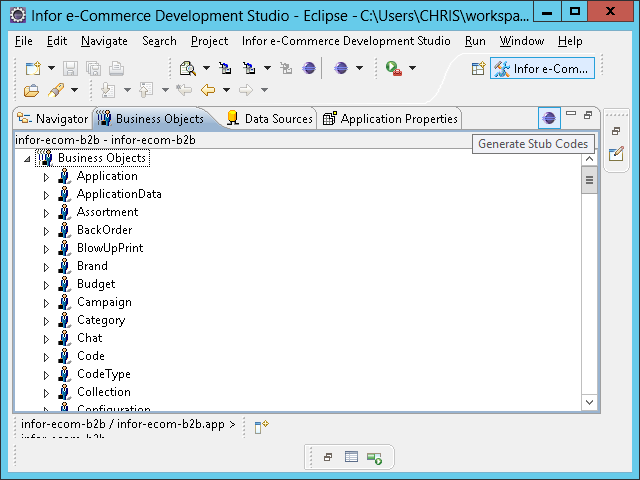
That will create the files:
extensions/businessobjectmethods.jar

src/com/

businessobject_timestamps.txt
If not, you may have to clean, re-build, and/or refresh the project.
This team member’s environment is now all set.
Repeat for each remaining team member.
4. Everyday development
For everyday development:
Set the Active Project as usual:

Select Team > Update to HEAD to update the project with the latest changes of everyone else:

Make the changes you need to any of the files (e.g. JSP, CSS, HTML), and save your changes:

Deploy the application or presentation as needed:

Test your changes in e-Commerce as usual:

Repeat as needed: make changes, deploy, test.
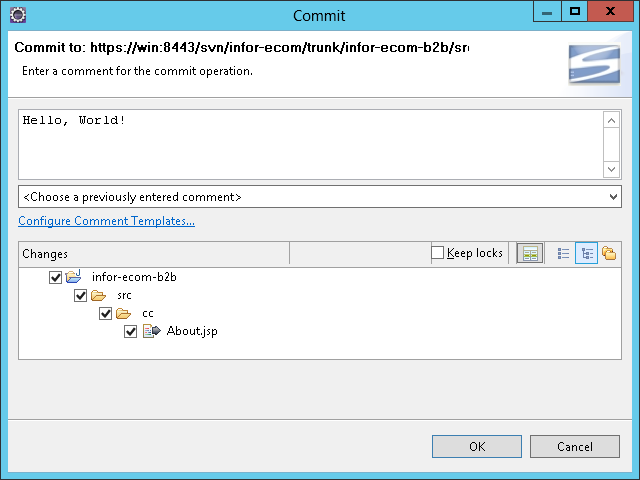
When done, select the files you modified, select Team > Commit, and enter a comment of your changes; ensure you select only the files you changed, nothing else:

Verify in the SVN Repository > Show History.
Now, when the other team members select Team > Update to HEAD, they will see your changes in their workspace.
Future work
Next time, I would like to try with Git instead of Subversion.
Conclusion
That was an illustration of how to setup Subversion in e-Commerce for a team to work on the same project at the same time. The first user bootstraps the project to the Subversion repository, and the other users checkout that project from the repository.
Special thanks to Wayne Liu of Infor and Marina Baldan of CAD IT for the help.
That’s it!
Please like, comment, subscribe, share, author.

Hi Thibaud. The document for Subversion looks good and straight forward. Only thing I did not get is, under the VisualSVN, when you created the repository for Infor e-com ( which as shown in the images- is a project under Eclipse) and how did the sub files (Branches, Tags, Trunks) automatically get created?
LikeLike
Hi. Thank you. It’s been many years so I don’t remember. Reading my own post, it says I created the project from these steps, probably at chapter 6 “New Application”: https://m3ideas.org/2017/02/01/how-to-install-infor-e-commerce-development-studio/
LikeLike
Hi. Thank you Thibaud for the new link that you shared. I will check the link and let you know if I would need some more information.
Also, Mr. Daniel Jones from Zurich Switzerland says Hi as you were in contact with him and Markus Tronich from the year 2003-2005.
LikeLike
Hello, nice to hear from them
LikeLike