Today I will show you how I made simple modifications to Infor Customer LifeCycle Management (CLM), the CRM product for Infor M3. With CLM standard out-of-the-box we only have the ability to show/hide fields, for example choosing whether or not we want the name, address, and phone number columns in the list or the fields in the details view. CLM is a great product, and by design it is intended to be simple to use. In my case I wanted something more: I needed to add a call button next to the phone number. That is not officially possible by default so I had to do some hacking.
I’m working on a project for a customer to integrate Cisco IP phones with CLM, such that when a customer service representative on the phone receives an incoming phone call we automatically pop-up the corresponding customer data on the screen, and conversely, such that they can click a phone number in CLM and make that outgoing phone call. I had already done some work in the past integrating Skype with Smart Office, and integrating ShoreTel phones with Smart Office. This time it’s Cisco IP phones. I cannot show you the entire source code as it’s propriety of the customer and my employer, but I will show you interesting bits and pieces, and the writing helps me clean-up my code too.
I will show you:
- How to get the list of open CLM windows
- How to find the phone number field
- How to add a button to CLM and use the Design System Icons
- How to make the outgoing phone call
About CLM
To tell if you have CLM, go to Smart Office > Help > About Infor Smart Office > View features, and you will see CLM Application:

Then, go to the Navigator widget, you will see the menu Customer Lifecycle Management, expand it and launch My Accounts > All:

It will open the list of accounts:

Double-click one of the rows to open the account details:

How to get the list of open CLM windows
Now we have two CLM windows open: the list of accounts, and the details of an account. To programmatically get that list, I use the DashboardTaskService.FindRunningTaskByUri method, to discriminate by Uri lclm://

var list /*System.Collections.Generic.List<Mango.UI.Services.FindTaskResult>*/ = DashboardTaskService.Manager.FindRunningTaskByUri("lclm://", TaskMatch.StartsWith);
for (var result : FindTaskResult in list) {
    var runner : IRunner = result.Runner;
    var task : ITask = runner.Task;
    debug.WriteLine(task.Uri);
}
That will return two tasks:
lclm://filter/?ActionType=View&MainTableID=…&FilterGroupID=…&SubFilterID=…
lclm://details/?ActionType=View&MainTableID=…&PrimaryKey=…
Now we need to tell apart the Accounts windows from the other potential CLM windows such as Activities or Contacts:
var host : IInstanceHost = runner.Host;
if (host.HostTitle.StartsWith("Account")) {
    // ...
}
This code will only work for English. Ideally we would use an official CLM API that returns the correct Tasks, but I haven’t found one. Let me know if you find one.
How to find the phone number field
Now that we have the correct window, we can get its contents and find the phone number field. First, I use WPF Inspector to visually introspect the window and find the phone number field in the visual tree:

The fields are layed out in one of the ancestor Grids:
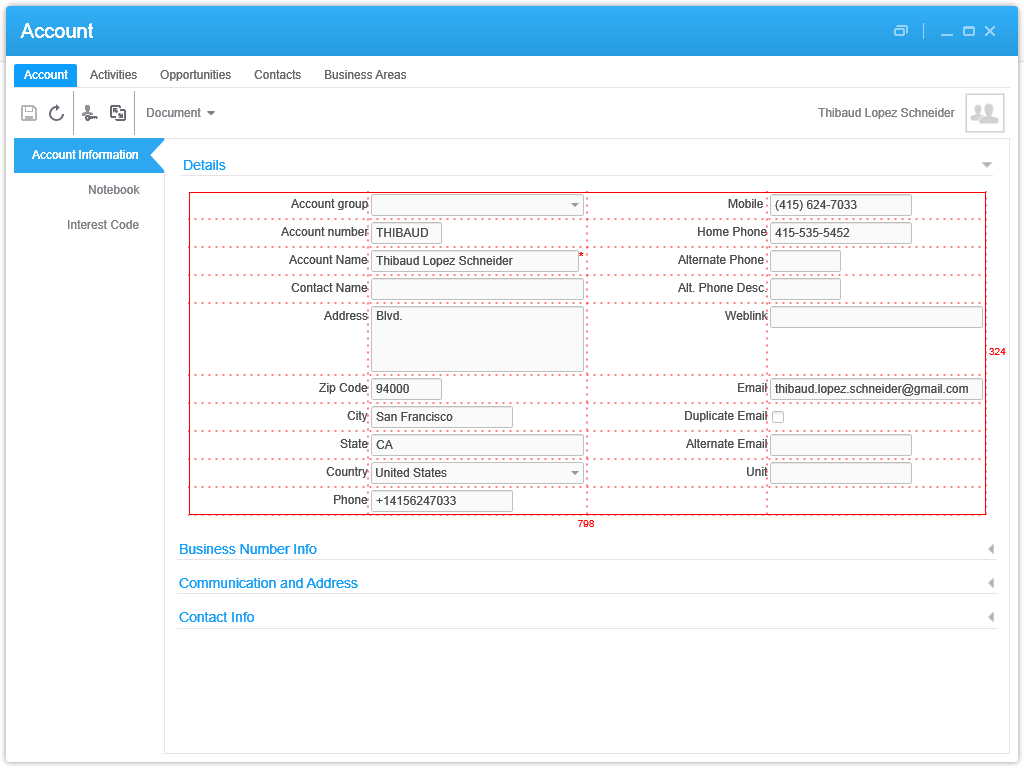
More specifically the phone number field is itself a Grid of one row and three columns:

That’s where I’ll inject my button. To get there programmatically, I use the VisualTreeHelper, and I do a pre-order depth first search:
function ... {
    //...
    var content : FrameworkElement = host.HostContent;
    if (content.GetType().ToString() == "lclmControls.Custom.TabularDetailsView") {
        var o: DependencyObject = FindPhoneTextBox(content);
        if (o != null) {
            var txtbox: SingleLineTextBox = o;
        }
    }
}
function FindPhoneTextBox(o : DependencyObject): DependencyObject {
    // visit node
    if (o != null) {
        if (o.GetType().ToString().EndsWith("SingleLineTextBox")) {
            var txtbox: SingleLineTextBox = o;
            if (txtbox.Name == "Phone") {
                return o;
            }
        }
    }
    // visit children
    for (var i = 0; i < VisualTreeHelper.GetChildrenCount(o); i++) {
        var child = VisualTreeHelper.GetChild(o, i);
        var result: DependencyObject = FindPhoneTextBox(child);
        if (result != null) {
            return result;
        }
    }
    // not found
    return null;
}
How to add a button to CLM and use the Design System Icons
Now that we found the phone number field and the Grid, we can add a button. I will use the IconButtons of the Design System as illustrated by norpe:
var btn: IconButton = new IconButton();
btn.IconName = "Phone";
btn.ToolTip = "Call this phone number."
btn.HorizontalAlignment = HorizontalAlignment.Left;
btn.Margin = new Thickness(5, 0, 0, 0);
btn.Tag = txtbox; // remember the textbox
Grid.SetRow(btn, 0);
Grid.SetColumn(btn, 2);
Grid.SetColumnSpan(btn, 2);
var grid: Grid = VisualTreeHelper.GetParent(txtbox);
grid.Children.Add(btn);
btn.add_Click(OnCall);
This is the result, with the IconButton hover and ToolTip:
![]()
Note: to get the Grid I used the textboxe’s parent. This assumption is true in CLM version 1.0.0.99, but could be false in a future version of CLM in which case this code would break. Ideally we would have an official CLM API for this.
How to make the outgoing phone call
Now you can do whatever with the phone number, for example use the default operating system’s URI handler for the tel scheme which is Skype in my case.
function OnCall(sender: Object, e: RoutedEventArgs) {
    try {
        var btn: Button = sender;
        var txtbox: SingleLineTextBox = btn.Tag;
        var phoneNumber: String = txtbox.Text;
        var uri: Uri = new Uri("tel:" + phoneNumber); // RFC 3966
        ScriptUtil.Launch(uri);
    } catch (ex : Exception) {
        debug.WriteLine(ex);
    }
}
And here’s the result:
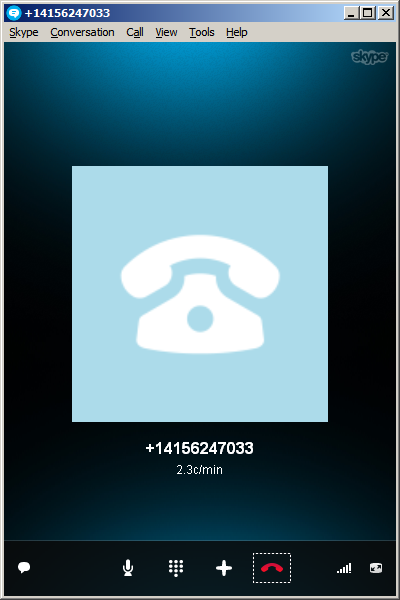
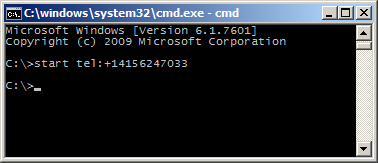
The method ScriptUtil.Launch will instruct the operating system to execute the specified command. That’s the equivalent of typing start command at the DOS prompt. In our case it’s:
start tel:+14156247033
That means any special characters of the command must be escaped, such as white spaces and ampersands. To escape white spaces in DOS that means enclosing the entire string in double-quotes. I tried enclosing the URI in double quotes, and it didn’t work. I also tried other escaping and encoding techniques like using backslash, plus sign, and %20, and they didn’t work either. So let’s simply strip it out:
phoneNumber = phoneNumber.Replace(' ', '');
Also, in my example I used a phone number that’s already correctly formatted in international E.123 notation which Skype understands. To validate the phone number, we can use a regular expression. A simple one is to strip all characters and keep only the plus sign and the digits, but that’s probably not fully compliant with the E.123 specification so we need to work more on this in the future:
var regex = /[^\+^\d]/g;
phoneNumber =  phoneNumber.replace(regex, "");
Future work
Future work includes:
- Use an event handler to listen for new CLM windows to automatically add the Call button as the user opens the Account views. I couldn’t find an event, and Karin confirmed it’s not currently supported. I tried MForms.MainController, DashboardTaskService, DashboardTaskBar, lclmControls.EventNotifier, WindowManager, etc. I found an event handler for M3 Forms, an event handler for the Quick Start CTRL+R, and private event handlers that would have worked had they been public. Nothing I could use. I ended up using a worker that’s polling Tasks every second in a background thread (yikes).
- Remember we added the button so we don’t add it again next time.
- Add the Call button on all phone number fields: fax, mobile phone, home phone, etc.
- Validate the phone number with a regular expression that complies with the specifications.
- Make the outgoing call thru the Cisco IP phone instead of using Skype.
- Listen for incoming phone calls.
- Move the script to a widget using the Smart Office SDK.
That’s it! If you like this post, subscribe to this blog. And if you rock, become an author to share your ideas.