I just implemented international phone number parsing, validation and formatting for all MForms in Smart Office as an implementation of my previous post for a customer that needed to enforce this validation rule, and I will share my findings here with you.
Overview
I used libphonenumber-csharp, the known C# port of “Google’s phone number handling library, powering Android and more”.
I integrated it with Smart Office SDK as an MForms extension with Global scope so it applies to all MForms programs that have phone number fields, for instance CRS610, CRS620, and OIS002. For that I followed Peter’s post: Introduction to MForms extensions.
Then, if the phone number is not valid, I show an error message in MForms, I set focus in the corresponding input field, and I cancel the user request. For that I followed Peter’s other post: Validating M3 panels using JScript and MI programs before a request.
And if the phone number is valid, I re-format it in E.164 phone number format.
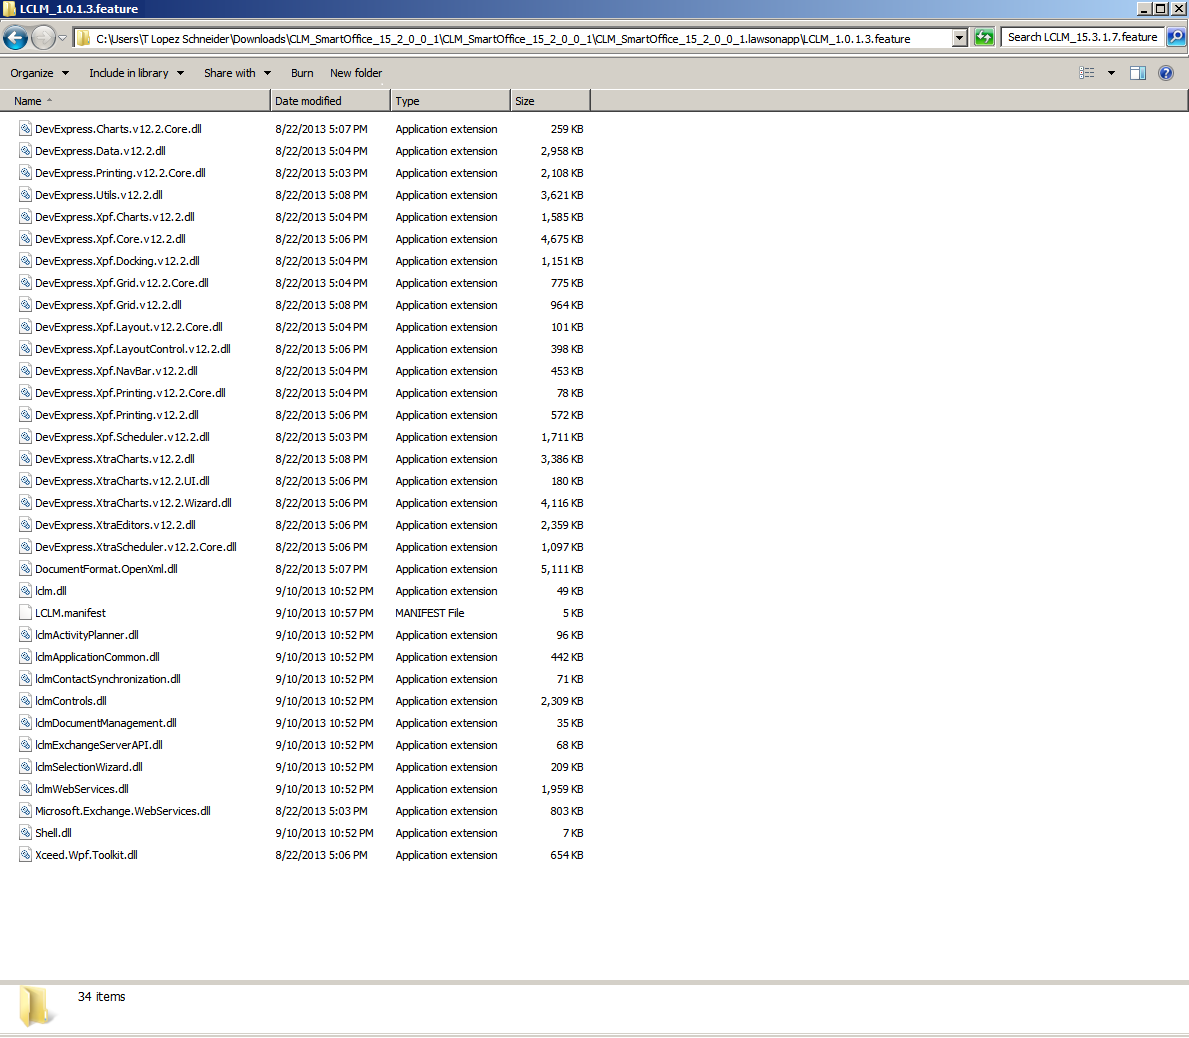
Then, I deployed it globally to all users via Infor LifeCycle Manager (LCM).
Now users have to enter valid phone numbers in MForms or they will get an error message that will prevent them from moving forward.
Hunt for the phone number fields
In order to make it work for all MForms, I had to determine what is the set of M3 programs, panels, and phone number fields.
A quick scan in the XML View Definitions gives:
- 4,260 programs (E:\M3BE\MVX\15.1\base\viewdefs>dir *.xml /s)
- 72,212 panels (findstr /c:”\<Panel” /s *.xml)
- 144,377 fields (findstr /c:”\<EntryField” /s *.xml)
That’s too big of a space to search exhaustively.
Then, I did a quick search in MetaData Publisher for the strings: phone, facsimile, fax, and mobile. Here is a screenshot:
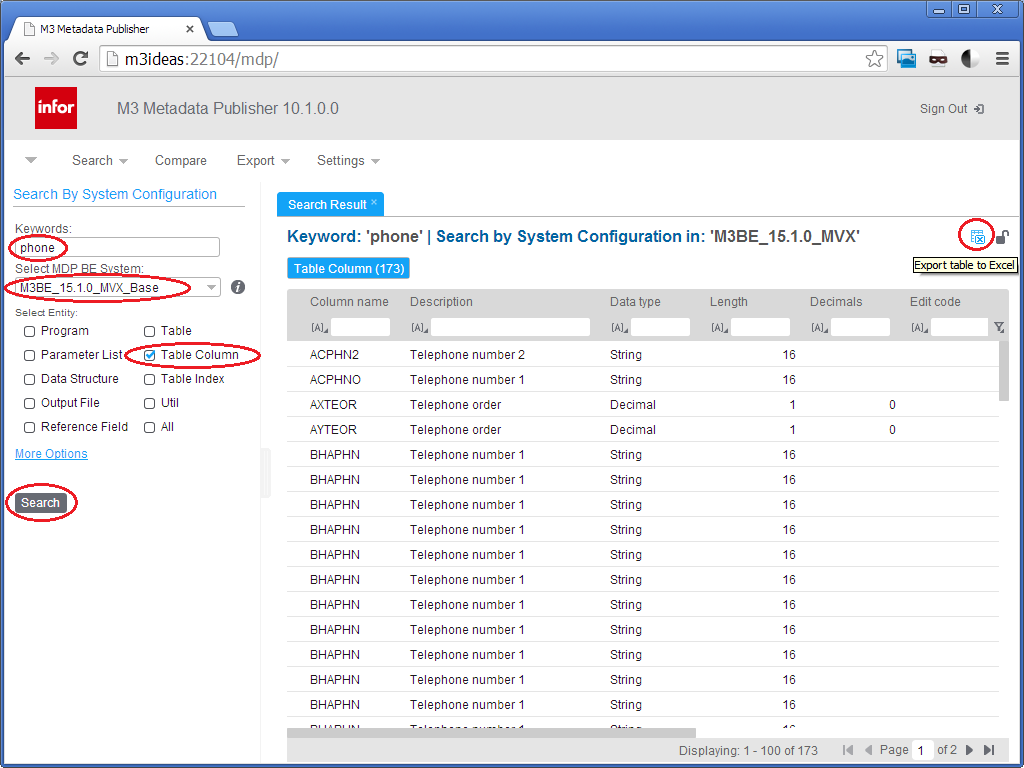
There were 173 results for phone including telephone, the search is case insensitive, 72 results for facsimile, no results for mobile, and results for fax with type checkbox and text that are unrelated to our problem at hand. That narrows down the search space to only 245 fields.
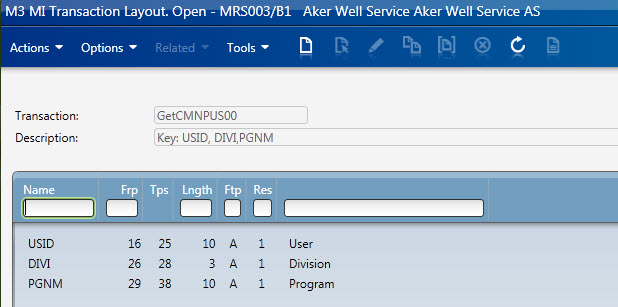
I merged both result sets, I removed the field name prefixes to keep only the radices, and I eliminated duplicates, and that further narrowed down the search space to only nine fields: APHN, CAPH, CPHN, GPNO, PHN1, PHN2, PHNO, SPHN, and TFNO. Here is a screenshot:

Then, I did the reverse search in MDP to verify that every field is a phone number, to prove the space is bijective, and I realized there are three fields that end in TFNO – they are CPTFNO, PPTFNO, and SPTFNO – that are not phone number fields. We can eliminate those fields by looking up the type and length of the field: it must be String of length 16.
Thus, the resulting set of all phone number fields across all of M3 is the following:
- APHN
- CAPH
- CPHN
- GPNO
- PHN1
- PHN2
- PHNO
- SPHN
- TFNO String[16]
A quick verification by scanning the View Definitions for those fields shows the following M3 Programs: APS095, APS200, ARS025, ARS115, ARS175, ARS200, ARS360, ARS390, CBS020, COS105, CRS435, CRS530, CRS538, CRS605, CRS609, CRS610, CRS620, CRS623, CRS690, CRS691, CRS739, CRS949, CSS204, CSS205, DRS013, GMS090, GMS200, LTS100, LTS101, MHS813, MHS850, MHS890, MMS005, MMS453, MNS100, MNS150, MNS205, MNS212, MOS156, MOS272, MOS295, MSS225, MTS201, MWS098, MWS099, MWS212, OIS002, OIS054, OIS055, OIS056, OIS102, OIS269, POS010, PPS171, PPS200, PPS360, PPS370, PPS390, QQS001, QUS095, QUS100, QUS112, RMS421, RSS103, RSS303, SAS002, SOS100, SOS101, SOS102, SOS105, SOS106, SOS110, SOS165, SOS375, SOS378, SOS435, SOS485, SOS520, SOS650, SOS972, SPS200, STS050, STS100, STS101, STS201, TXS100, TXS130, TXS140, TXS510. I recognize CRS610, CRS620, and OIS002 so I’m confident.
My approach is heuristic and is not guaranteed to be exact.
Source code
Here is the source code in C#:
using System;
using System.Collections.Generic;
using System.Globalization;
using System.Windows;
using System.Windows.Controls;
using libphonenumber;
using MForms;
using MForms.Extension;

namespace PhoneNumberValidation
{
    public class PhoneNumberValidationExtension : IPanelExtension
    {
        private static String validKeys = "F3,F4,F5,F12";
        private static String phoneNumberFields = "APHN,CAPH,CPHN,GPNO,PHN1,PHN2,PHNO,SPHN,TFNO";
        private static readonly log4net.ILog Logger = Mango.Core.LogManager.GetLogger(System.Reflection.MethodBase.GetCurrentMethod().DeclaringType);

        public void Load(PanelExtensionEventArgs e)
        {
            try
            {
                InstanceController controller = (InstanceController)e.Controller;
                controller.Requesting += OnRequesting;
                controller.Requested += OnRequested;
            }
            catch (Exception ex)
            {
                Logger.Error("Failed to handle extension event", ex);
                throw new ApplicationException();
            }
        }

        void OnRequesting(Object sender, CancelRequestEventArgs e)
        {
            try
            {
                if (e.CommandType == "KEY" && validKeys.Contains(e.CommandValue))
                {
                    // Request allowed
                    return;
                }
                // validate all phone numbers in this panel
                InstanceController controller = (InstanceController)sender;
                Grid content = controller.RenderEngine.Content;
                IList<FrameworkElement> controls = controller.RenderEngine.Controls;
                foreach (FrameworkElement control in controls)
                {
                    if (control is System.Windows.Controls.TextBox)
                    {
                        TextBox txtbox = (TextBox)control;
                        String baseName = txtbox.Name.Substring(2);
                        bool IsPhoneNumberField = phoneNumberFields.Contains(baseName) && txtbox.MaxLength == 16;
                        if (IsPhoneNumberField)
                        {
                            if (txtbox.Text != "")
                            {
                                try
                                {
                                    PhoneNumber number = PhoneNumberUtil.Instance.Parse(txtbox.Text, RegionInfo.CurrentRegion.Name);
                                    if (number.IsValidNumber)
                                    {
										txtbox.Text = number.Format(PhoneNumberUtil.PhoneNumberFormat.E164);
                                    }
                                    else
                                    {
                                        controller.RenderEngine.ShowMessage("The phone number is not valid.");
                                        txtbox.Focus();
                                        e.Cancel = true;
                                    }
                                }
                                catch (com.google.i18n.phonenumbers.NumberParseException ex)
                                {
                                    Logger.Debug(ex.Message);
                                    controller.RenderEngine.ShowMessage(ex.Message);
                                    txtbox.Focus();
                                    e.Cancel = true;
                                }
                            }
                        }
                    }
                }
            }
            catch (Exception ex)
            {
                Logger.Debug(ex.ToString());
            }
        }
        void OnRequested(Object sender, RequestEventArgs e)
        {
            try
            {
                InstanceController controller = (InstanceController)sender;
				// clean-up
                controller.Requesting -= OnRequesting;
                controller.Requested -= OnRequested;
            }
            catch (Exception ex)
            {
                Logger.Debug(ex.ToString());
            }
        }
    }
}
Result
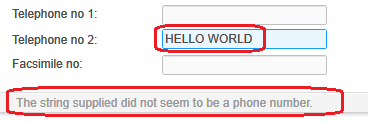
Here is the result.
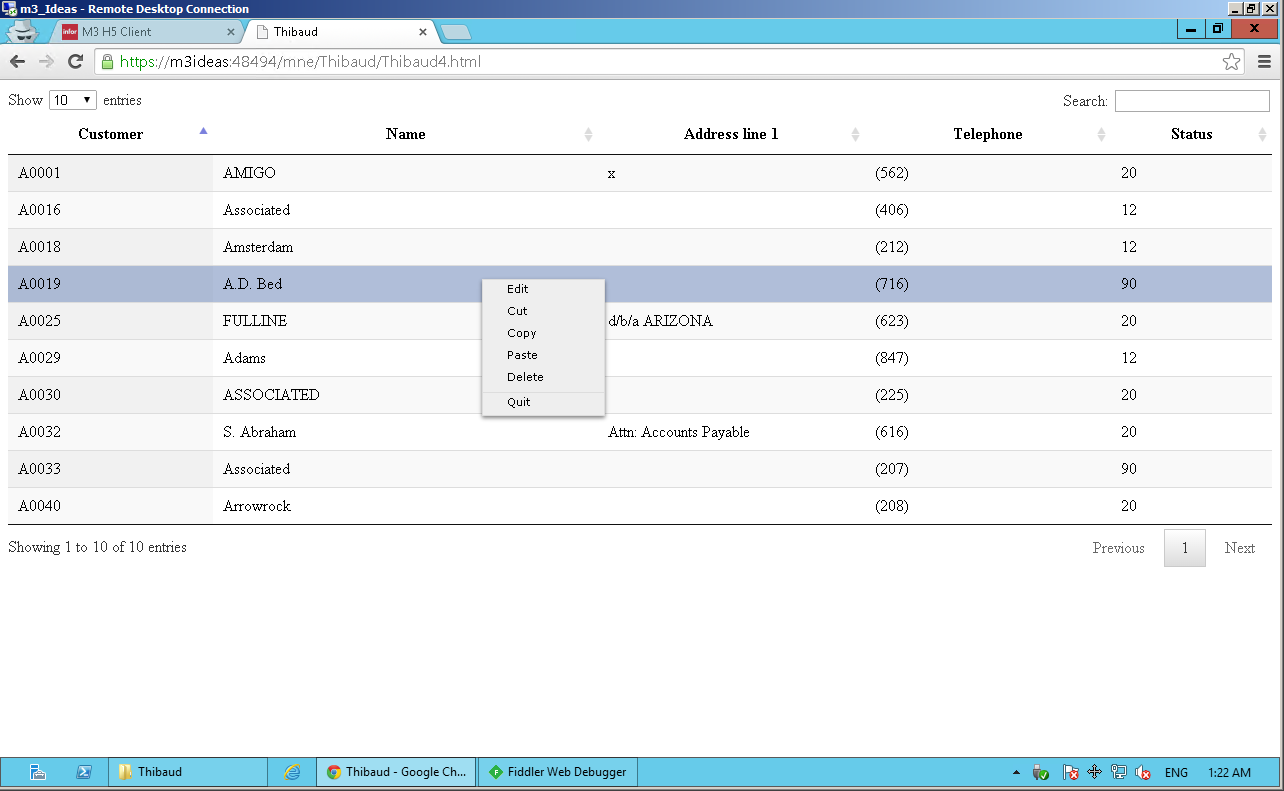
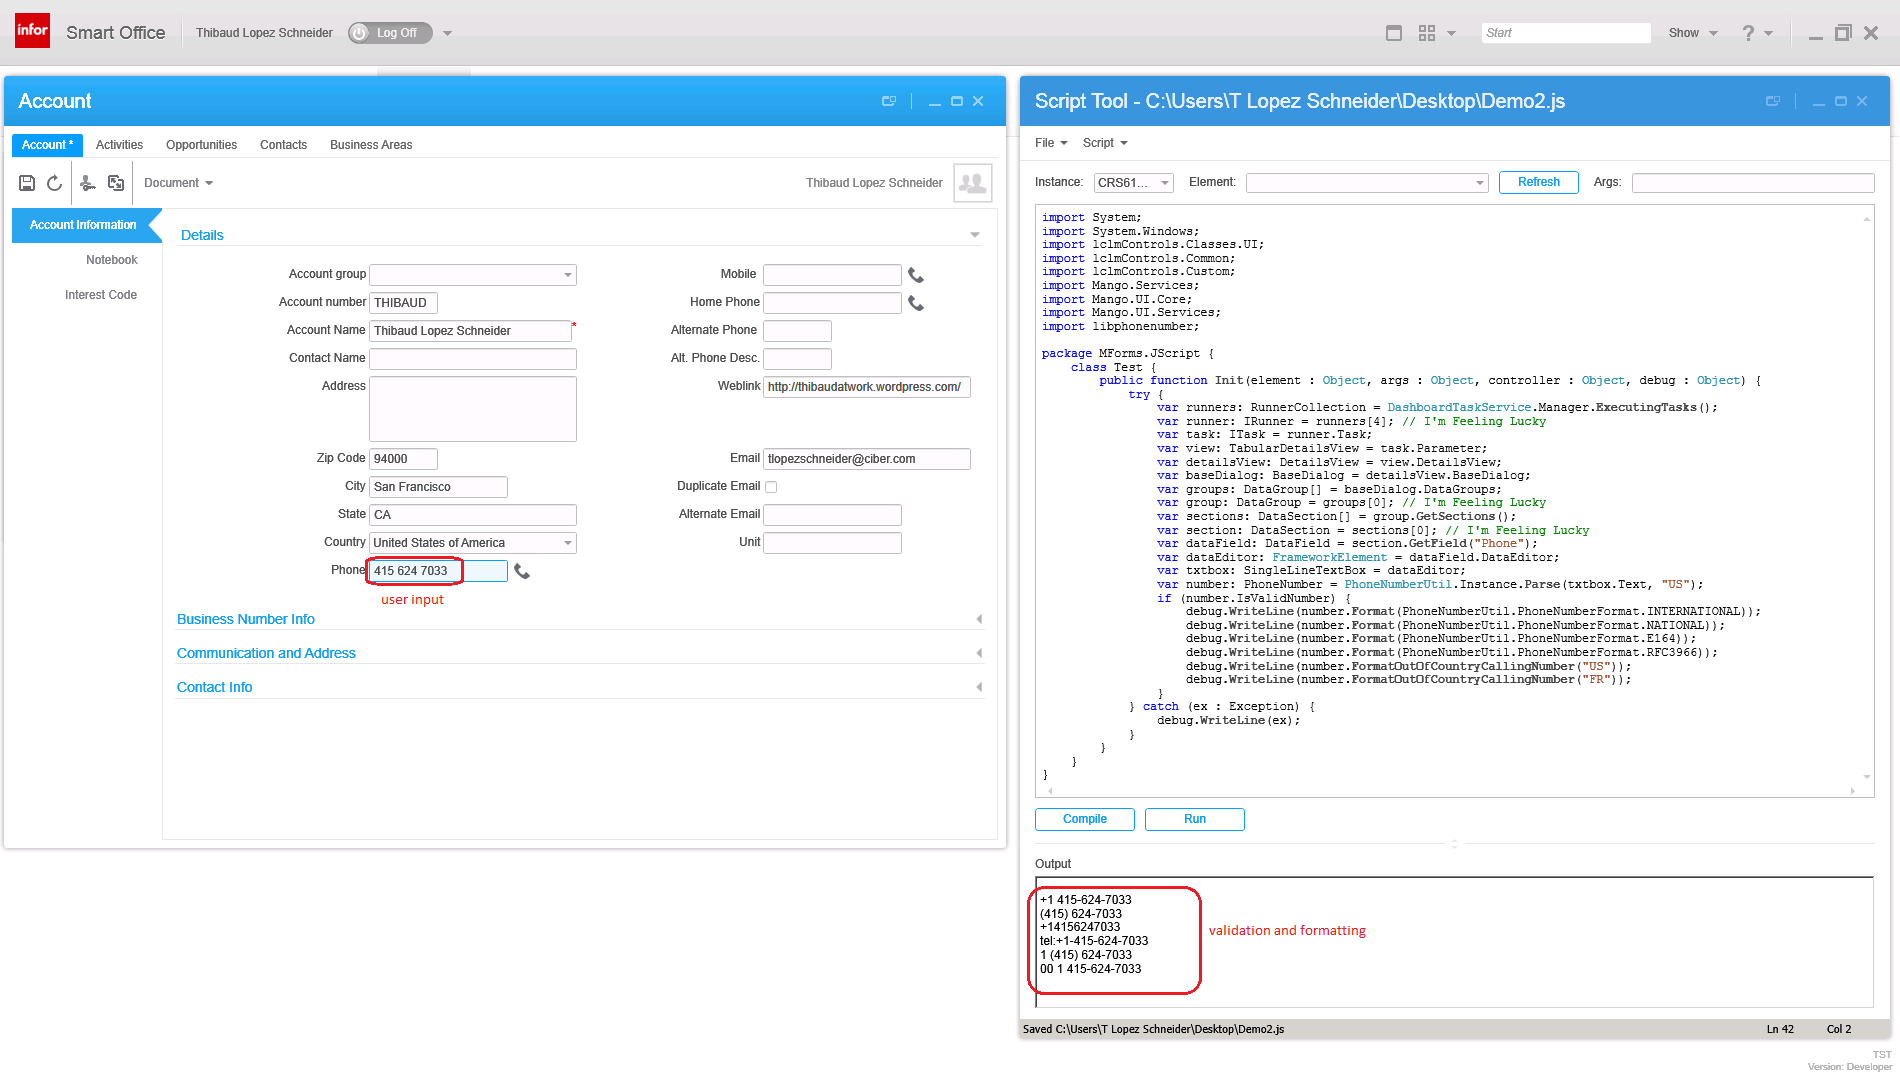
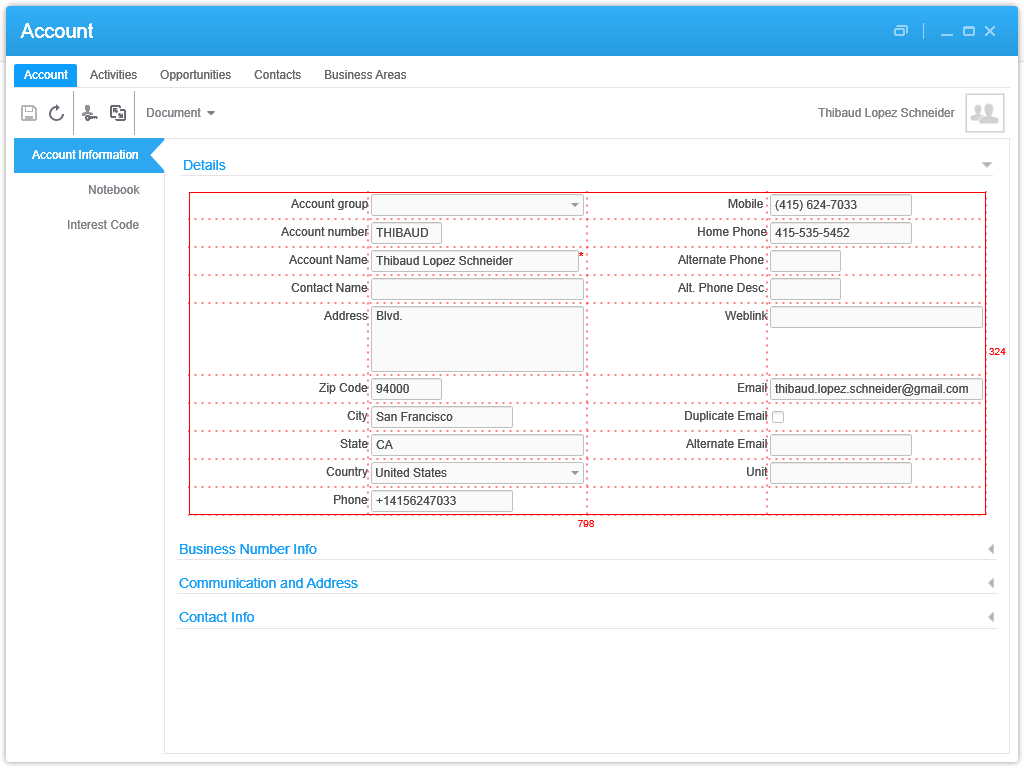
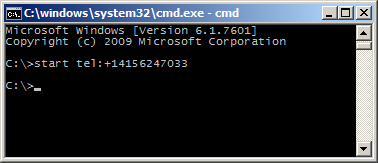
Here is a sample user input with phone numbers formatted incorrectly:

Here is the result after parsing, validation, and formatting:

And here is an invalid input and the error message in the status bar:
Future work
As future work, I would like to use ValidationRule which Infor already uses for Infor Document Archive.
That’s it! Check out my series on telephony. And as usual, subscribe, comment, share, and enjoy.