Developing H5 Client scripts – Part 1

The day came I have to develop a script for Infor M3 H5 Client with M3 API calls for a customer. This post will add to my previous post, to Scott’s three previous posts, and to Karin’s previous post.

Disambiguation

Scripts for H5 Client are written in the JavaScript programming language (ECMAScript). Scripts for Infor Smart Office are written in the JScript.NET programming language. Programs for M3 are written in the Java programming language. Despite the similarities, the three languages are different. Smart Office scripts will NOT execute in H5 Client; you will have to re-write most of the code and be familiar with functional programming, jQuery, Deferred, Promises, etc.; it is like back in the days of IBrix.

Documentation

Here is the M3 H5 Development Guide:

Conversion

Here are some tips to convert a Smart Office script to an H5 Client script:

Example of a minimal script for Smart Office:

package MForms.JScript {
	class Test {
		public function Init(element: Object, args: Object, controller : Object, debug : Object) {
			debug.WriteLine('Hello, World!');
		}
	}
}

The equivalent script for H5 Client:

var Test = new function () {
	this.Init = function (scriptArgs) {
		console.log('Hello, World!');
    };
};

Various ways to get a field and its value compared to norpe’s guide for Smart Office:

var controller = scriptArgs.controller;
var host = controller.ParentWindow;
controller.FieldMap.WRCUNM[0]
controller.GetElement('WRCUNM')[0]
H5ControlUtil.GetFieldValue('WRCUNM')
ScriptUtil.FindChild($, 'WRCUNM')[0]
ScriptUtil.FindChild(host, 'WRCUNM')[0]

UPDATE 2017-06-06: According to the H5 Development Guide, the above is not the recommended API, but controller.GetContentElement().GetElement("WRCUNM") instead.

Example to call an M3 API in H5 script:

ScriptUtil.ApiRequest('/execute/CRS610MI/LstByNumber', result => console.log(result), (error, message) => console.log([error, message]))

UPDATE 2017-06-06: According to the H5 Development Guide, the above is not the recommended API, but MIService.Current.execute|executeRequest instead, but I get error ‘MIService is not defined’; perhaps I do not have the latest version of H5 Client.

Chrome Developer tools

Use the Google Chrome Developer tools:

Use it for the list of global variables, code completion, type reflection, console, dynamic execution, debugger, network monitor, DOM, styles:

Pause execution to introspect global variables:

UPDATE 2017-06-06: In the JavaScript console, you can get the current controller with getActiveController() or MainController.Current.Instances.host_X where X is the controller number.

Administrative tool

Use the administrative tool to import/export H5 scripts:

UPDATE 2017-06-06: To update a script, simply re-import it, click Yes to override, and refresh the M3 panel with Actions > Refresh-F5; there is no cache thus no need to add the version number in the script file name unlike Smart Office.

Execute

Attach the script to the panel as usual at Tools > Personalize > Scripts:

Select Actions > Refresh-F5 to load the script:

Use the JavaScript debugger statement in your script to pause execution and invoke the Chrome debugger:

Call M3 API, and refer to my previous post:

Conclusion

That was a quick look at how to develop scripts for Infor M3 H5 Client including calls to M3 API.

Thanks to Scott Campbell of Potato IT for the first look.

Please like, comment, subscribe, share, come author with us, or look at other ways to contribute.

Related documentation

Building an Infor Grid Lab – Part 2bis

I am learning how to install an Infor ION Grid laboratory from scratch without LifeCycle Manager (LCM). I had started in part 2 with a minimalist Grid. Today, I will add the Default Router, Developer Session Provider, Administrative Router, Configuration Manager, web user interface, and Grid Agent.

BUT WHY?

I am learning the guts of the Grid because I am curious by nature, because I want to do penetration testing, because I want to install M3 on Linux and PostgreSQL to promote free software (as in freedom), and I want to make a proof-of-concept of M3 (just the Grid for now) on a homomorphic encryption database such as CryptDB or Microsoft’s Always Encrypted SQL Server.

Learning process

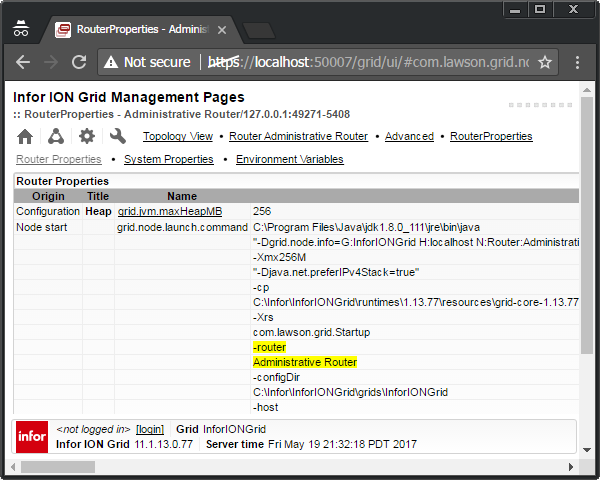
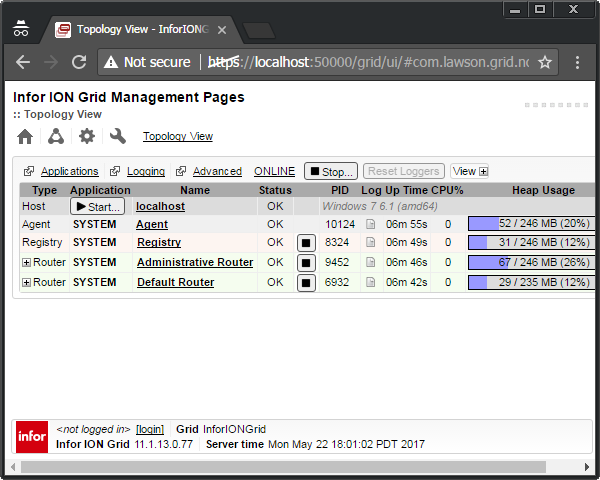
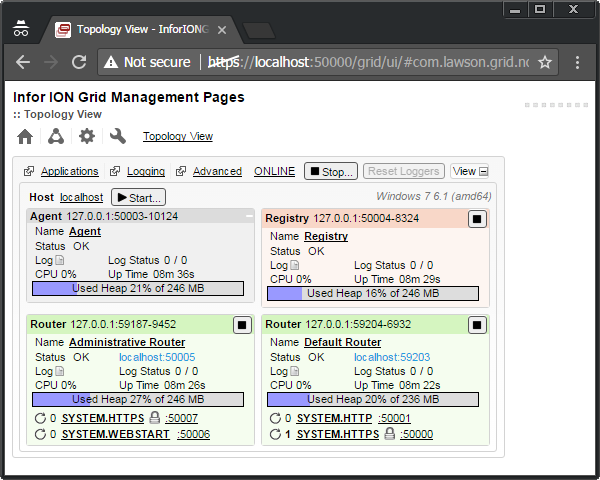
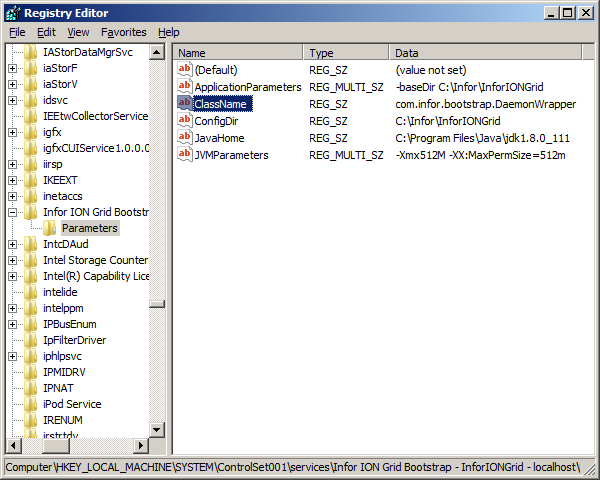
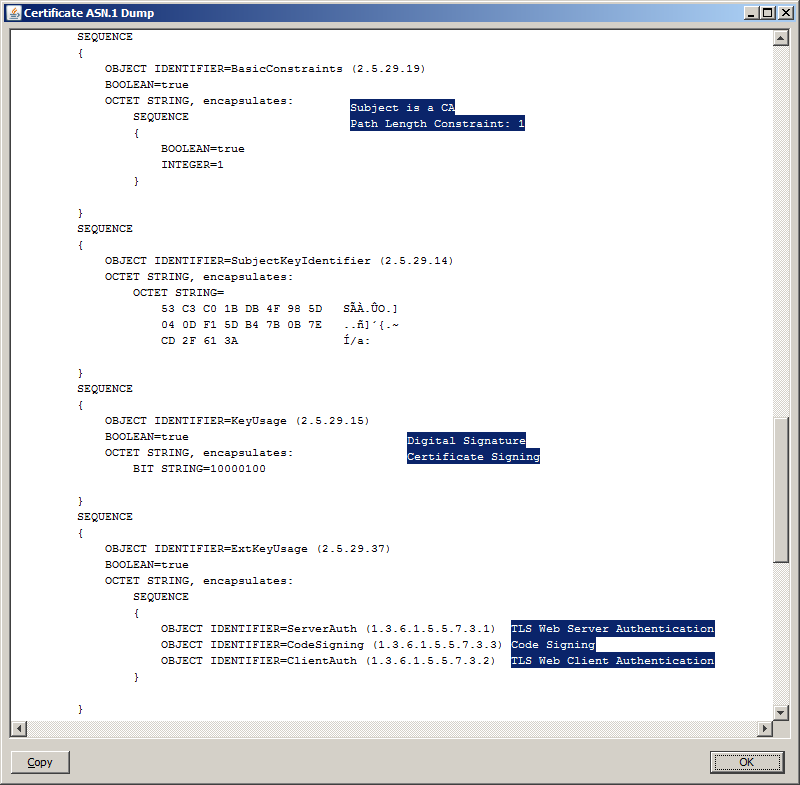
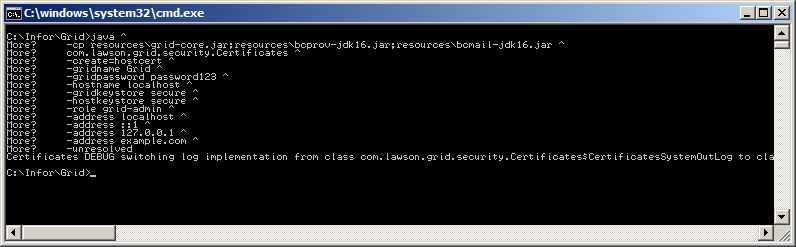
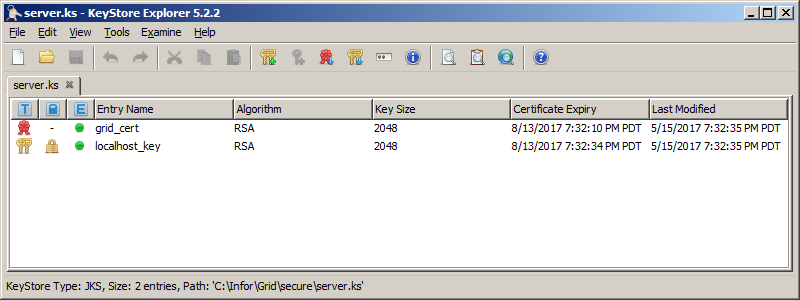
To learn, I take any installed Grid as a reference, and I study its internals. I start from the Topology View, I select the Node of interest (e.g. Administrative Router), I look at the Properties to make note of the command that launches it, I look at the Threads to determine the Java class name, I look at the disassembled source code to assimilate what it does, I look at the LCM installation package to understand the Velocity scripts and Ant tasks (see my previous work on LCM), and I look at the public Infor documentation. Then, I try to reproduce the Grid in my laboratory with only the necessary and sufficient elements. Here are some screenshots while learning the Grid Administrative Router:

I must use this Chinese wall technique because as a consultant I do not have access to Infor Product Development, i.e. the developers do not respond to my questions, and they do not share their source code or internal documentation. I am known for having “crazy ideas”, supposedly pointless. I call it progress 😉 If we do not challenge the status quo, who will? Even if I had access to the internal details, I am not allowed to show proprietary information. The workaround is to put myself in the situation of a clean room, analogous to that of any customer that has access to the binaries and that can reverse engineer on their own. That is how I can share my results here. Nonetheless, congratulations to Infor for finally having made a lot of the documentation public; please encourage them as well. In that direction, please sign the petition so Infor makes their source code at least source-available or shared source, and so they cooperate more with developers.

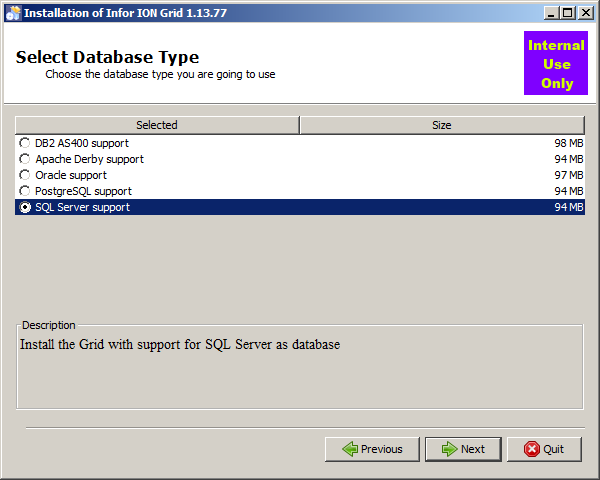
1. Begin with minimal Grid

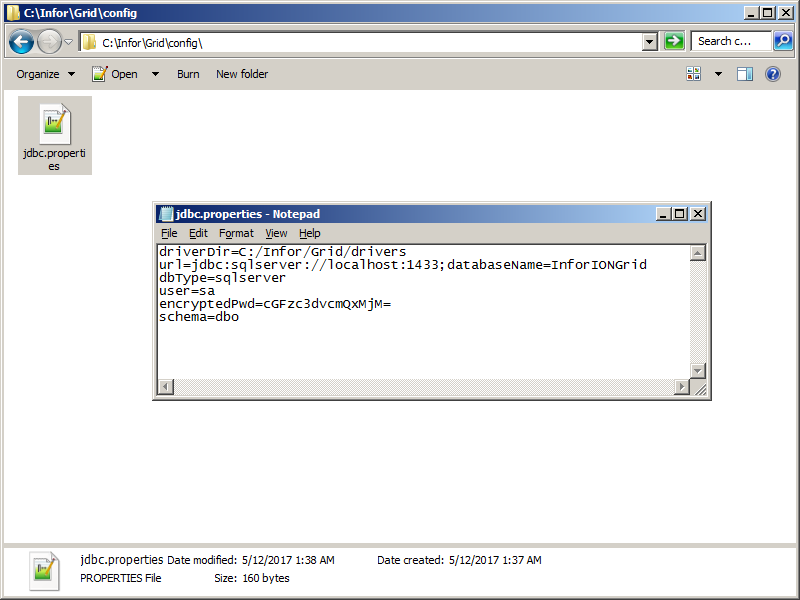
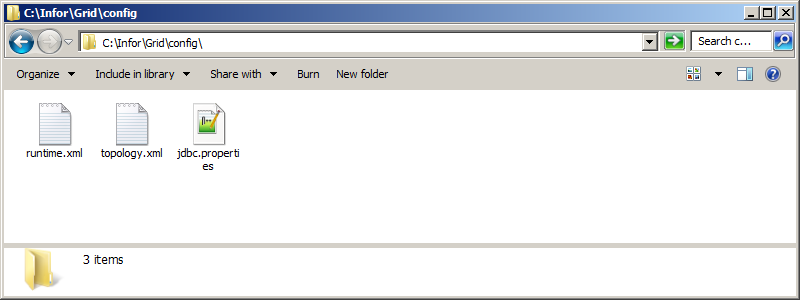
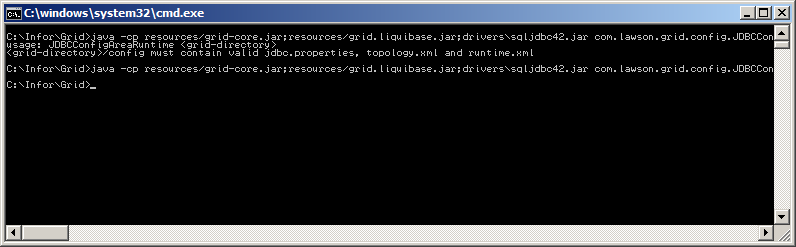
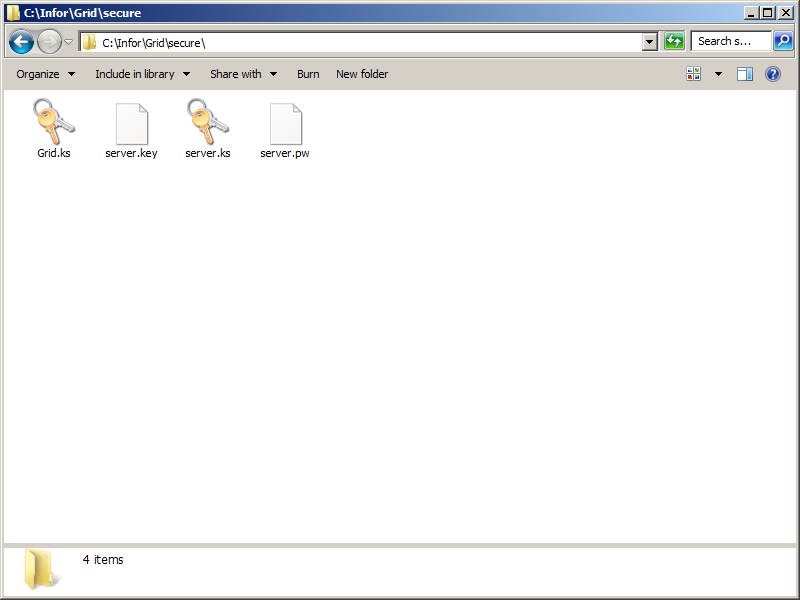
Follow part 2 to begin with a minimal Grid.

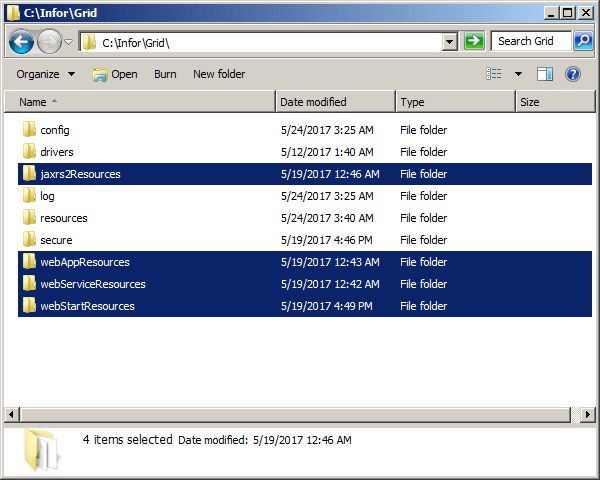
2. Additional JAR files

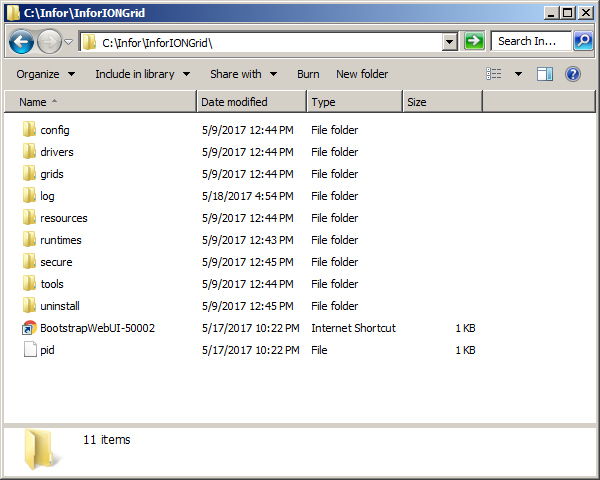
Get the following additional JAR files (I may need to clean up the list). These JAR files are packed with IzPack at Grid_Installer_11.1.13.0.77.lcm\products\Infor_ION_Grid_11.1.13.0\components\installer-1.13.77.jar\resources\packs\ . More easily, I get them from my existing Grid installation of part 4. Then, put them somewhere, e.g. C:\Infor\Grid\resources\ :

resources\1.13.77\jna-3.3.0-platform.jar
resources\1.13.77\jna-3.3.0.jar
runtimes\1.13.77\jaxrs2Resources\grid-jaxrs2-1.13.77.jar
runtimes\1.13.77\jaxrs2Resources\hk2-api-2.2.0.jar
runtimes\1.13.77\jaxrs2Resources\hk2-locator-2.2.0.jar
runtimes\1.13.77\jaxrs2Resources\hk2-utils-2.2.0.jar
runtimes\1.13.77\jaxrs2Resources\jackson-core-asl-1.9.13.jar
runtimes\1.13.77\jaxrs2Resources\jackson-jaxrs-1.9.13.jar
runtimes\1.13.77\jaxrs2Resources\jackson-mapper-asl-1.9.13.jar
runtimes\1.13.77\jaxrs2Resources\javassist-3.18.1-GA.jar
runtimes\1.13.77\jaxrs2Resources\javax.annotation-api-1.2.jar
runtimes\1.13.77\jaxrs2Resources\javax.inject-2.2.0.jar
runtimes\1.13.77\jaxrs2Resources\javax.ws.rs-api-2.0.jar
runtimes\1.13.77\jaxrs2Resources\jersey-client-2.7.jar
runtimes\1.13.77\jaxrs2Resources\jersey-common-2.7.jar
runtimes\1.13.77\jaxrs2Resources\jersey-container-servlet-core-2.7.jar
runtimes\1.13.77\jaxrs2Resources\jersey-guava-2.7.jar
runtimes\1.13.77\jaxrs2Resources\jersey-media-json-jackson-2.7.jar
runtimes\1.13.77\jaxrs2Resources\jersey-media-multipart-2.7.jar
runtimes\1.13.77\jaxrs2Resources\jersey-server-2.7.jar
runtimes\1.13.77\jaxrs2Resources\mimepull-1.9.3.jar
runtimes\1.13.77\jaxrs2Resources\validation-api-1.1.0.Final.jar
runtimes\1.13.77\tools\grid-cli\jackson-core-asl-1.9.13.jar
runtimes\1.13.77\tools\grid-cli\jackson-mapper-asl-1.9.13.jar
runtimes\1.13.77\webAppResources\commons-fileupload-1.2.2.jar
runtimes\1.13.77\webAppResources\grid-webapp-1.13.77.jar
runtimes\1.13.77\webAppResources\javax.websocket-api-1.0.jar
runtimes\1.13.77\webAppResources\javax-websocket-client-impl-9.1.1.v20140108.jar
runtimes\1.13.77\webAppResources\javax-websocket-server-impl-9.1.1.v20140108.jar
runtimes\1.13.77\webAppResources\javax.annotation-api-1.2.jar
runtimes\1.13.77\webAppResources\jetty-http-9.1.1.v20140108.jar
runtimes\1.13.77\webAppResources\jetty-io-9.1.1.v20140108.jar
runtimes\1.13.77\webAppResources\jetty-security-9.1.1.v20140108.jar
runtimes\1.13.77\webAppResources\jetty-server-9.1.1.v20140108.jar
runtimes\1.13.77\webAppResources\jetty-servlet-9.1.1.v20140108.jar
runtimes\1.13.77\webAppResources\jetty-servlets-9.1.1.v20140108.jar
runtimes\1.13.77\webAppResources\jetty-util-9.1.1.v20140108.jar
runtimes\1.13.77\webAppResources\websocket-api-9.1.1.v20140108.jar
runtimes\1.13.77\webAppResources\websocket-client-9.1.1.v20140108.jar
runtimes\1.13.77\webAppResources\websocket-common-9.1.1.v20140108.jar
runtimes\1.13.77\webAppResources\websocket-server-9.1.1.v20140108.jar
runtimes\1.13.77\webAppResources\websocket-servlet-9.1.1.v20140108.jar

3. CLASSPATH

Prepare a CLASSPATH environment variable with all the JAR files including the JDBC driver:

set CLASSPATH=drivers\sqljdbc42.jar;resources\bcmail-jdk16.jar;resources\bcprov-jdk16.jar;resources\commons-fileupload-1.2.2.jar;resources\grid-core.jar;resources\grid-jaxrs2-1.13.77.jar;resources\grid-webapp-1.13.77.jar;resources\grid.httpclient.jar;resources\grid.liquibase.jar;resources\hk2-api-2.2.0.jar;resources\hk2-locator-2.2.0.jar;resources\hk2-utils-2.2.0.jar;resources\jackson-core-asl-1.9.13.jar;resources\jackson-jaxrs-1.9.13.jar;resources\jackson-mapper-asl-1.9.13.jar;resources\javassist-3.18.1-GA.jar;resources\javax-websocket-client-impl-9.1.1.v20140108.jar;resources\javax-websocket-server-impl-9.1.1.v20140108.jar;resources\javax.annotation-api-1.2.jar;resources\javax.inject-2.2.0.jar;resources\javax.servlet-api.jar;resources\javax.websocket-api-1.0.jar;resources\javax.ws.rs-api-2.0.jar;resources\jersey-client-2.7.jar;resources\jersey-common-2.7.jar;resources\jersey-container-servlet-core-2.7.jar;resources\jersey-guava-2.7.jar;resources\jersey-media-json-jackson-2.7.jar;resources\jersey-media-multipart-2.7.jar;resources\jersey-server-2.7.jar;resources\jetty-http-9.1.1.v20140108.jar;resources\jetty-io-9.1.1.v20140108.jar;resources\jetty-security-9.1.1.v20140108.jar;resources\jetty-server-9.1.1.v20140108.jar;resources\jetty-servlet-9.1.1.v20140108.jar;resources\jetty-servlets-9.1.1.v20140108.jar;resources\jetty-util-9.1.1.v20140108.jar;resources\jna-3.3.0-platform.jar;resources\jna-3.3.0.jar;resources\mimepull-1.9.3.jar;resources\validation-api-1.1.0.Final.jar;resources\websocket-api-9.1.1.v20140108.jar;resources\websocket-client-9.1.1.v20140108.jar;resources\websocket-common-9.1.1.v20140108.jar;resources\websocket-server-9.1.1.v20140108.jar;resources\websocket-servlet-9.1.1.v20140108.jar

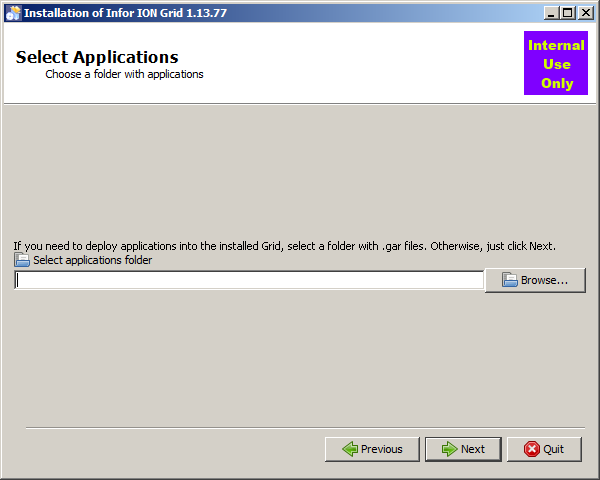
4. Additional folders

Create the following additional folders, I leave them empty even though I could organize the JAR files accordingly:

jaxrs2Resources
webAppResources
webServiceResources
webStartResources

And create file webStartResources\webStartResources.properties, even though empty.

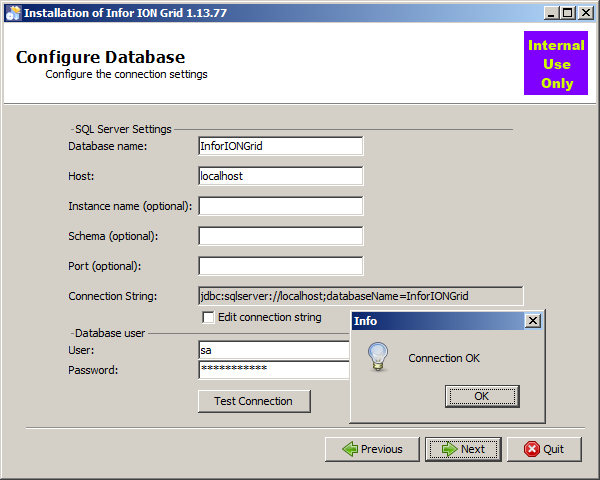
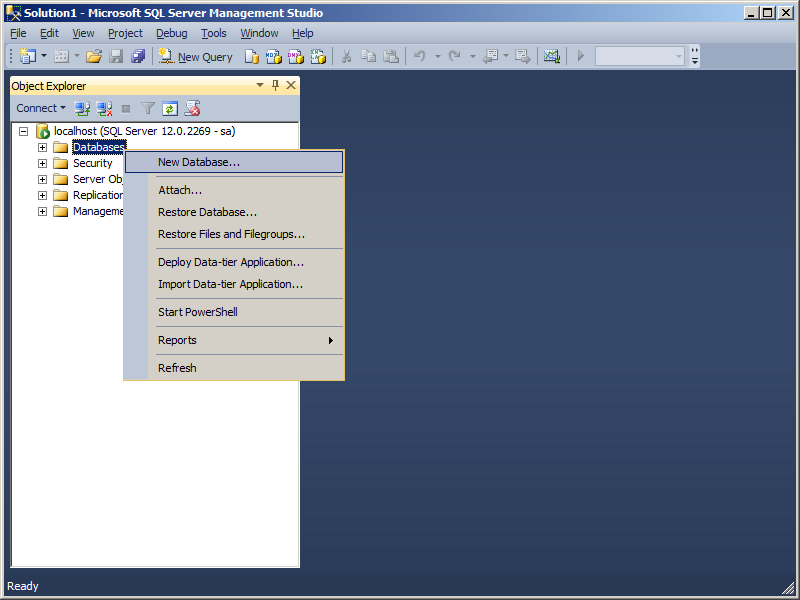
5. Additional tables

Create the following additional database tables:

CREATE TABLE KEY_VALUE_STORE (
 APPLICATION_NAME varchar(64) NOT NULL,
 PROPERTY_NAME varchar(256) NOT NULL,
 PROPERTY_KEY varchar(128) NOT NULL,
 PROPERTY_VALUE varbinary(max) NULL,
 PROPERTY_TYPE varchar(256) NOT NULL,
 PROPERTY_SIZE numeric(10, 0) NOT NULL,
 SEQID numeric(5, 0) NOT NULL,
 TIMESTAMP numeric(20, 0) NOT NULL,
)
CREATE TABLE HOSTS(
 GRID_NAME varchar(64) NOT NULL,
 HOST_NAME varchar(64) NOT NULL,
 VALID_CERT varchar(32) NOT NULL,
 MODIFIED_BY varchar(128) NULL,
 DEPLOY_STATE varchar(32) NOT NULL,
 TIMESTAMP numeric(20, 0) NOT NULL,
 RUNNING varchar(32) NOT NULL,
 GRID_VERSION varchar(64) NOT NULL,
 BOOTSTRAP_VERSION varchar(64) NULL,
 HTTP_PORT numeric(20, 0) NOT NULL
)
INSERT INTO HOSTS (GRID_NAME, HOST_NAME, VALID_CERT, MODIFIED_BY, DEPLOY_STATE, TIMESTAMP, RUNNING, GRID_VERSION, BOOTSTRAP_VERSION, HTTP_PORT) VALUES ('Grid', 'localhost', 'true', 'Thibaud', 'ACTIVE', 0, 'STARTED', '1.13.77', '1.13.77', 50002)
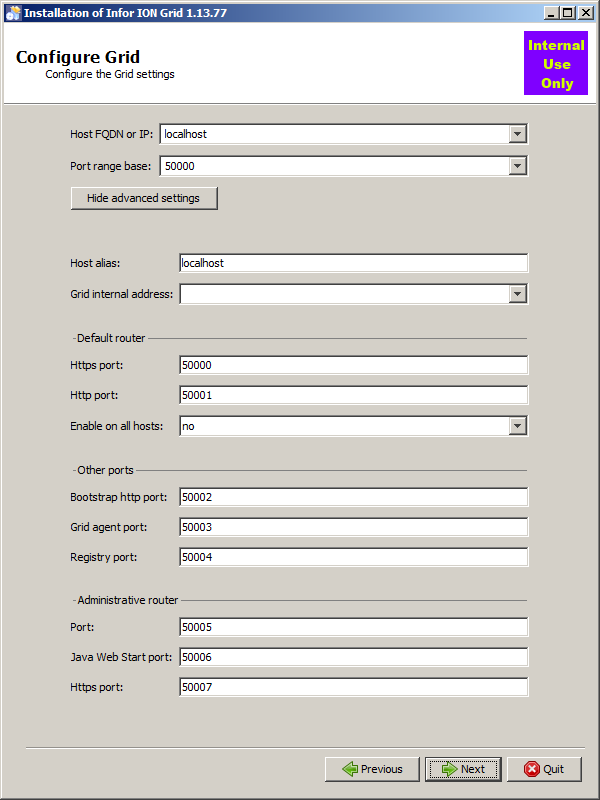
6. Default Router

The Default Router is what Grid clients will connect to by default to communicate with the Grid.

Add the following to <routers> in the runtime.xml in the GRIDCONF table:

<router name="Default Router" host="localhost" httpsPort="50000" httpPort="50001" />

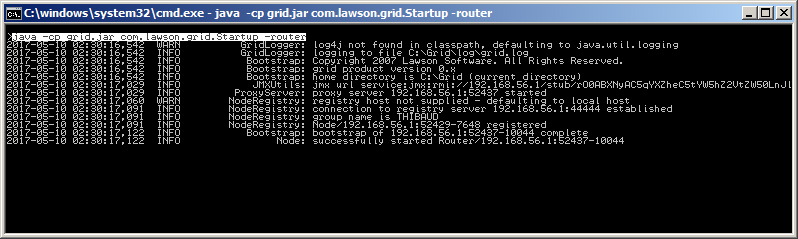
Use this command to start the Default Router:

java -cp %CLASSPATH% com.lawson.grid.Startup -router "Default Router" -configDir C:\Infor\Grid\ -host localhost -logLevel ALL

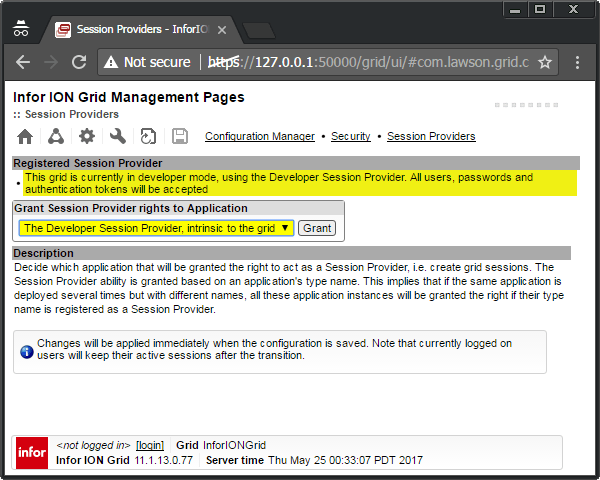
7. Developer Session Provider

The Developer Session Provider will let us login with any user and password (e.g. grid-admin) and get a session.

Add the following to <runtime> in the runtime.xml in the GRIDCONF table:

<sessionProviders developer="true" />

8. Administrative Router

The administrative router is the server part of the Configuration Manager.

Add the following to <topology> in the topology.xml in the GRIDCONF table:

<administrativeRouter host="localhost" port="50005" webStartPort="50006" httpsPort="50007" />

Use this command to start the Administrative Router:

java -cp %CLASSPATH% com.lawson.grid.Startup -router "Administrative Router" -configDir C:\Infor\Grid\ -host localhost -logLevel ALL

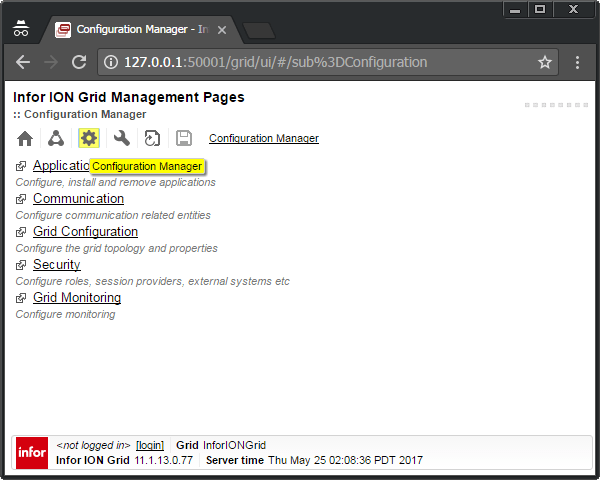
9. Configuration Manager Client

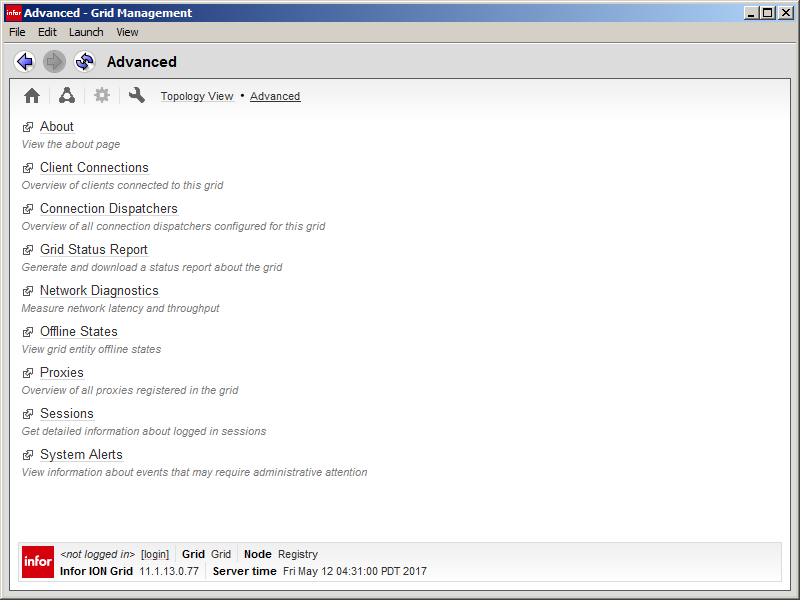
The Configuration Manager Client is the user interface to manage the runtime.xml.

You can use the online client from the Grid Management Pages:

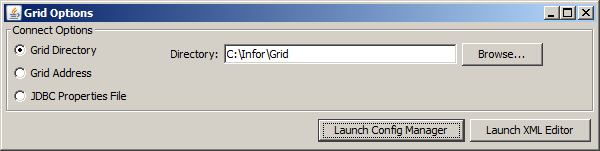
Or you can use this command to start the offline client:

java -cp %CLASSPATH% com.lawson.grid.config.client.ui.Launch
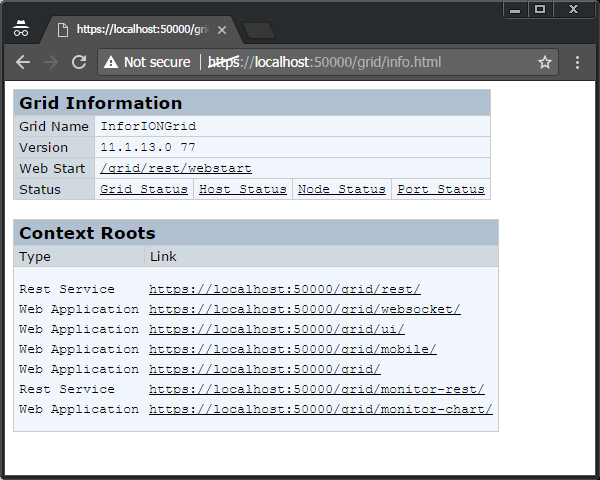
10. Web UI

Start the Grid web user interface by opening a browser to https://localhost:50000/grid/info.html , then select /grid/ui/ , then go to the Configuration Manager and login:
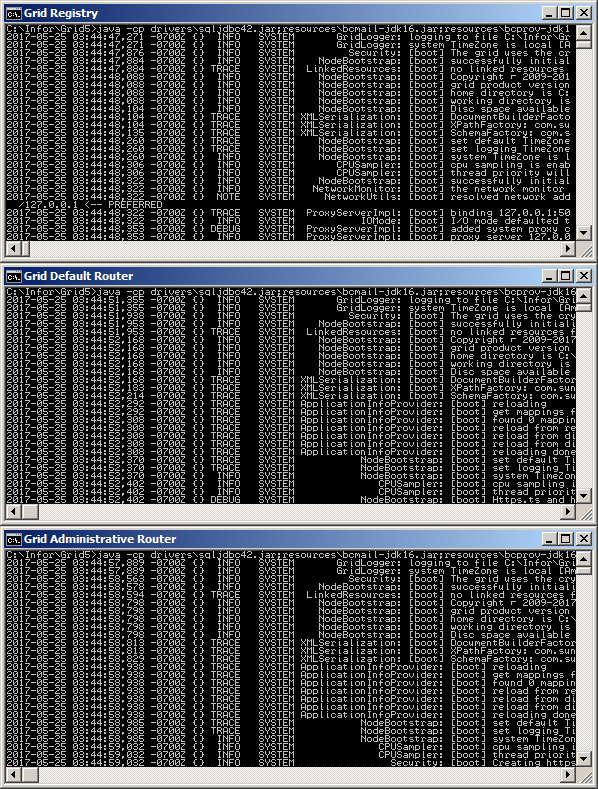
11. Start the Grid

To start the Grid:

  1. Start the Registry as shown previously in part 2:
  2. java -cp %CLASSPATH% com.lawson.grid.Startup -registry -configDir C:\Infor\Grid\ -host localhost -logLevel ALL
  3. Start the Default Router as shown above.
  4. Start the Administrative Router as shown above.

Now we can start the Configuration Manager Client and/or web UI as shown above and enjoy the Grid.
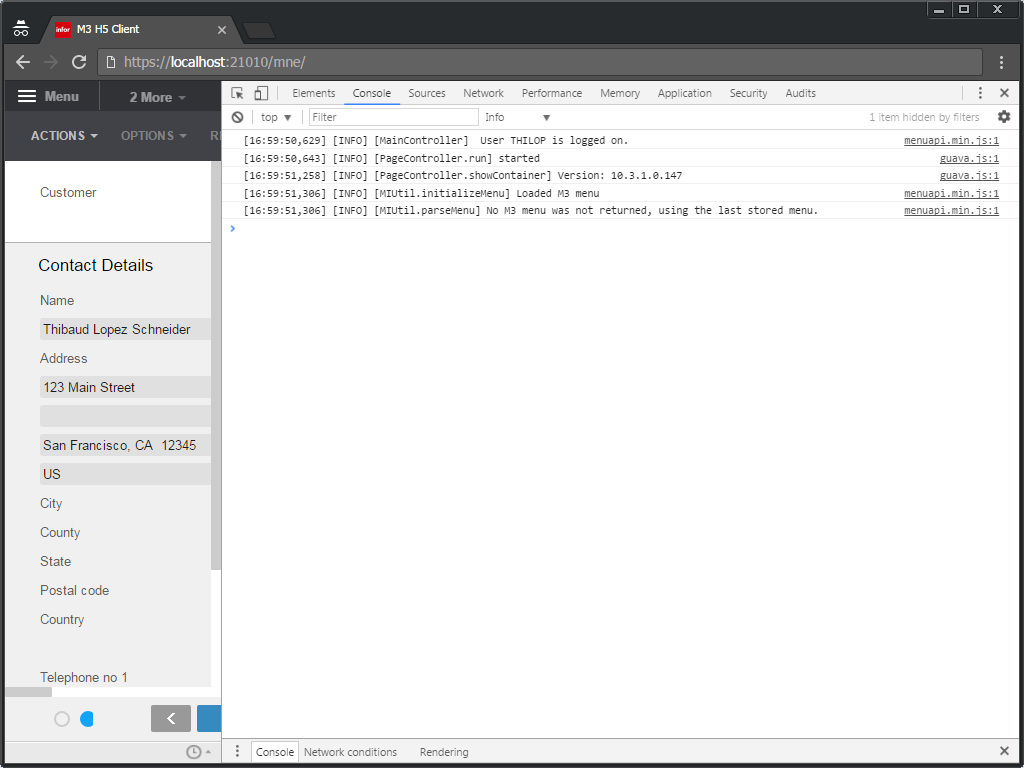
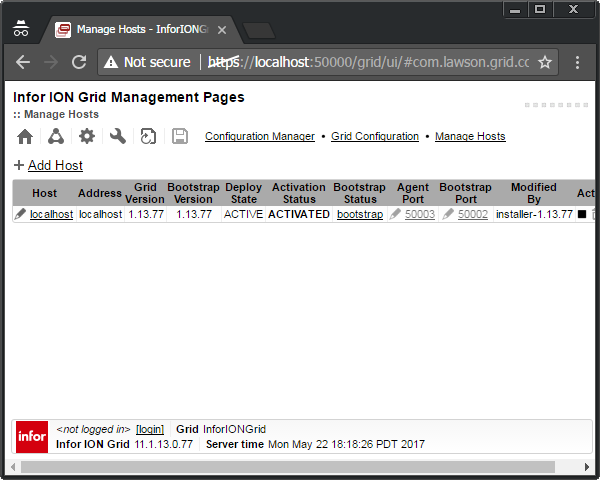
Result

We now have a minimal Grid with the Configuration Manager and fewer error messages:

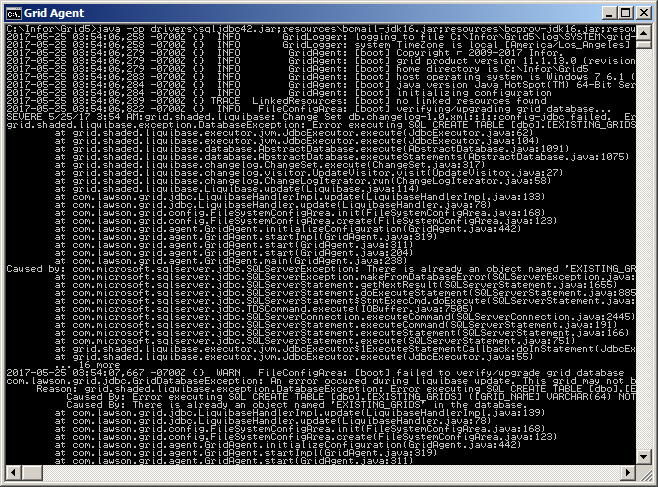
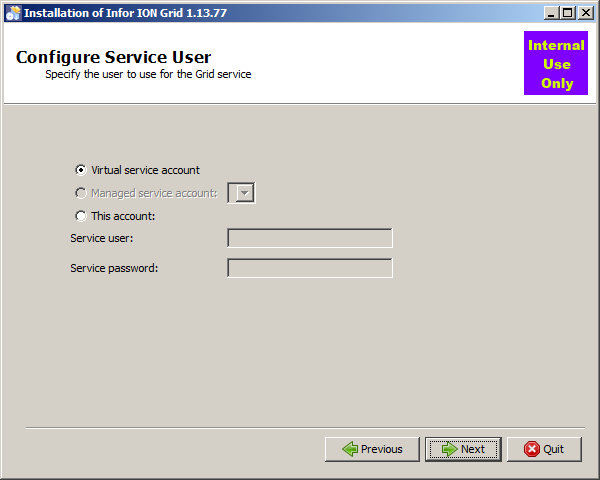
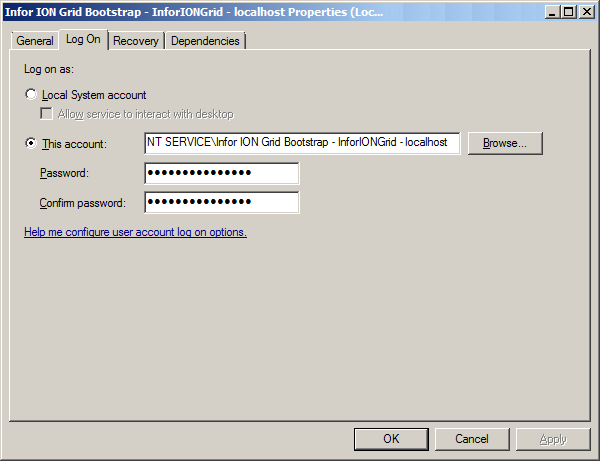
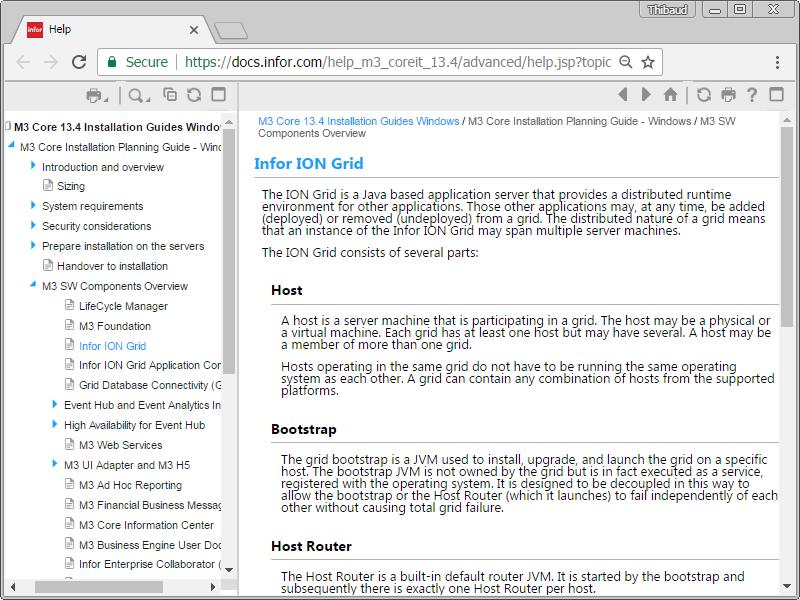
Optional – Grid Agent

Instead of starting the Grid manually piece by piece, we can let the Grid Agent start it all. The Grid Agent is used to start nodes programmatically (e.g. registry, routers, applications); there is one Grid Agent per host. The Windows Service Infor ION Grid Bootstrap uses the Grid Launcher and Grid Agent to launch everything in the Grid at startup: registry, routers, applications, etc.:

java -cp %CLASSPATH% com.lawson.grid.agent.GridAgent -configDir C:\Infor\Grid\ -logToConsole -logLevel ALL -host localhost

Note: The Grid Agent will attempt to create the database tables, but because we already have some tables, not all of them, it will stop. Delete all the tables from the Grid database; re-run the Grid Agent, it will create all the tables; re-import the GRIDCONF with runtime.xml and topology.xml; re-run the Grid Agent.

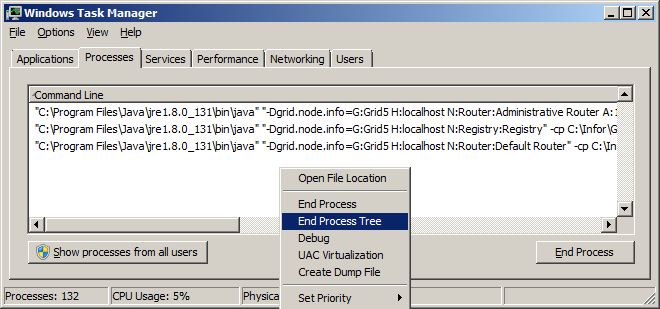
Note: To stop the Grid, if we simply close the Grid Agent command prompt to terminate the batch job, it will not terminate the Java processes. We must go in the Task Manager and end the three java.exe processes for the registry, default router, and administrative router:

GitHub

I put the SQL and commands on my GitHub.

Future work

I hope to do the following soon:

  • Install Grid session providers
  • Install GDBC
  • Install Grid applications
  • Install the Grid on Linux and PostgreSQL
  • Penetration testing
  • Proof-of-concept of Grid database on homomorphic encryption with CryptDB or Microsoft’s Always Encrypted SQL Server

Conclusion

That was a continuation of part 2 of building an Infor Grid laboratory for learning purposes, beginning with a minimal Grid, and adding a Default Router, Developer Session Provider, Administrative Router, Configuration Manager, web user interface, and Grid Agent. I can probably polish some of it. I will continue in the next posts.

That’s it!

Please like, comment, subscribe, share, and come write the next idea.

Related posts

Building an Infor Grid Lab – Part 4

Continuing to learn Infor ION Grid and building a laboratory without LifeCycle Manager (LCM), today I will use the Grid bundled installer and spew screenshots of the intuitive and automated install.

Disclaimer

The Grid bundled installer is available publicly as part of the Grid deliverable, but it is for internal use only, not for production use.

1. Database

Install a database server (DB2 AS/400, Apache Derby, Oracle, PostgreSQL, or SQL Server), and create a new database, e.g. InforIONGrid:

2. JAR file

Go to the Infor Product Download Center, find the M3 Core Infrastructure and Technology, download the Grid installer, unzip it, go to the components sub-folder, and execute the installer JAR file:

3. Next Next Next

Follow the wizard:

3. Result

Here is the resulting Grid, files and folders, web UI, admin UI, topology, registry, default router, administrative router, user and role mapping, Grid Bootstrap, database, Windows Service, processes, topology XML, and runtime XML:

User and Role Mappings:

Routers:

Database:

Windows Service:

Infor ION Grid Bootstrap - InforIONGrid - localhost
LogOnAs=NT SERVICE\Infor ION Grid Bootstrap - InforIONGrid - localhost
ConfigDir=C:\Infor\InforIONGrid
JavaHome=C:\Program Files\Java\jdk1.8.0_111
ClassName=com.infor.bootstrap.DaemonWrapper
JVMParameters=-Xmx512M -XX:MaxPermSize=512m
ApplicationParameters=-baseDir C:\Infor\InforIONGrid

topology.xml:

<?xml version="1.0" encoding="UTF-8" standalone="no"?>
<topology gridId="83144c68-5a16-4e6c-8280-b9102a477980" xmlns:xsi="http://www.w3.org/2001/XMLSchema-instance" xsi:schemaLocation="http://schemas.lawson.com/grid/configuration_v3 http://schemas.lawson.com/grid/configuration_v3" xmlns="http://schemas.lawson.com/grid/configuration_v3">
    <hosts>
        <host address="localhost" gridAgentPort="50003" name="localhost"/>
    </hosts>
    <registry host="localhost" port="50004"/>
    <administrativeRouter externalAddress="localhost" host="localhost" httpsAuthType="client" httpsPort="50007" port="50005" webStartPort="50006"/>
    <!--5/9/17 12:45 PM-->
    <!--Created by installer-->
</topology>

runtime.xml:

<?xml version="1.0" encoding="UTF-8" standalone="no"?>
<runtime xmlns:xsi="http://www.w3.org/2001/XMLSchema-instance" xsi:schemaLocation="http://schemas.lawson.com/grid/configuration_v3 http://schemas.lawson.com/grid/configuration_v3" xmlns="http://schemas.lawson.com/grid/configuration_v3">
    <bindings/>
    <sessionProviders developer="false"/>
    <routers>
        <router externalAddress="localhost" host="localhost" httpAuthenticationMethods="ntlm" httpPort="50001" httpsAuthType="client" httpsAuthenticationMethods="basic ntlm" httpsPort="50000" name="Default Router"/>
    </routers>
    <propertySettings>
        <propertyOverrides nodeType="router">
            <property name="grid.jvm.maxHeapMB">256</property>
        </propertyOverrides>
        <propertyOverrides nodeType="registry">
            <property name="grid.jvm.maxHeapMB">256</property>
        </propertyOverrides>
        <propertyOverrides>
            <property name="grid.jvm.maxHeapMB">512</property>
            <property name="java.net.preferIPv4Stack">true</property>
            <propertyListMap name="grid.slf4j.mapping" strategy="merge">
                <key>org.apache.cxf.service.*</key>
                <values>
                    <value>ERROR</value>
                    <value>WARN</value>
                    <value>DEBUG</value>
                    <value>DEBUG</value>
                    <value>TRACE</value>
                </values>
                <key>org.apache.cxf.endpoint.*</key>
                <values>
                    <value>ERROR</value>
                    <value>WARN</value>
                    <value>DEBUG</value>
                    <value>DEBUG</value>
                    <value>TRACE</value>
                </values>
            </propertyListMap>
            <propertyListMap name="grid.router.endpoints"/>
        </propertyOverrides>
    </propertySettings>
    <!--5/9/17 12:45 PM-->
    <!--Created by installer-->
</runtime>

Here is the folder structure (zoom in):

C:\Infor\InforIONGrid>tree /a /f
Folder PATH listing for volume Windows_OS
Volume serial number is 0E5A-3982
C:.
|   BootstrapWebUI-50002.url
|   pid
|
+---config
|       agentlaunch.properties
|       bootstrap.properties
|
+---drivers
|       sqljdbc4-4.0.jar
|
+---grids
|   \---InforIONGrid
|       |   AdminUI.cmd
|       |   ChangeDBPassword.cmd
|       |   ChangeJDK.cmd
|       |   OfflineConfigUI.cmd
|       |   StartAllHosts.cmd
|       |   StartHost.cmd
|       |   StopAllHosts.cmd
|       |   StopHost.cmd
|       |
|       +---config
|       |       binary.path
|       |       jdbc.properties
|       |
|       +---log
|       |   \---SYSTEM
|       |           grid-agent-1244.log
|       |           grid-agent-1772.log
|       |           grid-agent-4504.log
|       |           grid-agent-4600.log
|       |           grid-agent-4960.log
|       |           grid-agent-6808.log
|       |           grid-registry-3816.log
|       |           grid-registry-3872.log
|       |           grid-registry-4072.log
|       |           grid-registry-5040.log
|       |           grid-registry-6492.log
|       |           grid-registry-8832.log
|       |           grid-router-Administrative_Router-3220.log
|       |           grid-router-Administrative_Router-3908.log
|       |           grid-router-Administrative_Router-4776.log
|       |           grid-router-Administrative_Router-5020.log
|       |           grid-router-Administrative_Router-5320.log
|       |           grid-router-Administrative_Router-9504.log
|       |           grid-router-Default_Router-3052.log
|       |           grid-router-Default_Router-3832.log
|       |           grid-router-Default_Router-4824.log
|       |           grid-router-Default_Router-5152.log
|       |           grid-router-Default_Router-5340.log
|       |           grid-router-Default_Router-8508.log
|       |
|       \---secure
|               https-ts.pw
|               https.ks
|               https.pw
|               https.ts
|               InforIONGrid.der
|               InforIONGrid.ks
|               InforIONGrid.pw
|               server.key
|               server.ks
|               server.pw
|
+---log
|       bootstrap-2516.log
|       bootstrap-2532.log
|       bootstrap-2544.log
|       bootstrap-2552.log
|       bootstrap-2568.log
|       bootstrap-2588.log
|       bootstrap-2732.log
|       bootstrap-8144.log
|       installation_20170509124513914.log
|       installation_20170518165426295.log
|       service-2516.log
|       service-2532.log
|       service-2544.log
|       service-2552.log
|       service-2568.log
|       service-2588.log
|       service-2732.log
|       service-8144.log
|       service_out-2516.log
|       service_out-2532.log
|       service_out-2544.log
|       service_out-2552.log
|       service_out-2568.log
|       service_out-2588.log
|       service_out-2732.log
|       service_out-8144.log
|
+---resources
|   |   bootstrap-daemon-1.2.4.jar
|   |   commons-daemon-1.0.15.jar
|   |
|   +---1.13.77
|   |       bcmail-jdk16-1.45.jar
|   |       bcprov-jdk16-1.45.jar
|   |       bootstrap-core-1.13.77.jar
|   |       grid-core-1.13.77.jar
|   |       grid.commons-dbcp2-2.0.1.jar
|   |       grid.httpclient-4.2.6.jar
|   |       grid.liquibase-2.0.5.jar
|   |       jackson-core-asl-1.9.12.jar
|   |       jackson-mapper-asl-1.9.12.jar
|   |       javax.servlet-api-3.1.0.jar
|   |       jna-3.3.0-platform.jar
|   |       jna-3.3.0.jar
|   |       maven-shared-utils-0.4.jar
|   |       windowsjnasecurity-1.0.4.jar
|   |
|   +---amd64
|   |       service-wrapper-11.1.13.1-amd64.exe
|   |
|   \---x86
|           service-wrapper-11.1.13.1-x86.exe
|
+---runtimes
|   \---1.13.77
|       +---jaxrs1Resources
|       |       grid-jaxrs1-1.13.77.jar
|       |       jackson-core-asl-1.9.2.jar
|       |       jackson-jaxrs-1.9.2.jar
|       |       jackson-mapper-asl-1.9.2.jar
|       |       jackson-xc-1.9.2.jar
|       |       jersey-core-1.18.1.jar
|       |       jersey-json-1.18.1.jar
|       |       jersey-multipart-1.18.1.jar
|       |       jersey-server-1.18.1.jar
|       |       jersey-servlet-1.18.1.jar
|       |       mimepull-1.9.3.jar
|       |
|       +---jaxrs2Resources
|       |       aopalliance-repackaged-2.2.0.jar
|       |       grid-jaxrs2-1.13.77.jar
|       |       hk2-api-2.2.0.jar
|       |       hk2-locator-2.2.0.jar
|       |       hk2-utils-2.2.0.jar
|       |       jackson-core-asl-1.9.13.jar
|       |       jackson-jaxrs-1.9.13.jar
|       |       jackson-mapper-asl-1.9.13.jar
|       |       jackson-xc-1.9.13.jar
|       |       javassist-3.18.1-GA.jar
|       |       javax.annotation-api-1.2.jar
|       |       javax.inject-2.2.0.jar
|       |       javax.ws.rs-api-2.0.jar
|       |       jersey-client-2.7.jar
|       |       jersey-common-2.7.jar
|       |       jersey-container-servlet-2.7.jar
|       |       jersey-container-servlet-core-2.7.jar
|       |       jersey-guava-2.7.jar
|       |       jersey-media-json-jackson-2.7.jar
|       |       jersey-media-multipart-2.7.jar
|       |       jersey-server-2.7.jar
|       |       mimepull-1.9.3.jar
|       |       osgi-resource-locator-1.0.1.jar
|       |       validation-api-1.1.0.Final.jar
|       |
|       +---licenses
|       |   +---asm
|       |   |       license.txt
|       |   |
|       |   +---bcprov-jdk16
|       |   |       license.txt
|       |   |
|       |   +---core
|       |   |       license.html
|       |   |
|       |   +---cxf
|       |   |       license.txt
|       |   |
|       |   +---httpcore
|       |   |       license.txt
|       |   |
|       |   +---jetty-package
|       |   |       license.txt
|       |   |
|       |   +---jna
|       |   |       license.txt
|       |   |
|       |   +---jquery
|       |   |       license.txt
|       |   |
|       |   +---jquery-hashchange
|       |   |       license.txt
|       |   |
|       |   +---jsp-2.1-glassfish
|       |   |       license.txt
|       |   |
|       |   +---neethi
|       |   |       license.txt
|       |   |
|       |   +---servlet-api
|       |   |       license.txt
|       |   |
|       |   +---timepicker
|       |   |       license.txt
|       |   |
|       |   +---wsdl4j
|       |   |       license.txt
|       |   |
|       |   +---wstx-asl
|       |   |       license.txt
|       |   |
|       |   +---xml-resolver
|       |   |       license.txt
|       |   |
|       |   +---xmlbeans
|       |   |       license.txt
|       |   |
|       |   \---XmlSchema
|       |           license.txt
|       |
|       +---monitorResources
|       |       activation-1.1.jar
|       |       antlr-2.7.7.jar
|       |       antlr-3.3.jar
|       |       antlr-runtime-3.3.jar
|       |       commonj.sdo-2.1.1.jar
|       |       commons-math3-3.0.jar
|       |       decision-trees-1.0.2.jar
|       |       drools-compiler-5.4.0.Final.jar
|       |       drools-core-5.4.0.Final.jar
|       |       ecj-3.5.1.jar
|       |       eclipselink-2.5.1.jar
|       |       grid-monitor-1.13.77.jar
|       |       grid-monitor-impl-1.13.77.jar
|       |       grid-monitor-linux-1.13.77.jar
|       |       grid-monitor-wmi-1.13.77.jar
|       |       groovy-all-2.0.0.jar
|       |       javax.persistence-2.1.0.jar
|       |       joda-time-2.0.jar
|       |       jsr166-1.7.0.jar
|       |       knowledge-api-5.4.0.Final.jar
|       |       knowledge-internal-api-5.4.0.Final.jar
|       |       mail-1.4.jar
|       |       mvel2-2.1.0.drools16.jar
|       |       ojalgo-31.0.jar
|       |       stringtemplate-3.2.1.jar
|       |
|       +---resources
|       |       bcmail-jdk16-1.45.jar
|       |       bcprov-jdk16-1.45.jar
|       |       grid-core-1.13.77.jar
|       |       grid.commons-dbcp2-2.0.1.jar
|       |       grid.httpclient-4.2.6.jar
|       |       grid.liquibase-2.0.5.jar
|       |       javax.servlet-api-3.1.0.jar
|       |       jna-3.3.0-platform.jar
|       |       jna-3.3.0.jar
|       |       linked-binaries-1.13.77.jar
|       |       maven-shared-utils-0.4.jar
|       |
|       +---services
|       |   \---log
|       |           slf4j-api-1.7.5.jar
|       |           slf4j-grid-1.13.77.jar
|       |
|       +---tools
|       |   \---grid-cli
|       |           grid-cli-1.13.77.jar
|       |           jackson-core-asl-1.9.13.jar
|       |           jackson-mapper-asl-1.9.13.jar
|       |           jcommander-1.32.jar
|       |
|       +---webAppResources
|       |       asm-4.1.jar
|       |       asm-commons-4.1.jar
|       |       asm-tree-4.1.jar
|       |       commons-fileupload-1.2.2.jar
|       |       grid-webapp-1.13.77.jar
|       |       javax-websocket-client-impl-9.1.1.v20140108.jar
|       |       javax-websocket-server-impl-9.1.1.v20140108.jar
|       |       javax.annotation-api-1.2.jar
|       |       javax.el-3.0.0.jar
|       |       javax.servlet.jsp-2.3.2.jar
|       |       javax.servlet.jsp-api-2.3.1.jar
|       |       javax.servlet.jsp.jstl-1.2.0.v201105211821.jar
|       |       javax.websocket-api-1.0.jar
|       |       jetty-annotations-9.1.1.v20140108.jar
|       |       jetty-continuation-9.1.1.v20140108.jar
|       |       jetty-http-9.1.1.v20140108.jar
|       |       jetty-io-9.1.1.v20140108.jar
|       |       jetty-jndi-9.1.1.v20140108.jar
|       |       jetty-jsp-9.1.1.v20140108.jar
|       |       jetty-plus-9.1.1.v20140108.jar
|       |       jetty-schemas-3.1.M0.jar
|       |       jetty-security-9.1.1.v20140108.jar
|       |       jetty-server-9.1.1.v20140108.jar
|       |       jetty-servlet-9.1.1.v20140108.jar
|       |       jetty-servlets-9.1.1.v20140108.jar
|       |       jetty-util-9.1.1.v20140108.jar
|       |       jetty-webapp-9.1.1.v20140108.jar
|       |       jetty-xml-9.1.1.v20140108.jar
|       |       org.apache.taglibs.standard.glassfish-1.2.0.v201112081803.jar
|       |       org.eclipse.jdt.core-3.8.2.v20130121.jar
|       |       websocket-api-9.1.1.v20140108.jar
|       |       websocket-client-9.1.1.v20140108.jar
|       |       websocket-common-9.1.1.v20140108.jar
|       |       websocket-server-9.1.1.v20140108.jar
|       |       websocket-servlet-9.1.1.v20140108.jar
|       |
|       +---webServiceResources
|       |       asm-3.1.jar
|       |       commons-logging-1.1.1.jar
|       |       cxf-api-2.7.5.jar
|       |       cxf-rt-bindings-soap-2.7.5.jar
|       |       cxf-rt-bindings-xml-2.7.5.jar
|       |       cxf-rt-core-2.7.5.jar
|       |       cxf-rt-databinding-jaxb-2.7.5.jar
|       |       cxf-rt-databinding-xmlbeans-2.7.5.jar
|       |       cxf-rt-frontend-jaxws-2.7.5.jar
|       |       cxf-rt-frontend-simple-2.7.5.jar
|       |       cxf-rt-management-2.7.5.jar
|       |       cxf-rt-transports-http-2.7.5.jar
|       |       cxf-rt-ws-addr-2.7.5.jar
|       |       cxf-rt-ws-policy-2.7.5.jar
|       |       cxf-rt-ws-rm-2.7.5.jar
|       |       cxf-rt-ws-security-2.7.5.jar
|       |       ehcache-core-2.5.1.jar
|       |       geronimo-javamail_1.4_spec-1.7.1.jar
|       |       grid-ws-1.13.77.jar
|       |       neethi-3.0.2.jar
|       |       stax2-api-3.1.1.jar
|       |       woodstox-core-asl-4.2.0.jar
|       |       wsdl4j-1.6.3.jar
|       |       wss4j-1.6.10.jar
|       |       xml-resolver-1.2.jar
|       |       xmlbeans-2.6.0.jar
|       |       xmlschema-core-2.0.3.jar
|       |       xmlsec-1.5.4.jar
|       |
|       \---webStartResources
|               AppUI.jnlp
|               grid-core-1.13.77.jar.pack.gz
|               Infor48x48.png
|               webStartResources.properties
|
+---secure
|       client.ks
|       client.pw
|
+---tools
|       admin-ui.jar
|       application-deployer.jar
|       certificates.jar
|       change-db-password.jar
|       change-jdk.jar
|       grid-cli.jar
|       log-viewer.jar
|       scripting-client.jar
|
\---uninstall
    |   uninstall.cmd
    |   uninstall.jar
    |
    \---resources
            grid-annotations.jar
            grid-jdbc.jar
            grid.commons-dbcp2.jar
            grid.liquibase.jar
            installer-common.jar
            installer-post.jar
            installer-uninstall-code.jar
            izpack-api.jar
            izpack-tools.jar
            jna-platform.jar
            jna.jar
            maven-shared-utils.jar
            windowsjnasecurity.jar

Future work

Next, I may:

  • Installing a Grid silently with izpack XML
  • Generate secure\server.key with OpenSSL
  • Setup an Administrative Router
  • Setup a Grid Agent
  • Setup a Grid Launcher
  • Setup a Grid Bootstrap
  • Install session providers
  • Install applications
  • Install GDBC
  • Install the Grid on Linux and PostgreSQL

Conclusion

That was an illustration of the Infor ION Grid bundled installer which is internal only and intuitive.

Related posts

Building an Infor Grid Lab – Part 3

I am building an Infor ION Grid laboratory manually without LifeCycle Manager (LCM) for my learning purposes. In part 2, I had made the installation using cryptographic keys taken from an existing Grid installation. Today, I will create new keys.

About

The Grid uses TLS to ensure privacy, authentication, and integrity of communication within the Grid. That involves asymmetric cryptography, public/private key pairs, key exchange, digital certificates, digital signatures, symmetric keys, ciphers, etc.

Thankfully the Grid automates most of it. It uses the Java Cryptography Extension (JCE), the Bouncy Castle Crypto APIs, and 2048 bit RSA key pairs. The key material is unique to each installation.

Documentation

The Infor Documentation Infocenter has an Infor ION Grid Security Administration Guide:

Disclaimer

The Infor documentation that is publicly available covers the default cryptographic properties of the Grid such as algorithms, providers, cipher suites, block cipher modes of operation, hashing functions, padding, key length, paths, file names, etc.; the Internet covers cryptography in general; and I am not revealing any secrets; therefore, I am revealing no more information than what is already available publicly. Besides, revealing cryptographic properties does not reveal any secrets, therefore Infor is not revealing any secrets either. Besides, the default properties can be changed to suit our needs. The security of a cryptosystem depends not on the knowledge of its cryptographic properties, but on its implementation and on the security of the secret key material. Thus, it is important you keep your systems up-to-date, and keep your secret key material secure. In doubt, read Auguste Kerckhoffs’s principle, “il faut qu’il puisse sans inconvénient tomber entre les mains de l’ennemi” or Claude Shannon’s maxim, “we shall assume that the enemy knows the system being used.”

Key material

For a minimalist Grid installation, we need the following four files, they are unique to each installation:

For the Grid, we need these files, where the file names must match the Grid name, e.g. Grid:

  • Grid.ks: this is the Java keystore for the Grid. It contains the Grid’s public/private key pair, and the Grid self-signed certificate which will be the root certificate authority (CA) to sign other keys.
  • Grid.pw (optional): this is the clear text password for both keystore and private key.

For each host, we need these files, where the file names are server:

  • server.ks: this is the Java keystore for the host. It contains the host’s public/private key pair, and the host certificate signed by the Grid.
  • server.pw: this is the clear text password for both keystore and private key.
  • server.key: this is a symmetric key, signed and encrypted, used to encrypt/decrypt protected Grid properties.

In a production environment, keep all these files secure.

Console tool

The Grid has a console tool that automatically creates the key material:

In addition to the console tool, I will show the equivalent command using the Java keytool, and I will inspect the result with KeyStore Explorer.

1. Create Grid material

Use this command to create new key material for the Grid (replace the parameter values with your values, and use a strong password):

java ^
 -cp resources\grid-core.jar;resources\bcprov-jdk16.jar;resources\bcmail-jdk16.jar ^
 com.lawson.grid.security.Certificates ^
 -create=gridcert ^
 -gridname Grid ^
 -gridpassword password123 ^
 -gridkeystore secure

It produces these two files:

  • Grid.der
  • Grid.ks

Note: Grid.der is the root CA that typically system administrators will push to the users computers, and then those computers will automatically trust the certificates of M3, Smart Office, etc.

Note: Unfortunately, the command does not automatically generate a strong password for this keystore, which leaves it vulnerable to user choice.

The Grid certificate has the following extensions:

  • Basic Constraints: Subject is a CA, Path Length Constraint: 1
  • Subject Key Identifier
  • Key Usage: Digital Signature, Certificate Signing
  • Extended Key Usage: TLS Web Server Authentication, Code Signing, TLS Web Client Authentication

Alternatively, instead of the console tool, we can use the Java keytool:

keytool ^
 -genkeypair ^
 -keyalg RSA ^
 -keysize 2048 ^
 -sigalg SHA256WITHRSA ^
 -dname cn=Grid ^
 -ext BasicConstraints=ca:true,pathlen:1 ^
 -ext KeyUsage=digitalSignature,keyCertSign ^
 -ext ExtendedkeyUsage=serverAuth,codeSigning,clientAuth ^
 -validity 90 ^
 -keypass password123 ^
 -keystore secure\Grid.ks ^
 -storepass password123

Then, we need to do some export/import to add the certificate as a separate entry:

keytool ^
 -exportcert ^
 -file secure\Grid.der ^
 -keystore secure\Grid.ks ^
 -storepass password123
keytool ^
 -changealias ^
 -alias mykey ^
 -destalias grid_key ^
 -keypass password123 ^
 -keystore secure\Grid.ks ^
 -storepass password123
keytool ^
 -noprompt ^
 -importcert ^
 -alias mykey ^
 -file secure\Grid.der ^
 -keypass password123 ^
 -keystore secure\Grid.ks ^
 -storepass password123
keytool ^
 -changealias ^
 -alias mykey ^
 -destalias grid_cert ^
 -keypass password123 ^
 -keystore secure\Grid.ks ^
 -storepass password123

2. Create host material

Use this command to create new key material for the host (replace the parameter values with your values, and add as many roles and addresses as needed for this host):

java ^
 -cp resources\grid-core.jar;resources\bcprov-jdk16.jar;resources\bcmail-jdk16.jar ^
 com.lawson.grid.security.Certificates ^
 -create=hostcert ^
 -gridname Grid ^
 -gridpassword password123 ^
 -hostname localhost ^
 -gridkeystore secure ^
 -hostkeystore secure ^
 -role grid-admin ^
 -address localhost ^
 -address ::1 ^
 -address 127.0.0.1 ^
 -address example.com ^
 -unresolved

It produces these two files:

  • server.ks
  • server.pw

Note: Fortunately, the command automatically generates a strong password for this keystore.

The host certificate has extensions for the role (e.g. grid-admin), for the host actor (SYSTEM), for the IP addresses and hostnames:

Alternatively, instead of the console tool, we can use the Java keytool. But it is tricky for we have to add the certificate extensions in hexadecimal. The IANA enterprise number for Lawson Software (Infor) is 10105. The OID names can be found in the OID repository. Note: Thomas Fanto registered child OID 238 for the Grid runtime information in 2009, but somehow the console tool uses child OID 237 instead, which is not reserved. Anyway, dump the OID values as hexadecimal (e.g. grid-admin is 677269642D61646D696E, and SYSTEM is 53595354454D). Prefix them with the ASN.1 UTF8String tag byte of 0x0C to encapsulate them as a UTF-8 String and with the byte length in HEX (e.g. grid-admin is 10 bytes long which is 0x0A, and SYSTEM is 6 bytes long which is 0x06). For the sequences, prefix them with the SEQUENCE tag byte of 0x30 and with the sequence byte length (e.g. 9+3+9+11+2*4 = 40 = 0x28).

keytool ^
 -genkey ^
 -alias localhost_key ^
 -keyalg RSA ^
 -keysize 2048 ^
 -sigalg SHA256WITHRSA ^
 -dname cn=localhost ^
 -ext 1.3.6.1.4.1.10105.237.0.2=300C0C0A677269642D61646D696E ^
 -ext 1.3.6.1.4.1.10105.237.0.3=0C0653595354454D ^
 -ext 1.3.6.1.4.1.10105.237.0.4=30280C096C6F63616C686F73740C033A3A310C093132372E302E302E310C0B6578616D706C652E636F6D ^
 -validity 90 ^
 -keypass password123 ^
 -keystore secure\server.ks ^
 -storepass password123

Then, we need to create a certificate signing request (CSR) for the host certificate, sign it with the Grid root CA, and import the resulting chain to the keystore:

keytool ^
 -certreq ^
 -alias localhost_key ^
 -keyalg SHA256WITHRSA ^
 -file secure\server.csr.txt ^
 -keystore secure\server.ks ^
 -storepass password123
keytool ^
 -gencert ^
 -infile secure\server.csr.txt ^
 -outfile secure\server.der ^
 -keystore secure\Grid.ks ^
 -storepass password123 ^
 -alias grid_key ^
 -ext BC=0
keytool ^
 -importcert ^
 -noprompt ^
 -trustcacerts ^
 -alias grid_key ^
 -file secure\Grid.der ^
 -keystore secure\server.ks ^
 -storepass password123
keytool ^
 -importcert ^
 -trustcacerts ^
 -alias localhost_key ^
 -file secure\server.der ^
 -keystore secure\server.ks ^
 -storepass password123

Then, save the keystore password with:

echo | set /p="password123" > secure\server.pw

3. Create symmetric material

Use this command to create new symmetric key material (replace the parameter values with your values):

java ^
 -cp resources\grid-core.jar;resources\bcprov-jdk16.jar;resources\bcmail-jdk16.jar ^
 com.lawson.grid.security.Certificates ^
 -create=symkey ^
 -gridname Grid ^
 -gridkeystore secure ^
 -gridpassword password123 ^
 -symkeypath secure ^
 -hostkeystore secure ^
 -hostname localhost

It produces this file:

  • server.key

It is used to encrypt/decrypt protected Grid properties such as passwords:

Alternatively, we can generate the server.key in Java by taking the Grid certificate’s distinguished name in ASN.1 DER encoded form, signing it with the Grid’s private key, and encrypting it with the host’s public key, but I am not allowed to show the source code for that, and I am struggling with replicating it with the OpenSSL RSA utility and AES encryption. So use the Grid command tool above to generate server.key.

Result

We now have the new unique necessary and sufficient cryptographic key material for a minimalist Grid, and the Grid successfully validates it:

successfully initialized secret key
successfully initialized server keystore

GitHub

I collected all the commands in my GitHub at keys.cmd.

Future work

Next time, I would like to:

  • Generate the symmetric key with OpenSSL
  • Continue researching security vulnerabilities
  • Use the new Grid installer
  • Setup an administrative router
  • Setup session providers
  • Install applications
  • Install the Grid on Linux and PostgreSQL

Conclusion

That was an illustration of how to manually create – for learning purposes – new cryptographic keys for a minimalist installation of the Infor ION Grid using the built-in tools, and alternatively using the Java keytool. I am learning so I probably missed a few things. Thankfully the Grid console tool automates most of it.

That’s it! Congratulations if you’ve made it so far.

Related posts

Building an Infor Grid Lab – Part 2

I am building an Infor ION Grid laboratory manually without LifeCycle Manager (LCM) for my learning purposes. In the previous post I had installed a minimalist Grid using an old version. Today I will install the latest version.

1. Preparation

Choose values for the following properties (here are some sample values):

Grid name e.g. Grid
Grid folder e.g. C:\Infor\Grid\
Database name e.g. InforIONGrid
Host name e.g. localhost
Host address e.g. 127.0.0.1
Grid agent port e.g. 50003
Registry port e.g. 50004

2. Download latest version

Download the latest version of the Grid; as of today (5/12/2017) it is 11.1.13.0.77:

3. Create folder structure

Choose a home directory for your Grid, e.g. C:\Infor\Grid\ where the folder must match the Grid name (e.g. Grid), and create these sub-folders:

Grid
+---config
+---drivers
+---resources
\---secure

4. Copy JAR files

Let’s find the main grid-core.jar and supporting JAR files:

  1. Unzip the LCM file.
  2. Go to folder: Grid_Installer_11.1.13.0.77.lcm\products\Infor_ION_Grid_11.1.13.0\tasks\
  3. Select these JAR files:
    bcmail-jdk16.jar
    bcprov-jdk16.jar
    grid.httpclient.jar
    grid.liquibase.jar
    grid-core.jar
    javax.servlet-api.jar

  4. Copy them to your Grid\resources\ folder:

5. Create database

Let’s create the Grid database:

  1. Install SQL Server and SQL Management Studio (I installed SQL Server 2014 Express Edition at no cost), and ensure it works correctly:
  2. Download and install the Microsoft SQL Server JDBC Driver, and ensure you can connect to the database via JDBC (e.g. with SQuirreL):
  3. Create a new database (e.g. InforIONGrid):
  4. Run the following SQL to create the configuration table:
    CREATE TABLE GRIDCONF (
        GRID varchar(64) NOT NULL,
        TYPE varchar(32) NOT NULL,
        NAME varchar(128) NOT NULL,
        TS numeric(20, 0) NOT NULL,
        DATA varbinary(max) NULL,
        SEQID numeric(5, 0) NOT NULL
    )

  5. Run the following SQL to create a Grid configuration with name (e.g. Grid), runtime XML and topology XML (replace the Grid name and XML contents as needed):
    DECLARE @runtime VARCHAR(300)
    DECLARE @topology VARCHAR(300)
    SET @runtime =
    '<?xml version="1.0" ?>
    <runtime xmlns="http://schemas.lawson.com/grid/configuration_v3">
        <bindings />
        <sessionProviders />
        <routers />
        <contextRoots />
        <propertySettings />
    </runtime>'
    SET @topology =
    '<?xml version="1.0" ?>
    <topology xmlns="http://schemas.lawson.com/grid/configuration_v3">
        <hosts>
            <host name="localhost" address="127.0.0.1" gridAgentPort="50003" />
        </hosts>
        <registry host="localhost" port="50004" />
    </topology>'
    INSERT INTO GRIDCONF (GRID, TYPE, NAME, TS, DATA, SEQID) VALUES ('Grid', 'runtime' , 'null', 0, CONVERT(varbinary(max), @runtime), 0)
    INSERT INTO GRIDCONF (GRID, TYPE, NAME, TS, DATA, SEQID) VALUES ('Grid', 'topology' , 'null', 0, CONVERT(varbinary(max), @topology), 0)

  6. Verify the result:
    SELECT GRID, TYPE, NAME, TS, DATA, LEFT(DATA, LEN(DATA)), SEQID
    FROM GRIDCONF

  7. Copy the JDBC driver to your Grid\drivers\ folder:
  8. Create the JDBC configuration file at Grid\config\jdbc.properties with the values you chose above and with your database password Base64-encoded (in a production environment, keep this file secure):
    driverDir=C:/Infor/Grid/drivers
    url=jdbc:sqlserver://localhost:1433;databaseName=InforIONGrid
    dbType=sqlserver
    user=sa
    encryptedPwd=cGFzc3dvcmQxMjM=
    schema=dbo

Configuration Import & Edit

Alternatively, instead of using SQL to insert the runtime and topology XML into the GRIDCONF table, we can run the following command to import the XML files from the Grid\config\ folder into the GRIDCONF table (it requires the EXISTING_GRIDS table):

CREATE TABLE EXISTING_GRIDS (
    GRID_NAME varchar(64) NOT NULL,
    GRID_VERSION varchar(32) NOT NULL,
    MODIFIED_BY varchar(128) NULL,
    TIMESTAMP numeric(20, 0) NOT NULL,
)
INSERT INTO EXISTING_GRIDS (GRID_NAME, GRID_VERSION, MODIFIED_BY, TIMESTAMP) VALUES ('Grid', 1, 'Thibaud', 0)
java -cp resources/grid-core.jar;resources/grid.liquibase.jar;drivers\sqljdbc42.jar com.lawson.grid.config.JDBCConfigAreaRuntime C:\Infor\Grid

Then, we can use this other command to launch the XML Editor and edit, format and validate the XML:

java -cp resources/grid-core.jar;resources/grid.liquibase.jar;drivers\sqljdbc42.jar;resources/bcprov-jdk16.jar;resources/bcmail-jdk16.jar com.lawson.grid.config.client.ui.Launch

6. Security

The Grid uses cryptography to protect its network traffic. We need the following four files in the folder Grid\secure\ . For now, I will simply get these files from an existing Grid, and I will create new ones later.

Grid.ks
server.key
server.ks
server.pw

7. Start the Grid

Start the Grid:

java -cp resources/grid-core.jar;resources/bcprov-jdk16.jar;resources/bcmail-jdk16.jar;resources/grid.liquibase.jar;drivers\sqljdbc42.jar;resources/javax.servlet-api.jar;resources/grid.httpclient.jar com.lawson.grid.Startup -registry -configDir . -host localhost -logLevel ALL

8. Grid Management Pages

Start the Grid Management Pages and connect to the registry at localhost:50004:

java -jar resources/grid-core.jar

9. Topology View

For the Topology View, we need another table:

CREATE TABLE APPMAPPINGS (
    GRID varchar(256) NOT NULL,
    NAME varchar(256) NOT NULL,
    HOST varchar(256) NOT NULL,
    ID varchar(64) NULL,
    PENDINGID varchar(64) NULL,
    STATE varchar(32) NOT NULL,
    LOGNAME varchar(256) NULL,
    PROFILENAME varchar(64) NULL,
    PROFILEDATA varbinary(max) NULL,
    JVMID varchar(64) NULL
)

Result

We now have a minimalist Grid installed manually without LCM.

Future work

In the next post, I will show how to create the security files.

Conclusion

That was how to install a minimalist latest version of the Infor ION Grid manually without LifeCycle Manager. We have the minimalist folder structure, database, configuration, commands, Grid Management Pages, and Topology View. I will continue in the next post.

That’s it!

M3 Ideas, now 282 subscribers.

Related posts

Building an Infor Grid Lab – Part 1

These days I am doing a lot of work with the Infor ION Grid – to learn, troubleshoot, and do penetration testing – and I need to setup my own laboratory. I will follow the footsteps of PotatoIT’s Lab.

Grid concepts

The Infor ION Grid is a proprietary application framework to run Java applications in a distributed, redundant, fail-over, load balanced, scalable, performant, and secure environment, sort of a crossing between IBM WebSphere Application Server (WAS) and Platform as a Service (PaaS), for the purposes of Infor products, and that over the years has become a rich framework that helps power the Infor CloudSuite. Grid concepts are explained in the Infor documentation and in my previous work. Basically, there are: hosts (physical/virtual machines), a registry (to keep track of the nodes), nodes (JVM), applications (e.g. M3), routers (to direct network traffic), and more.

Download

The Grid is available for download from the Infor Xtreme Product Download Center:

Documentation

The Installation Guide has a chapter Installing Infor ION Grid:

LCM? No.

The documentation says Infor LifeCycle Manager (LCM) is a prerequisite to install the Grid. But in my previous encounter with LCM I had concluded I can reproduce installation steps manually without LCM, albeit with a lot of work. Anyway, for my purposes I just need a minimal Grid without Infor M3 which makes the installation easier. To that end, I set out to learn how to install a minimal Grid manually without LCM. I will split my learning into several blog posts.

Version 0.x

In my archives of 10 years ago I found an early internal development unreleased version of the Grid with some documentation. It was a pure Java application that started Grid hosts, nodes, routers, registry, and user interface. It did not have database, certificates, configuration, or web server. It was not available publicly. Thanks to its simplicity, I will use it as a starting point of my learning.

1) Start the registry

java -cp grid.jar com.lawson.grid.Startup -registry -groupName THIBAUD

2) Start a node

java -cp grid.jar com.lawson.grid.Startup

3) Start a router

java -cp grid.jar com.lawson.grid.Startup -router

4) Start the user interface

java -jar grid.jar localhost 44444

Result

We have a minimal Grid with a host, a registry, a node, a router, and a user interface.

Future work

In my next blog posts, I will:

  • Install a later version of the Grid
  • Use the new Grid installer
  • Install the Grid on Linux and PostgreSQL

Conclusion

That was a starting point for me to learn how to install a minimal Infor ION Grid manually without LifeCycle Manager. I will continue in the next post.

That’s it!

Related posts

Site map

I just re-organized this blog: I grouped all posts by category, I added a menu, I made this sitemap, and I re-wrote the pages About and Authors. The idea is to better navigate this blog so you can find more content.

Tips on how to use this blog:

  • Use Google Search to search this blog. Use the keyword m3ideas to filter results, e.g. the search  m3ideas m3 web services  will lead you to this blog. You can refine even further with the operator site, e.g.  site:m3ideas.org m3 web services . This blog has a search bar, but unfortunately the WordPress theme doesn’t let me put it above the menu so it’s buried below.
  • Click on the title of a blog post to open it in full and reveal the additional sections.
  • Read the Related and Pingback sections at the bottom of the blog posts, I use them to cross-reference posts with each other so you can find other content related to what you are reading; they are created automatically by WordPress. Sometimes I create my own Related section.
  • Read the comments at the bottom of a blog post, that’s where I put latest updates and notes about a post that I didn’t incorporate in the original post.
  • Please, if you like what you read, click Like, leave a comment, let me know what you think, subscribe to stay informed, and share around you. If there is something you want to write about, let me know, and I will send you an author invite. Even better, start your own blog and create your own community. The more information the better our work.
  • This blog is volunteer and community based and wouldn’t exist without your contribution. Thank you.

3D

Augmented Reality

Customer Lifecycle Management (CLM)

Event Hub, Event Analytics

External Program Connector (EPC)

Field Audit Trail (FAT)

H5 Client

Hacking

IBrix

Ideas

M3 MI Data Import for Web Services (MDIWS)

I just learned the existence of the M3 MI Data Import for Web Services (MDIWS), which is the equivalent of the traditional M3 Data Import (MDI) but using the M3 API REST/JSON endpoint instead of the traditional proprietary binary endpoint.

The tool and documentation are straightforward, so I will just promote it here with some screenshots:

Here are the executable and documentation:

Here is a sample semicolon separated CSV file with data, no header:

Here is the tool in action:

As a reference, here is the traditional M3 Data Import tool:

Thanks Björn P. for the tool.

That’s it!

Poll: Infor e-Commerce Application Installer (IAI)

I have a question regarding Infor e-Commerce (f.k.a. e-Sales): have you ever used the Infor Application Installer (IAI) to deploy e-Commerce applications via ZIP files instead of via the Development Studio?

Scenario

We have two different environments, development and production, that are physically isolated.

Our development environment is integrated: it has the e-Commerce Development Studio, the Subversion repository, and the e-Commerce Server, all on the same host. Thus, we can simply deploy the e-Commerce application from the Studio directly to the server.

Problem

Our production environment, on the other hand, is isolated from that network: it has the e-Commerce server, but it does not have the e-Commerce Development Studio, and it does not have access to the Subversion repository either. Then, how do we deploy the e-Commerce application?

Unskillful solution

We cannot deploy from the Studio because the development environment does not have access to the production network, the two are isolated from each other.

One solution is to install the Studio on the production environment and give it access to the Subversion repository, to mimic the development environment. But because the production environment is isolated, it does not have access to the Subversion repository, so we would have to make a copy of the source code.

I challenge this solution. Indeed, we would end up with double maintenance of the Studio and of the source code. We would risk generating a non-identical version of the application. And we would risk creating an accidental branch of the source code then have to resolve and merge. There ought to be a simpler and more elegant solution.

Documentation

There are two e-Commerce documents that explain the application deployment process and how it uses the Infor Application Installer (IAI):

Development Studio

According to the documentation, the Studio generates this temporary ZIP file:
C:\Windows\Temp\laitmp\upload\infor-ecom-b2b.zip

The ZIP file has a datasources folder with connection information in XML files (e.g. movex.dsc and sqlserver.dsc):

Infor Application Installer (IAI)

The Infor Application Installer (IAI) has the following Servlets and JSP to upload the ZIP file and deploy the application:

Proposed solution

The solution I propose is to use the Infor Application Installer (IAI) to deploy a modified version of the temporary ZIP file.

We would take the temporary ZIP file from the development environment, make a copy of it, unzip it, change the datasources connection information, re-zip it all, copy the resulting ZIP file to the production environment, and use the publish JSP to deploy it. We can even write a script to automatically duplicate the file, unzip it, change the connection information, and re-zip it, to reduce the number of manual steps and to avoid possible human errors.

I postulate this new solution is much simpler than the other one as we would just manipulate ZIP files, and we would not need to double maintain another Studio or another source code. And it is elegant because it is part of e-Commerce.

What others think

I asked others for opinion.

The experienced e-Commerce consultant disagrees. He says that all e-Commerce applications MUST be deployed from the Studio in order to make sure they are working properly, that it is the right way, that everyone uses this method, that there is no other method, and that Infor would not support another method.

Nonsense.

Similarly, Infor Support reached out to the development team who reached out to the e-Commerce product owner who said the ZIP file deployment can be done for DEVELOPMENT purposes only but it is NOT RECOMMENDED, that it can be explored at your own risk, and that support would NOT be provided if further issues or concerns occur.

Rubbish.

I do not believe either of these responses. e-Commerce is about 15 years old, and most of the original developers are no longer part of the company. I believe the responses above are from new developers that lack knowledge, and are not willing to try another way. Or perhaps there is a valid reason that they have not yet articulated.

Poll

What about YOU? Do YOU know the answer?

Let me know in the comments below, please. Thank you.

Access Control on Grid Management Pages

It is my great pleasure to be an author of M3 Ideas. Thanks very much for Thibaud’s invitation.

I put my foot into M3 water five years ago and M3 Ideas has been giving me great help in developing my technical skills since then. It is my great honor to share my work and make contributions to it.

The issue of access control on grid management pages has been a trouble to me for nearly two years. The installation web page of ISO, in our case, http://BE Server:19005/LSO/index.html is very close to the grid information page, http://BE Server:19005/grid/info.html and the grid management pages, http://BE Server:19005/grid/ui/#. It is fairly easy for a user with web skills to figure out the latter two web pages and he/she can explore and check basically all the grid information.

Although the grid management pages requires credentials to log on to be able to start or stop a process, a user actually can try the default account,  and the famous password, which are mentioned by the Companion, to get full control. This is not a joke, but a real case. It makes M3 system really vulnerable. Even if users do not make any actions to it, there is no sense and it is ridiculous to disclose all the system information to the public.

We did raise InforXtreme case for Infor to fix it. However, they could not give a robust solution after a long time discussion. The reason is the grid management pages and LSO is sharing the same Java process in the BE server. If you check the TCP connections and processes using netstat in the BE server, you would find there is no way to tell which connection is from the grid management pages visit or from LSO request, which is the biggest technical challenge.

After many tests it seems the most feasible solution is to analyze each incoming and outgoing TCP packet in the BE sever to see whether there are any patterns. If we can be 100% sure that a remote IP address is visiting the grid management pages according to the patterns, then we can apply IPSec to block it automatically. Although it means that IP address cannot use LSO as well, it can be sorted out by manually removing it from the black list given a promise is made not to visit again. If the promise is broken, there is no second chance for them. It is something like Damocles’ Sword.

So I made a Console Application using C# as follows.


using System;
using System.Collections.Generic;
using SharpPcap;
using SharpPcap.LibPcap;
using System.Text;
using System.Net.Mail;
using System.Diagnostics;

namespace CA_Grid
{
class CA_Grid
{
static List<string> jsIPList;

static void Main(string[] args)
{
jsIPList = new List<string>();

var varDevices = CaptureDeviceList.Instance;

if(varDevices.Count<1) { Console.WriteLine("No devices were found on this machine"); return; } Console.WriteLine("The following devices are available on this machine:"); Console.WriteLine("----------------------------------------------------"); Console.WriteLine(); int i = 0; foreach(var varDec in varDevices) { Console.WriteLine("{0}) {1}", i, varDec.Description); i++; } Console.WriteLine(); Console.Write("-- Please choose a device to capture: "); int varChoice = 0; if (!int.TryParse(Console.ReadLine(), out varChoice) || varChoice>=i)
{
Console.WriteLine("The device is not valid!");
return;
}

ICaptureDevice varDevice =varDevices[varChoice];

varDevice.OnPacketArrival += Device_OnPacketArrival;

varDevice.Open();
varDevice.Filter = "ip and tcp";
Console.WriteLine();
Console.WriteLine("-- Listening on {0}, hit 'Ctrl-C' to exit...",varDevice.Description);

varDevice.Capture();

varDevice.OnPacketArrival -=Device_OnPacketArrival;
varDevice.Close();
}

private static void Device_OnPacketArrival(object sender, CaptureEventArgs e)
{
try
{
string varMIP = "BE Server IP Address";
if (e == null || e.Packet == null)
return;

if (e.Packet.Data == null)
return;

var varPacket = PacketDotNet.Packet.ParsePacket(e.Packet.LinkLayerType, e.Packet.Data);
if (varPacket == null)
return;

if (varPacket.GetType()!=typeof(PacketDotNet.EthernetPacket))
return;

var varIP = (PacketDotNet.IpPacket)varPacket.Extract(typeof(PacketDotNet.IpPacket));
if (varIP == null)
return;

string varDIP = varIP.DestinationAddress.ToString();
string varSIP = varIP.SourceAddress.ToString();

if (varSIP != varMIP)
return;

var varTCP = (PacketDotNet.TcpPacket)varPacket.Extract(typeof(PacketDotNet.TcpPacket));
if (varTCP == null)
return;

if (varTCP.PayloadData == null)
return;

var varData = Encoding.UTF8.GetString(varTCP.PayloadData);

if (varData == null)
return;

string varDPort = varTCP.DestinationPort.ToString();
string varSPort = varTCP.SourcePort.ToString();

bool varHTTPS = varSPort == "443";
bool varHTTP = varSPort.Contains("19005") && varData.Contains("text/html") && varData.Contains("gzip");
if ((varHTTPS || varHTTP) && !jsIPList.Contains(varDIP))
{
jsIPList.Add(varDIP);

string varWay = varHTTP ? "HTTP" : "HTTPS";
string varM1 = "----------------------------------------------------";
string varM2 = string.Format("{0}, {1}, {2}", DateTime.Now, varDIP, varWay);
string varM3 = "Original IP packet: " + varIP.ToString();
string varM4 = "Original TCP packet: " + varTCP.ToString();
string varM5 = "Original TCP Header: " + varData;

if (varDIP != "IP to Exclude")
{
using (var varProcess = new Process())
{
varProcess.StartInfo.FileName = "cmd.exe";
varProcess.StartInfo.UseShellExecute = false;
varProcess.StartInfo.RedirectStandardInput = true;
varProcess.StartInfo.RedirectStandardOutput = true;
varProcess.StartInfo.RedirectStandardError = true;
varProcess.StartInfo.CreateNoWindow = true;
varProcess.Start();

string varCommand = "netsh ipsec static add filter filterlist=\"IP_Filter_Grid\" srcaddr=" + varDIP + " dstaddr=me protocol=TCP mirrored=No";
varProcess.StandardInput.WriteLine(varCommand);
varProcess.StandardInput.WriteLine("exit");
varProcess.StandardInput.AutoFlush = true;
varProcess.WaitForExit();
}
}

Console.WriteLine(varM1);
Console.WriteLine(varM2);
Console.WriteLine();
Console.WriteLine(varM3);
Console.WriteLine();
Console.WriteLine(varM4);
Console.WriteLine();
Console.WriteLine(varM5);
Console.WriteLine();

using (var varSMTP = new SmtpClient("Mail Forwarder IP Address"))
{
using (var varMail = new MailMessage())
{
varMail.From = new MailAddress("from address");
varMail.To.Add("my e-mail address");
varMail.Subject = "Unauthorised Access to Infor Grid Management Pages";
varMail.Body = varM1 + "\r\n" + varM2 + "\r\n" + "\r\n" + varM3 + "\r\n" + "\r\n" + varM4 + "\r\n" + "\r\n" + varM5;
varSMTP.Send(varMail);
}
}
}
}
catch (Exception ex)
{
Console.WriteLine(ex.Message);
}
}
}
}

SharpPcap can be downloaded from GitHub. It has two Dlls, SharpPcap for capturing packets and Packet.Net for packet analysis. WinPcap needs to be downloaded and installed into the BE server. There is no need to restart the server after installation.

The console application is running in an asynchronous mode, so there is trivial impact on the M3 performance.

The script starts with detecting all the devices first. Then it asks for a device number to listen to. Each device could be a network adapter. A filter is applied to the device for IP and TCP packets. An event to capture the packets is attached to the device. Finally the listening starts.

The event handler has the key logic.

1. Two patterns to find the visit to the grid management pages.

(1) HTTPS: The source port would be 443.

(2) HTTP: The packet contains text/html and gzip.

HTTPS communication is encrypted, so we cannot analyze the packet content. Fortunately LSO never uses the port of 443.

2. If the destination IP address is not on the white list, then it would be added to the IPSec filter list. We need to manually create a IPSec policy and a IPSec filter & Action beforehand.

3. Console would output the captured information.

4. An e-mail alert would be sent with the captured information.

5. A global variable of jsIPList is used to keep the IP addresses already captured to avoid repeated alerts.

Then it works. There were three IT users from local division, who still tried to access to the grid management pages on Monday as usual. Then they found they could not visit it any more, as well as LSO. So far there are no normal users to be blocked, no matter whether they run M3 programs, or download LSO from the installation web page. All of sudden the two-year headache is gone.

If you have the similar concerns to me, I hope the above solution would give you a ride. If you have got any issues using the solution, please reply to this post or send me an e-mail at warren.dahai.hou@gmail.com.

Finally my heartfelt appreciations to all the authors on this website, as well as the author of SharpPcap and Packet.Net.